I love it when the weather warms up and my feet can be emancipated from socks. It feels so good to not have my feet wrapped up like sweaty mummies. Well, that is until you find the goat head in the hallway that stabs halfway up to your armpit when you step on it. But it's worth the random goat head to me to have my feet open and free. Always after winter I end up with a few single socks that lost their beloved somewhere along the cold and desolate path. What to do with single socks? Pinterest has a solution for that. Well...in a way. Is it a solution if you end up sending it in to us?
Pinterest Solution #1:
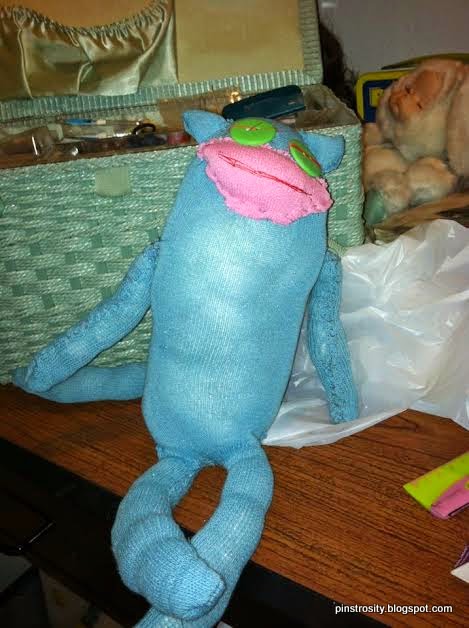
Jordan decided to use up some extra socks by following this pin. The story goes like this:
"I did everything it said to a T. It took about two hours to make and it was looking cute. It was only as I was stuffing him that he started to look...scary. I keep him in my car though. It's a pretty good conversation starter."
The Pinstrosity:
Bahaha. I love that the sock "monkey" lives in the car. Favorite part of the story right there.
The type of stuffing you use can make a difference with your sock creations. If it's too clumpy and stiff it isn't going to stuff nicely. I like to use Cluster Stuff. It isn't all one big pillow of stuffing that you have to rip apart, but rather a bunch of small soft little balls of fluff. It makes a much nicer stuffing medium, especially for stuffed animals.
How tight you pack in your stuffing makes a big difference too. You don't need to stuff you sock so tight with stuffing that you could use it to beat off burglars (although that would be quite the story for them in the slammer..."Yeah, he beat me with a sock monkey."). Just stuff until it's full, but not bursting at the seams.
So, the sock monkey didn't turn out so monkey-ish, what about doing something more like this cute little sock bunny instead?
Pinterest Solution #2
.jpg) |
| As far as I can tell, this creation comes courtesy of this blog, but it's hard to tell as it's in Persian and Google Translate is having a hard time with it. |
Isn't that cute? Hannah decided to try it with one of her socks. Her story goes like this: "
I used a sock and tried to follow the instructions but got confused between steps 5 and 6. mainly because once I sewed the ears up, I realised I had essentially made an inside out creation which didn't have a hole to reverse it through. So I had to snip one BUT then how do you create a tiny little twist like in step 6?! Huh. By then I realised that I should have used a more patterned sock, but I'd committed to this one so was seeing it through. I then became overly creative with felt then added a sharpie into the mix and here we are.....it's a sweet little weirdo, but pretty terrible really."
The Pinstrosity:
Just going from the pictures is hard. But, thanks to you awesome readers and commenters I think we've got it sorted out. In step 1 you cut of a small hole in the toe to stuff the bunny, as well as slicing the top of the sock for the ears. Step 2 you turn the sock in-side-out (it's hard to tel it's in-side-out, but it is) and sew the ears together, then turn back right-side-out as step 3. Between steps 5 and 6 you close up the small hole in the toe where you stuffed your bunny. Personally I would do a running stitch around the opening (like a drawstring) and then pull it tight to close it up. After that you could use a needle and thread to tuck in the ends and make it look tidy.
Well...they may not be as cuddly and cute as Jordan and Hannah imagined at first, but they made me smile! I want to make one now to put in my car like Jordan did, bahahaha. I'm still laughing about that.


those are AWESOME!!! I am going to have to try this one
ReplyDeleteI think the key to the bunny is in step one. If you look closely at the photo, the snipped the toe of the sock, thus giving a small hole to turn. It is a very small snip, and then in step 6, they seem to gather it and sew much higher... hmmm....
ReplyDeleteIt's hard to see, but in the step 1 picture, they snipped a teeny piece off the very bottom of the sock to make a hole for stuffing it. Then I assume you pinch it shut and tack it in place with a few discreet stitches.
ReplyDeleteOn the sock bunny: in step 1 it looks like they cut the tip of the toe off, too. So you sew the ears on the wrong side and turn it, then stuff it through the hole at the toe.
ReplyDeleteThe originals are cute, but I like the other results better. I may try for a car companion of my own.
ReplyDeleteGosh, this is a wonderful web site you are sharing with us. Thanks!
Very cute and I cracked up at 'he beat me with a sock monkey'.
ReplyDeleteI don't think Jordan did anything "wrong" with her sock monkey. I have made close to thirty sock monkeys over the years, so I feel that I have some experience. I would bet almost anything that Jordan used a REALLY stretchy pair of socks. I did that once. Stretchy socks may be comfy, but they do not work well for sock monkeys. You can never stuff them enough! I found the instructions a little awkward, but I think that is just because I make mine a bit differently. My advice to Jordan (if she wants it) if she makes a buddy for this monkey would be to use socks without a ton of stretch (I'm in Canada and the grey worksocks we have are my favourite - even more so than the "traditional" red-heel socks) and to learn the blind stitch, that will make the muzzle tidier. And advice to anyone: USE PINS. I have torn off more limbs and muzzles because I tried to eyeball their placement.
ReplyDeleteAs for the bunny, I like Hanna's better. It has personality. And I love the butt detail!!! Nice touch!
Sock monkey: look a bit more closely at the ear placement. The ears on the original are further down on the side of the face. This changes the look of the face.
ReplyDeleteAlso, in looking at the buttons for the eyes, I notice that the original sock monkeys have smaller buttons for the eyes which also changes the look of the face quite a bit.
It is often the case that small details change the overall look more than we realize.
Oh my goodness - that sock money made me laugh so hard I cried. What is not to love about it? It is the best ever. And I am still laughing and crying!
ReplyDelete