Saturday, May 31, 2014

Show and Tell Saturday: Burlap Brand Sign

Through Kilani's awesome Anteater submission during our Use It Up week I discovered the Iron Crafter group. It looked like a ton of fun, so I joined in! The last challenge we had was "B is for...". Here is what I put together for it:

My Grandpa and his brother ran a ranch together for many years under a joint brand, but my Grandpa had a brand all picked out if he ever were to register his own brand. D <--  That's the getto keyboard version at least.  A capital D followed by an arrow. Why that? That's his name! Darrow! 

When we named our little guy after my Grandpa, I knew eventually I wanted to make a sign with Grandpa's brand on it for Darrow's room. I just didn't know quite what I wanted to do and I've been putting it off. Finally it got to this past challenge for the Iron Crafter, "B is for...". So I decided that B would be for brand. It took me a few days to figure out how I wanted to go about the project. I finally decided burlap and cardboard (so I guess B is also for burlap). 

Here's how it turned out:

It looks a little unfinished just as it is, but I'm hoping to find a frame that I can put around it. That should finish it off nicely. 

To make this I first started out with a "box" that some photographs were shipped in. 

I cut off one of the flaps and used that as my base.

Next, I took black construction paper and cut out the shape of the D and the arrow that I wanted.

Using my adhesive spray, I attached the letters to the board, and then gave the whole front of the board another thick coating of spray so I could lay the burlap on top.

Once the burlap was stuck well and it had a few minutes to dry, I started "unweaving" the horizontal burlap strings that covered the black letters beneath. To do this I found my smallest pair of scissors and then carefully snipped just the horizontal strands. I clipped the strands right at the edge of the black letters beneath the burlap.

I used a pair of tweezers to grab the string and pull a small tail out.

From there it was easy to just pull the whole strand out.

In the end the vertical strands are left intact, but you can still see the shape of the symbols.


All done pulling out the horizontal strands!

Next I hot glued the edges of the burlap down in the back. 

And I was done!


It doesn't stand out as much as I'd hoped. I should have painted the cardboard white before putting the black paper shapes on it, but oh well. Any ideas to help make it pop? 

And since he hasn't made an appearance on here for a little while, here's Darrow!

He's finally caught up with his growth and his developmental milestones, and really is doing great. This kid cracks us up. 


Friday, May 30, 2014

Cream of Play-Dough Soup

Here in the U.S. we love our food. Well, actually I'm sure that's a global thing. If we ever meet an extraterrestrial race and they ask about earth life I'm pretty sure we could say, "We love food!". We love it so much in fact that we try to make everything edible.

Edible Jewelry
http://www.gingerbread-house-heaven.com/edible-jewelry.html
Edible Clothes
http://avaxnews.net/charming/The_Edible_clothes.html

An Edible Pen
http://www.foodiction.net/2011/09/matitizia/

Edible (chocolate!) candles
http://fxballery.com/index.php?/news/fujisan/

Even Edible Spray Paint
http://www.geekosystem.com/edible-spray-paint/

So with all those odd edibles, why not make kids stuff edible? Darrow puts everything in his mouth. Everything. He discovered yesterday that he doesn't like the taste of dead moths (seriously, if there's anything weird or out of place on the floor, he will find it). Gross. When he gets older it'll be fun to play with clay with him, but I know that'll also go in his mouth. Since it's going in anyway, might as well make it at home and make it edible! 

Sam had the same thoughts and found herself a great edible play-dough recipe. It's edible, but it doesn't taste good so as to discourage your tot from scarfing it all for lunch.
The Original Pin
http://theimaginationtree.com/2012/04/best-ever-no-cook-play-dough-recipe.html

Sam decided not to go full blown with this project, which may have been a good thing: "I must admit that I changed the recipe a little bit. First off, I cut it in half {which should have worked, right?}. I also didn't add glycerin...but that was an optional ingredient. I had {almost} everything on-hand so I thought I would give it a whirl... a few minutes later and I ended up with this..."

The Pinstrosity
"It's more like cream of play-dough soup than actual play-dough!"

"To end up with my soup as pictured above, I actually added some oats, extra salt, and more flour. That was when I decided to give up and try a whole new recipe...to me, there was no saving it! For those looking to make this play-dough in the future, I'm sure you could continue adding flour, or maybe with less water it could work. "

Did she let this get her down though? Nope! Check out her blog to get the recipe for edible Pumpkin Pie Play Dough!


Thursday, May 29, 2014

Throwback Thursday: Molten Rainbows

Ever wondered what a volcano would look like if it spewed rainbows rather than lava? Here, check it out.


Now you know. This is today's Pinstrosity. And it's a Throwback! We've seen this project on here before.

The Original Pin
http://www.babble.com/best-recipes/rainbow-cake-in-a-jar/
Rainbow cake in a jar. Mmmm. Taste the rainbow of awesomeness!

http://pinstrosity.blogspot.com/2012/06/sunshine-in-and-out-of-jar.html
Or maybe not. Looks like a Leprechaun tasted the rainbow a little too much. Rainbow hangover? 

Emily (not to be confused with Pinstosity's Emilee who also loves rainbows, as well as cake, unicorns, the color mustard, peacocks, etc., and who will be returning to blog-land in the near future) sent us the video above along with her story. "I discovered Pinterest not long before my son's first birthday. I had a blast pinning ideas and making a plan for his fun party. I decided to make a cake that looked like his stacking ring toy. It turned out great. What didn't turn out so great was what I tried for the rest of the cake that the guests would eat. I saw a fun pin for making rainbow cakes in a jarI saved a bunch of baby food jars and knew everyone was going to be really impressed when I pulled out these great little cakes. I'll let the photos speak for themselves. Yikes!"

The Pinstrosity


"This was a total disaster. If you look closely, you can see that the jars spewed their contents from the center. I thought I might be able to salvage a few since the outside baked and looked ok. The problem was that the center was empty because it all came flowing out of the jarI ended up scrapping the idea and making cupcakes instead."

Wait! Hollow rainbow cakes? 

*Deviating for a split second. Do you ever write out a word and have it look completely wrong, but can't figure out where the misspelling is, so you Google it only to find out you typed it correctly (even though it still looks wrong)? Hollow just looks wrong, like it's missing a letter, even though I know it isn't. Weird. Okay, back to the post.* 

Hollow rainbow cakes? If it's possible to clean up the rainbow spew and the outside of the jar I'm thinking to capitalize on this and fill that cavity with pudding or cream and have a cream filled rainbow in a jar. Mmmm. Perhaps though it was too hollow and there wasn't much of a cake "crust" left for that. 

How cool is all that? Rainbow lava and cream filled rainbow cake? Sounds yummy. But let's say you're not going for rainbow lava. Let's just say that you want a rainbow cake in a jar. How do you avoid making mini volcano's that would draw out the leprechauns? 

Emily says, "Looking back, though, I know what I did wrong. The key is to fill your jars only 1/2 to 3/4 full. That's what you do with a muffin tin and the jars are no different. I definitely over-filled them."

It's so easy to think more is better, but this is truly an instance where less is more. Don't overfill those jars! Overfilling can lead to rainbow lava, or unbaked cake in the center of your jar-o-awesomeness. 


P.S. Did you catch Cameron's awesome post yesterday? A HUGE thank you to him for covering for me. You'll be hearing more from him in the future. 

Wednesday, May 28, 2014

Tortilla Trouble

Hello Pinstrosity! Cameron here! Marquette had an appointment up north in the big city, so she asked me if I could take a break playing lizard mortician to fill in for a day. This particular submission has been on my mind for a very long time. Andrea e-mailed this in about two years ago, and when I saw it, I asked Marquette if I could do this one because of my experience in this field. While it would be pretty fun if it was about pickling lizards in chemicals, it's about tortillas.


The Original Pin
http://jazibesrecipes.blogspot.com/2007/07/tortillas-de-harina-flour-tortillas.html

I have loved tortillas ever since I moved to New Mexico with my family when I was five. I usually don't eat regular bread at all when there are tortillas handy. So, when I found a recipe for tortillas, I became the tortilla man in this house. So, I can totally understand how excited Andrea was when she found a recipe for tortillas that was so easy.

Andrea said, "I thought this pin would save me from buying tortilla's on a regular basis. In my family we love making tacos and fajitas."

I hear ya loud and clear Andrea, make those tortillas!

The Pinstrosity

"I think I messed it up when it asked for 1kg of flour. I love to cook but have never seen that before. Not only did the shape not turn out, but they were super salty. It was such a mess to clean up too. This experience has scared me from trying it again."

Hmm, maybe don't make those tortillas. So what went wrong? Well, I stepped into the Pinstrosity Test Kitchen, and then promptly stepped out because it was a disaster zone. I tried calling FEMA to set up a camp here, but Marquette told me to quit whining and clean it up (this was before she left for Albuquerque, otherwise you would see pictures of how we shuffle dishes around to make room to cook). Anyway, three years later when the dishes were finally done, I started up the project.

First I quartered the recipe using this recipe calculator, because I wasn't too jazzed about having to feed the coyotes a wet lump of unappetizing tortilla dough if it really was awful.

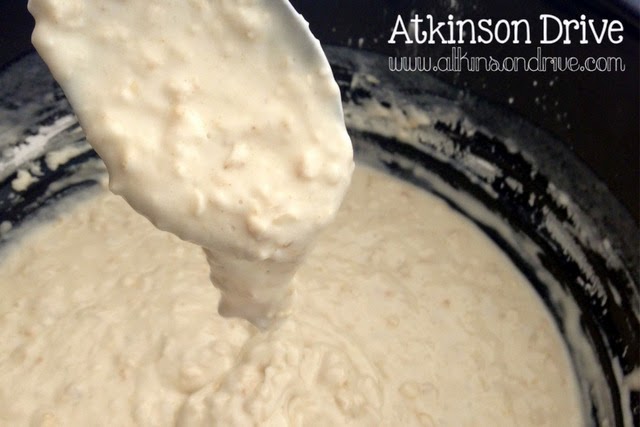
Once quartered, I got to work. I pretty quickly found out that first thing wrong with the recipe featured was the lack of moisture. I forgot to take a picture to show you all, but there was no amount of mixing that would fix the problem of crumbliness. The tortilla is a desert food, and is very thirsty. These tortillas needed more water. I actually had to add a significant amount of water to the dough before it hit the right consistency. The dough should not be sticky, but it should hold together really well when you knead and pull it.


It's still thirsty

Which brings me to the next important point of tortilla making. Knead that ball of dough like a Swedish masseuse. This ain't French Pastry class, this is a dense piece of Mexican goodness, so get after it. The dough should almost be able to bounce after your done with it.

It doesn't actually bounce.

Afterwards, I let it sit for about twenty minutes. I don't really know why. All of my recipes say to let it sit, and I'm not one to argue with those that have a splash of that fiery Aztec blood, so I do as I'm told.

The next step is pretty easy. This dough is not supposed to be sticky, so I have never felt the need to dust with flour before rolling the tortillas out. Jazibe suggests flouring your counter-top, but I feel like you would just end up with more flour in the dough. Once again, I deviated from the recipe (I'm often told that I'm a deviant), and just rolled them out on the bare counter.

I have a specially made tortilla roller, which makes it easier. A French pin would work almost as well.

You want to roll 'em out pretty thin, because they do shrink up a little when they cook. These tortillas cooked up just about how I would expect. After they cook, I usually put the tortillas under a dish cloth so that they don't dry out too bad.

Bluebird flour. Its not the flour that makes it special, its the sack.

Now, I realize that all the Pinteresters out there think that pretty presentation and totally unrealistic picture equals tasty tasty, but here at Pinstrosity we know that pictures don't mean squat. Is the food actually tasty tasty? Well, I thought that these tortillas were pretty good, but they were a bit on the salty side, as Andrea pointed out. In addition, they got kind of dry during cooking, which may indicate that instead of more water, I should have added a little more oil as well.

Actually, they got really dry. 

Jazibe does tell us that we can use less salt in this recipe than what is called for, which gives some flexibility as to how salty it will taste. The only real problem I see with this Pinstrosity is the lack of moisture. Once that is corrected by adding some more water and oil or shortening, you should be good to go. I should have measured the amount of water I added, but maybe we can revisit this one on another post if we get some interest. Tortillas are a really fun and easy food to make, so I hope that you'll give it another go, Andrea.


Cameron
(I don't have a cool signature)


Wait, Wait! Don't leave to check out all of your open tabs just yet! I have more tortilla goodness to share! The best part of of tortilla making are the Sopapillas!

Sopapillas are pieces of tortilla dough that are rolled out like a tortilla, but instead of cooked on a griddle, they are dropped into really hot oil. The flash cooking causes them to puff up like balloons.


Did you hear that? That was sound of your diet going out the window.

Any New Mexican restaurant worth a dang will serve these at the end of your meal on the house. We usually eat them with honey, but I've seen people eat with cinnamon sugar,  powdered sugar, maple syrup, or even stuffing them with meat and beans. This particular recipe we just tested did not lend itself too well to sopapillas, but my mother-in-law's recipe works pretty well.

Tortillas
4 cups Flour
2 teaspoons salt
2 teaspoons baking powder
2 heaping tablespoons of lard or shortening (lard is way way better)
1 1/2 cups warm water (the warm temperature helps soften the lard to mix well)

Mix flour, salt, and baking powder. Cut in shortening. Stir in warm water and knead on a BARE surface until smooth and elastic. Divide into 12 balls cover with a damp cloth, and let stand for 10-15 minutes. Roll thin and bake on a hot griddle.

For Sopapillas: Cut tortilla into quarters and deep fry.

You're welcome.

Tuesday, May 27, 2014

Weaving Wonders and Woes

Today's post has been 2 years in the works. This is not because I've been working on writing it for two years, but because the submission has been sitting in our inbox for 2 years. I'm not a weaver; the only weaving I've done was in 3rd grade with those cardboard looms and yarn. That doesn't quite make me an expert. I tried reading about weaving to figure out how to trouble shoot the submission and I just didn't feel like I got it enough to give tips on how to get this project down. So I waited. My aunt is working on her BA in Art and has recently completed weaving courses. Now that I have someone who really knows what they are talking about when it comes to weaving, I figured it was time to pull this submission out of the archives. 

The Original Pin
http://www.craftpassion.com/2010/03/recycle-tutorial-woven-rag-rug.html
That is a cute rug made from old bed sheets! Isn't that fantastic?!

Anna gave this a try and didn't have the results she'd hoped for. 

The Pinstrosity
"First of all I think I was too aggressive in pulling the fabric - I should have just looped the fabric around the end pieces and not pulled tight at all. Secondly, I think the cardboard was not nearly strong enough (or I wanted to make my rug too big and therefore the weight of the fabric was too heavy?)."

"I tried making a wooden frame out of wooden dowels and nails. Alas, I kept pulling too tight (even though I tried really hard not to) and it started cinching in again!!!"

"Kept it small because I couldn't keep the larger shape intact"

"Cats like it at least".


Before I give Alice's response I thought I'd add in this photo as a reference for weaving nomenclature:
http://www.cd3wd.com/cd3wd_40/vita/handloom/en/handloom.htm
So the weft is the fabric that you weave into the warp (which is the vertical fabric attached to the loom). 

Alice says, "Anna, I love the colors you've used in this. First thing to know is your warp has to be super tight, so the heavy fabric needs a wooden frame, or even PVC pipe or any other clever frame. Secondly, if your weft fabric has any stretch, when you lay it into the warp it will indeed contract and squeeze the middle of your rug in too skinny. While I would love to make something that has that particular effect on my personal middle, on a rug it's just a disappointment!  Stretchy fabric will work, just make sure you've not pulled it tight before you beat or pack it into the warp. I just made a frame for weaving you might be interested in, to see it go to www.whatercolorit.blogspot.comGood luck and happy weaving!"

In addition to weaving, Alice also works in watercolor and pastels. Check out her blog and her work!

Monday, May 26, 2014

Happy Memorial Day!

"Memorial Day is a federal holiday in the United States for remembering the men and women who died while serving in the country's armed forces. The holiday, which is celebrated every year on the last Monday of May, was formerly known as Decoration Day and originated after the American Civil War to commemorate the Union and Confederate soldiers who died in the war. By the 20th century, Memorial Day had been extended to honor all Americans who have died while in the military service. It typically marks the start of the summer vacation season, while Labor Day marks its end."


Saturday, May 24, 2014

Show and Tell Saturday: Road Trips with Kids

We received a really great email yesterday that I thought would be perfect for today's Show and Tell Saturday. And...it fits the Road Trip theme! Here is what NaDell sent in:

My husband loves to drive, so a way to keep kids happy on road trips is essential!

I saw an idea on Pinterest when I first joined about a way to keep kids behaving on road trips (and because I was planning a drive with my kids I paid attention).  It was to have dollar bills attached to your visor for each child and then take one away when they misbehave.  I thought it wouldn't take long for my kids to lose all of their dollars and just be grumpy, so I put my own spin on it by giving our kids a quarter for every 15 minutes they were GOOD on our trip.  I wanted to recognize good behavior instead of bad behavior and it worked.  Sure it sounds like a lot of money when you look at 40 hours in the car per kid, but because of bathroom stops and food stops, it wasn't bad and they had to use the money they earned if they wanted any souvenirs or extra snacks (I had healthy apples and pretzels and water in the car).  

Basically, they paid for what we would have bought for them previously and they felt like they earned it.

The first year my husband brought all of his quarters he had in his coin jar and we had it in a bag between us.  When the kids earned their quarter, we'd put it in their small makeup bag.
We started this in 2012 when we drove from Washington to Utah to Colorado to Wyoming and then back to Washington in 11 days (spending three nights with siblings each stop).  
 When they spent their quarters, my husband used his debit card and we added the quarters back to our quarter bag to redistribute.  Our 18 month old yelled pretty much the whole trip, but the other three kids earned about $7 a day.  I'm pretty sure $21 a day is worth it for good behavior in the car!

For the next trip from Washington to Yellowstone, I made a paper chart and cut out little paper quarters and taped it on my dashboard with painter's tape adding quarters whenever they earned them.
http://andynadellransom.wordpress.com/2013/07/30/ransom-reunion-2013-and-brand-new-niece/

This past February we drove from Washington to Disneyland (about 20 hours each way) and I improved my chart to have one for each day with the quarters printed on the chart and I used a washable marker to color them in when they were earned and crossed them off when they spent them.


They were all able to buy a decent souvenir at Disneyland and a toy when we got home.


We plan on driving from Washington to Ohio and back this summer which will be about 80 hours total and this is our plan to keep them behaving.  We only use this when we are driving more than five hours so they look forward to it.

We don't use any DVD players or video games in the car (not that we don't use them at home, but we want them to see where we're going and enjoy the different places we are and we are old-school cheap.)  I like to have them pick a few books and little toys to play with in the car and bring an inexpensive notebook with washable markers for them to color pictures with.