Showing posts with label GCT Level 1. Show all posts

Friday, April 22, 2016

Kett Files: Results of the Macaron Massacre of 2016

I am a member of the Rising Tide Society, and each month, all across the nation, members get together to collaborate and support each other. I truly love the Community over Competition movement. I know not everyone does, but that's okay. We all don't have to like peanut butter either, although I don't know why you wouldn't! ;) 

But I digress. 

At this past month's meeting (the very first one I've been able to attend!) there was a mini styled shoot with the most delicious looking macarons ever by Sift Bakehouse. I was staying away from sweet treats that week and kept to my resolve not to eat them. And then I wished I had. They looked amazing. 


Even Foxy the Donkey wanted a taste! 

The more I looked at my pictures from the get together, the more I wished I'd tried one. And then I got a crazy idea. Why not try to make them?! I could do that! This coming from the girl who thought I could make a honeycomb cake and instead ended up with this: 
(via)
Yeah...I've totally got this. Pshhh. 

I read posts with tips. I watched videos. I got tips from Katie at Sift House. I was ready to rock out. 

I let my egg whites sit out, as per instructions in this post. I beat them into stiff peaks. This was going to be awesome. And the I realized I'd forgotten to pick up a kitchen scale, as suggested by the same post. Shoot. So, I found a conversion chart and tried to get everything as close as I could without weighing it. Did you know measuring out 1 and .834 cups of powdered sugar is hard?! It is. But I was still confident. 

I read in this post that over mixing and undermixing could be macaron killers. So when it came time to fold the macaron butter together I very carefully counted my strokes. 

I piped the macaron butter onto the nifty silicone macaron sheet I got at Michael's (50% off coupon! Woo!!), because the article said that silicone gave the best results.

They sat out to harden for the right amount of time, went in the oven, and I just knew it was going to work.

It didn't. They had spread rather than risen. Phooey. 

So the next tray I let them sit out and "harden" longer. Still the exact same results. And now I was out of macaron butter and time. I had to call it a day. 

Later that evening I got a Snapchat from Emilee with her GORGEOUS macarons! She'd figured it out and gotten beautiful results! High five to Emilee! No macaron massacre there. I can't wait for you to see hers!!!

She said she'd used Martha Stewarts recipe, followed it to a T, and didn't have any problems. 

I still had almond flour left, so I decided that the next day I'd try out the Martha Stewart recipe too. 

And it worked! 

At least the first pan did. The second pan I think would have worked had I not been holding a baby, fending off a two year old, and trying to turn the pan mid cooking. I think I spun the pan a little hard and bumped it, sending the fragile rising cookies toppling over to the side. 

The third pan I thought, "Hey, I want bigger cookies like Sift House had!" So I piped larger circles. That was a mistake. Apparently that batter couldn't support a larger cookie head. The cookie rose, got to heavy, and slid off the side, releasing extra batter out to spread beneath it. 

So out of my 5 pans...one turned out goodish. Oh well. One's not bad! I don't think they are quite right, but they were the closest I got before I ran out of powdered sugar to try more. 
 Top left (the golden brown one): 1st and 2nd pans. Top right: The pan that worked. Bottom right: The pan where I piped too big of cookies. Bottom left: The pan that got spun a little hard. 


So, once I had the cookies made it was time to fill them. After the first two pans I made the filling and it sat in the fridge hoping that it'd have something to go on. Guess the flavor!!
That's Prickly Pear Buttercream! I looked at a few fruit buttercream recipes and then just kinda made up my own. I took our prickly pear juice and boiled it down to try and get as much flavor and color into 1/4 cup of juice as possible. From there I added 1/4 c. butter, 2 c. powdered sugar, 1 tsp of lemon juice, and mixed! The Prickly Pear flavor isn't quite as strong as I'd like, but it's good. I think next time I'll boil the juice down even more.


The one pan of cookies that worked were small, bite sized little cookies. I want to try again and see if I can figure out how to get larger cookies that don't ooze and travel on the pan.


So there's my Macaron adventure! And, if you're wondering...I am spelling it right! I called these macaroons at first and then I saw that Sift House called them macarons, so I went to look it up. Macarons and Macaroons are totally different! Read about that here

Have any of you made macarons? What's your favorite recipe or filling?! 


Friday, January 9, 2015

Marshmallow Cups

Are you ready to have your mind blown? Here you go. You can make a miniature glass from a toasted marshmallow. Well...maybe. There is a pin with a video showing how to make them, but as you can imagine it's a little finicky. How finicky? Well, Jane tried this one out and sent it our way.

First, I'm sure your asking what you could drink out of marshmallow cups. Chocolate milk, warmish cocoa, or the original pin even suggests liqueur (but as I don't drink I can't attest to how that would taste...however chocolate milk out of marshmallow cups sounds phenomenal).

Now, what would these concoctions even look like?

This.

image from The Watering Mouth
Yum. Triple yum. If I had marshmallows in my house I'd totally blow off this health challenge I'm doing and go try this. Alas, there are no marshmallows to be found. Health challenge intact.

I may not have marshmallows on hand to show you how this turns out, but Jane took a stab at this. Here is what she sent over to us:

Toasted marshmallow cups for drinking Baileys out of?  We had to have a go at this one!  I specifically bought an American brand, “Rocky Mountain mega marshmallows” as we really wanted this to work. 

We used a gas hob instead of an electric element, but the video says use electric or gas.  Here is the result of our first few tries – we also tested a New Zealand brand but that just melted into goo almost immediately (it’s the pink blob in the middle of the plate).


You can see our main problem here – the marshmallows kept catching fire.  This is because we held them too close to the flame.  So we had more patience and finally got some actual toasted and not-on-fire marshmallows! 

But the top didn't collapse, as in the video, so it wasn't a cup shape.  We kind of cut a hole in the top and poured in some Baileys liqueur anyway.


And it promptly ran out the bottom!


But we enjoyed them anyway – here’s my daughter, Poy Ling, trying to eat one elegantly:


On the GCT fail scale, this really went through every stage – from white to literally in flames!  As we drank quite a bit of liqueur in the end, one way or another, we happily rate this Two-toned.

(Flaming marshmallows and alcomahol – I think it’s a win that we didn’t have to call the Fire Brigade!)

Thank you for reading,
Jane, Ruth and Poy Ling


So, maybe this isn't so easy. The original instructions even say so. She says, "Well, it does work, turns out. Half the time. It is a really finicky thing to make, but when you get it right, it is so so super cool. [...] So when I went to go make this, I had to try about 12 different marshmallows to figure out the best way. Make sure the marshmallow is really perfect looking, the less oblong the marshmallow, the better luck you will have." If you want to try this out, go read her entire post, watch the tutorial video, give it a shot, and let us know how it went! 

-Marquette

Sunday, October 26, 2014

Sunday Surprise: No Bake Oatmeal Cookies

Greetings everyone,

Happy Sunday! Oh boy, have I got a blog post for you today. The odds were stacked against me, and at two or three points during this recipe, I thought "This is going to be a genuine Pinstrosity". But, alas, I triumphed-ish.

So I should probably start this post by saying that I  really wanted to make these cookies for Pinstrosity's Pumpkin-tober.


But I ended up forgetting several crucial ingredients when I went to the grocery store (why do I think I can shop successfully when I don't make a list? I totally can't). Naturally, I didn't realize this until 9:00 PM, when I got the fever to bake said cookies.

Then, I thought I'd make some delicious oatmeal cookies. I was sure I had all of the items for those in the pantry already. But, nope, nope I did not. Being unable (and unwilling) to give up cookie making for my Saturday night project, I settled on these "Chocolate Oatmeal No Bake Cookies". Yummsies.


And note, when I type "settled", it wasn't like I was upset about those at all. I mean, look at that picture. GET IN MY FACE!

Here's the recipe listed on the original blog:


Chocolate Oatmeal No Bake Cookies
1/2 C Butter
2 C Sugar
1/2 C Milk
4 Tbsp Cocoa
1/2 C Peanut Butter
3- 3 1/2 C Quick cooking Oats
2 tsp. Vanilla

Add the first 4 ingredients in a saucepan. Bring to a rolling boil, and boil for 1 minute. Stir in the next 3 ingredients and drop onto wax/foil paper. Let cool until set. 
Now would probably be a good time to disclose that tonight, for no particular reason at all, I did not do a hands-on inventory of the things I needed for this recipe. I was just naturally sure that I had it all. Bad choice. especially considering that I couldn't make the original recipe because items were missing. As a writer, you'd think that I would have caught the ominous foreshadowing of this. No such luck. We shall call the lack of inventory Mistake #1.
Mistake #1A: Not enough butter. Nope. We're at the bottom of the container. Maybe a couple of teaspoons, at most. 


No problem, I figure. I'll just use Butter Flavored Crisco, despite never having used Crisco in this way. What could go wrong? 
I started with the whole "Add the first four ingredients in a saucepan". Mistake #2 (while Mistake #1 - no inventory-  is still in progress): I started cooking BEFORE gathering the ingredients. What the heck was I thinking?! 
Here we go... Milk, sugar, and Crisco
Here, see? The shortening is melting. That's cool.

Is it supposed to be separated like that? Like... not sure how much you can actually tell, but the shortening was just a yellow layer on top of the milk and the sugar. It didn't seem to be blending at all. Very oil/water. Hmm. Troubling... 
Photo in motion...ooooh....ahhh....
But, not nearly as troubling as what I found next (on the Crisco container):

As you can imagine, since this stuff was already heating in the saucepan, this was not an ideal moment to realize this. Even worse, the recipe instructed me to "bring ingredients to a rolling boil". Gulp.
I turned up the heat a little more, and then this started to happen:

I panicked and removed the pan from the burner (on the off chance that this was what Stage 1 of a grease fire looked like). But, the good news was that it started to mix up, kinda...
Pardon the messy stove.
Next item on the recipe? Quick oats. Awesome... I'll just go ahead and add my 3 - 3 1/2 cu-- oh no. Literally, as I am pouring the quick oats into the pan, I realize that there are only two cups left in the container. And, naturally, we only have one container. Mistake #1B.


Oat to  sugary grease ratio was all sorts of off.
At this point, I'm like, 'welp, this is over and done with. May as well figure out how to dump it in the trash...' Until... dun dun da dun!!! (Prince Oatmeal rides in on his valiant steed)
Individual packets of oatmeal that Rob bought at Target, but didn't like. So they've just been sitting in the pantry for a couple of months. Strawberry or not, into the pan the last three packets went.
Ahhh....much better.
It is only at this point during this "baking" session (if you can even call it that), that I realized I never added the cocoa, as I was instructed in Step 1.  Mistake #3. Whoops. I started scrounging around in my pantry only to discover...... no cocoa. 

ARE YOU KIDDING ME RIGHT NOW!?


Mistake #1C. Seriously. Almost lost my mind. But, again, I'd already made it this far, so I couldn't just give up. Right? Right.


Solution?


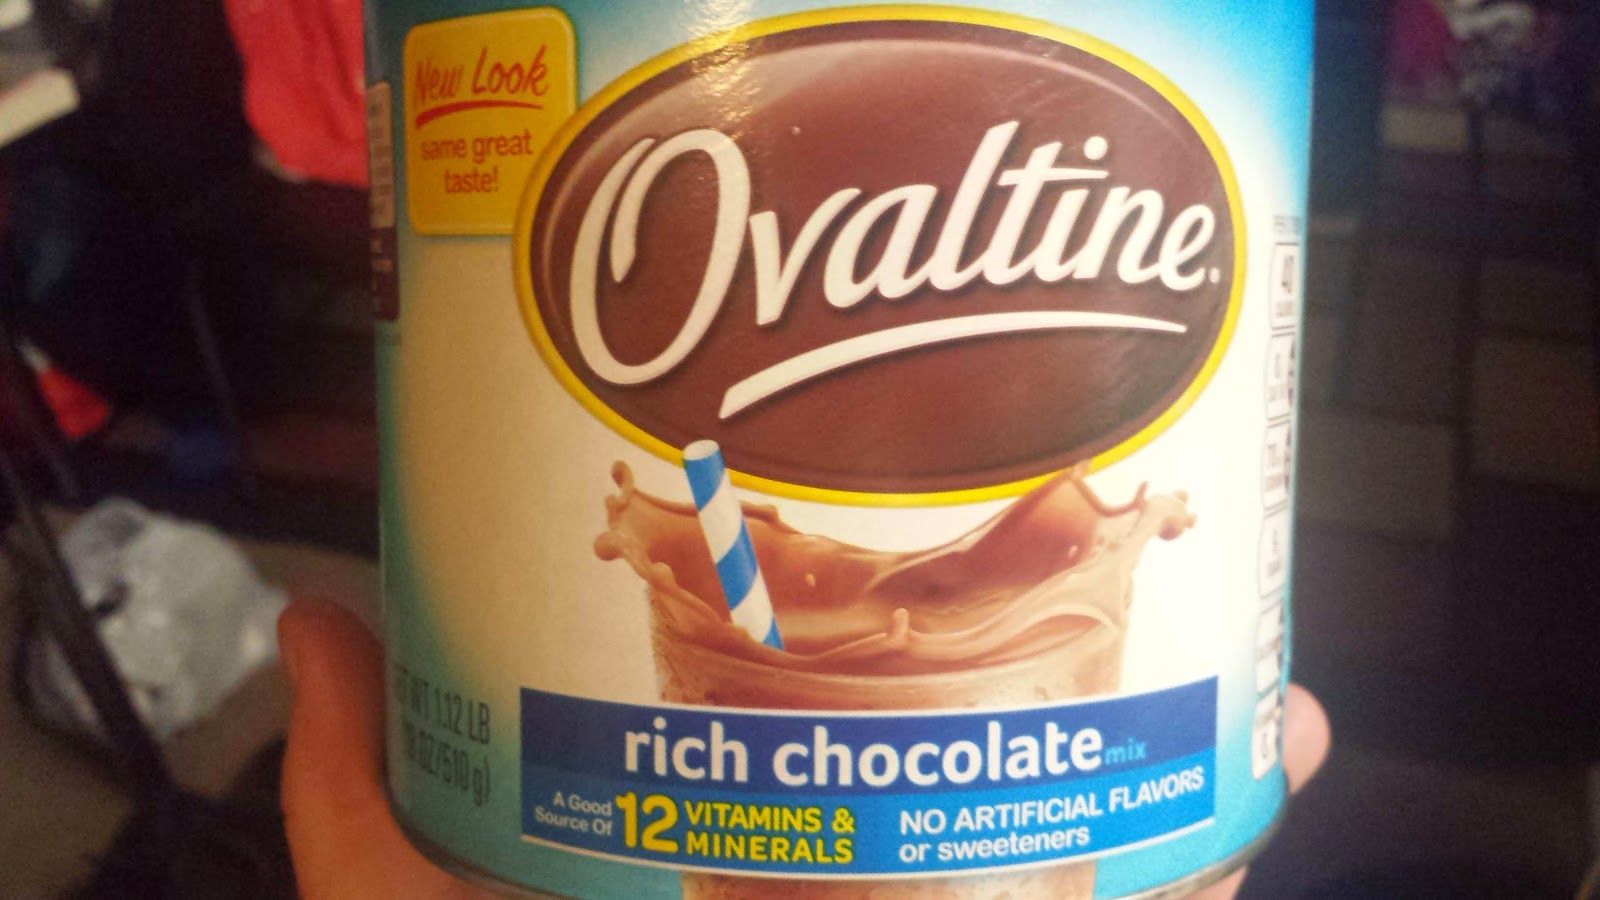
Indeed. Ovaltine to the rescue. I mean, it's powdery and chocolately, so, really, I felt like I was going in at least kind of the right direction. I added the vanilla for this photo too:


In the interest of full disclosure, this tasted amazing. I gave it a little nibble and was quite impressed. Because, really, I was still amazed that it wasn't on fire.

Carrying on. Last ingredient: peanut butter. 

And this, ladies and gentleman, was the first PLANNED substitution for this recipe. Skippy Dark Chocolate peanut butter was a Nutella competitor that I found at the dollar store awhile back. I quickly decided that there was no competing with Nutella, so about half of this jar has been hanging out in the pantry, waiting for its purpose. And this recipe was just the ticket.


The bad news? My 1/2 cup wouldn't fit into the container. And, I know, I know, I could have spooned it out into the 1/2 cup, but that just seemed like "too much work". I decided to just "eyeball it" because really, who cared at this point? I didn't really. It was tasty, but I was pretty cranky about how all of this was unfolding.


I scooped this into cookie sized balls and waited. After ten minutes, it didn't look like it was any closer to being "set"-- so I opted to put it in the fridge, with the other half in a pie dish.


This may have been a mistake, but as you can imagine, I was pretty much ready to throw the towel in anyway. I fell asleep and ended up leaving these in the fridge overnight. Here's the final product:


Rob quite likes them. Though they're not nearly as nice looking as the original post. They also have little specks in them. Maybe shortening? Who knows.

I actually find these to be waaaaaay too sugary/a weird consistency (almost....grainy?). But, of course, I don't blame that on the original post. I feel my version of this was a recipe unto itself, what with all of the fails. I do want to say this though, think of what a solid recipe this must be if I could replace butter with shortening, forget/replace cocoa with Ovaltine, use plain AND flavored oatmeal, and a different kind of peanut butter and still coming out edible. Hats off to the original post, I say.

Let's review the morals of the baking story:
  1. Do not, unless you are absolutely sure of what you're doing, start baking at 9:00 PM.
  2. Do a complete inventory of the ingredients needed. Seriously.
  3. Do NOT start to bake until inventory is complete (or, what you start working on can be used for something else, I suppose) 
Learn from my mistakes!!

Have any of you tried the original post? What did you think?
Thanks for hanging in there with me. Hopefully, I'll have something else for you soon!

E-hugs and e-kisses,
Rachel

Monday, September 8, 2014

Lipsick Lushisness ft. The Mr. Chips

Hello all! Sometimes I see a pin and I know I just can't take everyone else's word for it, I HAVE to try it out myself!! From the second I saw this pin I knew that I HAD to try it. Then I found another one (the first one...I switched up the order for the big reveal!) and thought that while I was in the neighborhood I would give it a shot. I even got Chip in on this one ;) Stay tuned for outtakes at the end :)

The Original

thebeautydepartment.com
 
Just to cover my basis, I am in no way saying that this poster is a false advertisement ...I am just relaying my own personal experiences. Nuff' said.
 
This fun pin helps you turn all of your favorite lipstick colors into lip stains so that they stay longer and won't transfer onto clothing, or anything else during the throws of a normal day. Here is my experience with this pin!
 
The Pinstrosity
I followed the steps shown in the poster by 1. Applying lipstick as normal.
I used one of my favorite moody mauve's, its called Summer Sunset by Maybelline.

2. Pressing a tissue (or TP, because that is what I have) to the lips.
 
3. Dabbing powder (I used baby powder) to the lips over the tissue.
 
and voila...only no voila here.

 
To me it just felt more like I had blotted the lipstick with a tissue. It still had that sticky lipstick feel and it wasn't even all that matte in real life. I felt that this one was a Pinstrosity. If I was looking for a lip stain I would probably just wear a lip stain and not go through all the trouble of the powder and tissue dance.
 
Now for the fun one ;)
 
The Original
 
I've had my eye on this one for MONTHS!!!
P.S. This girl has Jessica Rabbit lips, bravo to you lady.
 
The Pinstrosi-win-ity
(See what I did there)
 
I put concealer on first...nude lip anyone?
 
 Then I lined the lip in black eyeliner (harder than it looks!!)
 
I used Are You Red-y also by Maybelline for this one.
 
 I put the lipstick on my lips like normal.
 

And blended...which ended up looking like this.
 
And so I cleaned it up...


Not too bad! It's dark, but I like it. It has a sort of 90's gothic look that I really love. Not an everyday look, but it could be fun and it really wasn't too bad to replicate.
 
And now what you all have been waiting for, the outtakes!!
 
This was the first picture I took with the black lip liner...I couldn't stop laughing!!
 
 Get that corn outta my face!

 
 How you doin'?
 
 Ahaha!! I love him so much.


 And then finally all this happened. He is such a good sport. Love you Chip!
 
Happy Tuesday all!!