Monday, June 30, 2014

Mix It Up Monday: Patriotic Food

Are you still trying to decide on what to bring to the 4th of July party? Need an extra plate of something on your buffet table for your friends? Here are some great 4th of July recipes and food to give a shot this year! 

This first one is one I have personally tried and loved. In fact, you've seen it on the blog before, but I'll post it here again for you. The Caramel Apple Pie in a Cinnamon Roll Crust. Mmmmm! If I had to choose between pie or cake, I'd choose pie any day. Especially this one. 

http://www.ohnuts.com/blog/cinnamon-bun-pecan-pie-recipe/
The directions said you can use pre-made crust, or make your own from scratch, so I turned to my trusty pie crust recipe (it really is simple and really yummy). I did a double batch of pie crust dough for the bottom so I would be sure to have enough and it ended up being perfect. It really was easy to put the crust together, the directions are simple. Here's what my crust looked like after getting it in the pan:

Then, this is the recipe I used for the pie. I'm not normally a huge apple pie fan, but I love this recipe and it's so easy. Cut up the apples, put the lattice top on, and then you make a caramel sauce and pour it through the lattice. SOOOOOoooo yummy and easy. For the lattice top I rolled out the plain dough, then spread some melted butter, cinnamon, and sugar on top. I then smooshed the dough back together gently (because you don't want to mix it too well), and rolled it out again to get a sort of cinnamon/sugar marbled effect going on. Then I cut my lattice strips and put the top on. Here's the pie right before going into the oven:

And here's the finished product!

So we know it looks cool, but what about the taste? Let's just say that I will forever do my apple pie crusts like this now. It's adds such a subtle but yummy yummy yummy flavor to the pie. And I apparently didn't get the bottom crust flattened as thin as I thought so I ended up with a thicker crust (which I LOVE) that is extra yummy to eat because of the cinnamon in it and the pie filling soaked in. This one is WELL worth the time it takes to make it. MMMmmmmmmm.


Well, since I love pies so much, I'll give you another pie! This is from one of our early posts.
The Original Pin
http://www.womansday.com/recipefinder/stars-stripes-pie-121895
Doesn't that look amazing?! Oh man, I want to go make pie now. This was Marty's first pie attempt, which I'm rather impressed that she'd do this as her first pie...it would have scared me away to try and make this pie on my first pie making experience. So 100 points to Gryffindor (and Marty) for that. 

Marty tells us "I tried to make this for 4th of July. I followed the recipe exactly with the exception that I used strawberry pie filling instead of cherries because I don't like cherries. I used pie filling from a can and in the amount called for in the recipe. This was my first pie. It looked quite pretty before I put it in the oven. I even made sure I had 13 stripes. I was very excited."

The Pinstrosity

Still not bad. Here's what Marty had to say about it:

"Well, the filling overflowed all over my oven. Clearly, it called for too much filling. Also, as you can see, it doesn't look like the Woman's Day picture. It also didn't taste good. Next time, I will not fill it as full and I will make my own filling. I will try again next year."

I love Marty's resolve. So many of us quit after projects don't turn out quite how we want them to. Way to go Marty. 

So on to dissecting this pie. 
  • The Pie Filling
    • Marty used strawberry pie filling instead of cherry pie filling because she's not a big fan of cherries (which I probably would have done too...not a cherry fan). The only thing that probably affected was the color of the red in the pie; it wasn't as vibrant as the cherries. 
    • Like Marty, I think there was too much pie filling. When I read the original recipe I thought, "Holy cow, that's a lot of filling. That'll never fit in a 9" pie pan." I have trouble keeping 1 can of filling from going over the sides of the pie, let alone 3 and a half! I would probably start with one can and then add fresh fruit into it to get the consistency right. That's one of my favorite pie tricks, adding fresh-or frozen sometimes-fruit to the pie filling; it gives a great textures and adds nicely to the flavor of the pie. I especially do this with berry filling (and especially with strawberry filling) since sometimes the canned pie fillings have a funny aftertaste, which may have been Marty's taste issue, I don't know...having not tasted it I can't say what to do about the taste. 
  • The crust. 
    • I'm just not a fan of pre-made pie crusts. I'm not a fan of the flavor and they are usually thinner than I like them. I know it's easy to just pick one up at the store, but I just have never had great luck with them (I know some have wonderful success stories with them, but not me). I would always suggest making your own crust. It's really easy, and yummy, and you get to make it as thick as you want (I LOVE thick pie crust). 
    • It looks like Marty needed a higher crust in her pie to help hold in all the filling. Making your own crust will let you customize things to get the desired effect. The crust around the edges also makes a nice frame for the stars and stripes, pulling the whole design together. And it'll help the stripes not to slip around when baking. What I would do, is to cut the stripes longer than the width of the pie, then lay them over and pinch the edges of the stripes into the crust to help solidify everything. Then after that you could crimp the crust (or do whatever crust design you want). 
    • Placing the stripes in line with the blueberries rather than at an angle also might help give more of a flag look to the pie, if that's what your going for. I think Marty's looks fine, but there's another option for the pie. 

And now I have 4 more pie pins for you. These looks scrumptiously patriotic (not that I've heard anything described as scrumptiously patriotic, but that seems fitting for these pies). 

http://www.atthepicketfence.com/2013/06/4th-of-july-dessert-hand-pies.html

http://www.franklyentertaining.com/2012/07/04/easiest-potluck-dessert-ever/

http://www.adventures-in-cooking.com/2011/06/buttermilk-blueberry-pie.html

http://insidebrucrewlife.com/2014/05/lemon-cream-berry-pie/#_a5y_p=1707101
Happy pie making!


Saturday, June 28, 2014

Snapshots of Pinterest Success

Pinterest is used by some as inspiration for photo ideas. Pinterest is full of ideas for creative vacation photos, funny Christmas card ideas, cute pictures for your kiddos, and outfit ideas for family portraits. There are many professional photographers, hobbyist photographers, and everyday "snapshotters" that use ideas they found on Pinterest. Today I thought I'd share with you the 5 Pin Win and Pin Spin submission we have in our inbox from various people with their success stories.  

Original Pin #1
This photo is linked and reposted all over the internet and has been replicated over and over again. 
Sherri Butler Photography sent in this Photography Pin Spin. She said, "I am often asked to replicate images people have seen on Pintrest and I try to do my best – especially when it is really cute and I have the materials. The [above] pin was shown to me. Now you wouldn’t think this would be difficult. However, babies never want to be agreeable to specifics! No matter how many times Mom and Dad tried to get the baby to put her feet down inside the heels, she refused and pulled her legs upwards. I had a great chuckle and Mom and Dad were good sports. We went for something else and just let her sit and play with the shoes (they were brand new). I love the final result.  Go with the flow J

Pin Spin #1
You definitely have to be willing to improvise and go with the flow when photographing children, but that is what makes a child's portraits so fun and special. You can't help but capture a peek of their personality.

Original Pin #2
http://www.thephotoart.org/cute-picture/#.U6nFtvldWa8
Kaila sent in her Pin Win from a wedding she shot. "I have always loved photography and I recently had the chance to photograph one of my friends weddings! Of course she had some ideas she found on pinterest and so did I! This photo was one of our favorites and I was determined to get it right! I think it turned out ALMOST close to what the pin showed :) PIN WIN!"

Pin Win #2

Oh I love weddings. Love love love them. They just make me happy.


Original Pin #3
http://www.thephotographerswife.com/play-dates-and-pumpkins/
Merissa saw our post about babies who really hated being  put in pumpkins for photos and had to send in her chunky cherub who has no problem with pumpkins.

Pin Win #3


Original Pin #4

Jolene found the pin above and knew it was perfect for her new nephew. "My nephew was born on 12/11/12 and was the best Christmas gift this year! I wanted to do some cute newborn pictures of him so I thought I'd try out one of these pictures with infants inside stockings. Well, I think the photo speaks for itself. It came out great!"

Pin Win #4

That first Christmas is just special. Jolene's photo turned out much better than the one we've seen before here on Pinstrosity!

Original Pin #5

Erin decided to get some festive photos of her dog with the idea above as inspiration. "I think it turned out pretty well. I did have to fix a large scar on our dog’s nose and clean up some of the snow. Kahlua was very patient."

Pin Win #5

What I said above for photographing children applies here to pets as well. You definitely have to be willing to improvise and go with the flow when photographing animals, but that is what makes a pet portrait so fun and special. You can't help but capture a peek of their personality.

Friday, June 27, 2014

Bacon Cheese Dogs

With Independence Day Barbecues just a week away, I thought it was high time to pull this one out of the submission archives and get it up on the blog. Want to take your barbecue to the next level? Check this one out:

The Original Pin
http://www.savoryreviews.com/2009/08/18/cheese-stuffed-bacon-wrapped-hot-dogs/
That's a hot dog, with swiss cheese in the center, and thick sliced bacon wrapped around it. Ooh-de-lolly! The only way that could be more American was if you stuffed American cheese in the middle, but I personally love Swiss, so I'd leave it as is.

Jennifer said, "This weekend while camping, my mother was soooo excited to try 'this recipe from Pinterest.' My mother isn't always one for following the directions (or even reading them all the way), so we didn't have any instructions or photos to follow, just her memory of the pin. We first tried grilling them, but the drippings from the bacon caused the grill to flame up. So then we moved to a griddle. The end result wasn't pretty!"

The Pinstrosity


"Once I returned home from the camping trip, I looked up Mom's original pin and found a *few* minor details we failed to follow:"
  • The original pinner cut a pocket for the cheese. Mom sliced the hot dog from end to end, so the cheese oozed out.
  • Mom used approximately 3 times the amount of cheese as the original pinner. Maybe even 4...
  • Our bacon did not entirely cover the hot dog, leaving gaps for the cheese to ooze out. We used 2 pieces, but needed at least 3 to cover our Costco dogs.
  • We didn't have toothpicks to secure the ends of the bacon. We did find some skewers and used those once we realized the bacon was flopping all over the grill and not sticking to the hot dog.
"Despite our less than stellar results, the hot dogs were absolutely delicious. Next time we will actually follow (ahem, READ) the directions (or in this case LOOK at and follow the step-by-step photos)."

When we were kids my mom would cut a slit in the hot dogs, insert a small stick of cheddar cheese (or whatever cheese was on hand), and broil it until it was crispy and the cheese was gooey. That was a favorite treat. Adding bacon to the mix just sounds amazing. It's like the grown up version of a favorite childhood snack! I'm definitely giving this one a go!


Thursday, June 26, 2014

Well That's Just Ducky

I have so many friends and family members due with babies in the next 6-7 months, it's crazy. I can't wait for the baby showers to start. I love the food, the socializing, seeing the fun gifts, and some of the games (not the clothespin game, or the guess the melted candybar in the diaper game!). I like baby showers even more now that I have Darrow. Parties are just fun!

One thing that really tickles me with baby showers is seeing how the themed baby showers are put together, and how they incorporate the theme into food, decorations and games. There are some really creative ideas out there!

One theme that is gaining popularity, especially if the sex of the baby is unknown, is a Rubber Ducky party. It's such a cute baby theme while still being fun and versatile. One creative lady found a way to carry the Rubber Ducky theme all the way to the punch she served.

The Original Pin
http://tidymom.net/2011/ducky-baby-shower-punch/

If you've been with us for about 2 years, or if you've gone back through our old posts at all, you may be thinking that this looks familiar. 2 years ago Diana sent in how her punch turned out when she tried to make this:

http://pinstrosity.blogspot.com/2012/07/rubber-ducky-youre-not-one.html

Today, for Throwback Thursday, I have two more submissions of punches inspired by this same pin. 

Stephanie made this punch for her cousin's baby shower. "Unfortunately, I failed to read the directions carefully. It calls for white grape juice....I bought regular grape juice.  It calls for lemon sherbet....I couldn't find any, so figured orange sherbet would do just the same........"

Pinstrosity #1
She said, "my family affectionately nicknamed it the "pondscum punch".  Woops." It makes me think of some of the "Where's My Water" levels (anyone else play that game? I'll admit to it!). 

Stefane (it crack's me up that our two submitters today have the same name, what a funny coincidence!) told us this story: "I found your page through a link at Epbot (Jen is awesome!) and have been looking through your blog.  When I found the rubber ducky punch pinstrosity (http://pinstrosity.blogspot.com/2012/07/rubber-ducky-youre-not-one.html), I had to share my own tale."

"My sister absolutely loves rubber duckies, so it was easy for me to start planning her baby shower even before she found out the sex of the baby (it was a boy, born in July!), I found this punch and deemed it perfect for the shower.  In the days before the shower we tested out all (and I mean dozens!) of her rubber duckies to find the ones that would properly float and I washed the ones we selected.  I did my shopping, had all of the ingredients in a cooler at the shower site, and the last thing I did before people started arriving was to mix the punch up.  I had bought a blue packet of kool-aid, but apparently kool-aid in a blue packet is still red (tropical punch)...and there was nothing we could do at that point, so we plopped the duckies in anyways!  Luckily my sister found it funny- she started calling it a ducky blood bath!"

Pinstrosity #2

"I have since done some research and found that blue packets of kool-aid are difficult to fine nowadays...but I did find that tropical punch kool-aid (the flavor I used) is actually blue in the juice boxes, just not in the mix!  Everyone still said that it tasted great, but I mourned the loss of my beautiful ducky bathtub punch for awhile, lol!"

Finding the right ingredients for this is key. You definitely need the white grape juice, the blue kool aid (or any blue beverage mix...just as long as it's blue), and either pineapple or lemon sherbet. When it comes to making your punch blue, the original post the author added in this note: "Blue Kool Aid – Look for Ice Blue Raspberry Lemonade or Berry Blue flavors. Many people are having a problem finding blue Kool-Aid.  A reader used berry blue typhoon Hawaiian Punch, ginger ale white grape juice and sherbert… and NO SUGAR! (the Hawaiian Punch is sweetened so no more sugar is needed)". 

Some people also have had trouble getting their ducks to float. The author suggests buying bathtime rubber duck toys from the baby department. 

These may not have fit the baby shower themes just like they wanted them too, but I'm sure they put smiles on faces, and that they tasted great. Not a total loss! 


Wednesday, June 25, 2014

Popcorn Method of Doom

When it comes to things going wrong in the kitchen we usually can expect things like smoke, spills, nasty flavors, gooey messes, and flipping through the phone book to order a pizza when dinner flops. Rarely do we expect flying shards of glass. That's just not conducive to one's health and it should be avoided. What can cause flying shards of glass in the kitchen? Well, for two of our submitters, this pin was the start of their kitchen of doom:

The Original Pin
http://www.everythingbutthe.com/2011/09/08/blow-your-mind-microwave-popcorn/
According to the website, "Glass bowl + ceramic plate + popcorn kernels = perfectly popped popcorn in the microwave." According to our submitters though, "Glass bowl + ceramic plate + popcorn kernels = near death." 

The Pinstrosities
The stove. Perfectly situated to be easy to stand and cook at...and to have flying glass shards enter your abdomen. Yikes!
Tiffany said, "I normally make microwave popcorn in brown bags but I saw this pin and thought I would save the bag and pop it in the same bowl.  Upon reading the directions I was curious about the time 2 mins 45 secs.  Normally with a brown bag I only cook it for 2 mins or less.  But I tried it. It did take at least 3 mins to cook and the bowl and plate were both VERY hot just like the pin said.  Then I tried their suggestion of recooking the left over corn - cause there was quite a bit.  Once again I had to cook it for quite awhile before getting the popcorn to pop. After 3 mins I gave up because the popcorn that had popped smelled like it was burning.  So I pulled it out and right after setting it down on the stove top it sounded like a gun went off and the pyerx bowl exploded all over my kitchen! My guess is that the microwave is warming up the bowl and plate more than the popcorn.  I'll just stick with my brown bags!"

The microwave turned jack-in-the-box-of-death. 
Angela said, "I was super excited to try the microwave popcorn in a mixing bowl covered with a plate. I've actually had luck with the popcorn in a brown paper bag but thought this would be less wasteful. I was hearing pleasant popping and then heard a loud CRACK and opened my microwave to this. As I was not excited to eat glass shards, I would rate this a GCT of 5."

Thankfully neither lady was hurt. I have awful images in my head of opening the microwave just at the moment the bowl blew up and having a glass shard fly into a face. Or the shattering bowl on the stove/counter sending a glass spearhead into someone's stomach. These could have been bad. 

When objects heat up, they expand. Glass does not expand well, especially if there is even the tiniest flaw in it anywhere. We've had a Pyrex dish explode in our kitchen, but that was because we were idiots and didn't realize we'd left a burner on and pulled out dinner out of the oven and set it on the burner. A few minutes later it got way too hot and exploded. Don't leave burners on. Don't set anything down on burners unless you are actively cooking on them. And now we learn, don't put a glass bowl in the microwave for too long (in this case too long really isn't that long at all). Just because of the danger level with this one, I know I won't be trying this method here at home. 

Friday, June 20, 2014

Burnt Mason Jars

Mason Jars still seem to be a huge rage. I thought it would have died out by now but it hasn't. Our Walmart even carries mason jars in the crafting section now. Weird.

http://media-cache-ec0.pinimg.com/originals/d2/84/5a/d2845a480d14227f9e8dbfc4c98c821a.jpg

http://media-cache-ak0.pinimg.com/originals/fb/8e/6d/fb8e6d355ff8059815c06361105bf5d4.jpg

http://www.crumpleandtoss.com/pins-needles-10/

If you haven't guessed, today I have a mason jar Pinstrosity for you, and we've had 2 submission for it!

The Original Pin
http://www.doodlecraftblog.com/2012/07/blue-tinted-mason-jars.html?m=1

Don't want to buy glass spray? DoodleCraft has a cheap and easy way to make tinted glass jars. Easy at least until your oven decides to turn on you...again.

The Pinstrosities
Samantha explains the above picture: "So, I decided to try tinting some of my old mason jars for a friends birthday. BIG MISTAKE. My mom and I took four old jars, coated the inside with modge podge mixed with food coloring like the link told us to. The whole time we were thinking "This is so cute and beautiful!". Once the jars had become fully covered in the mixture, we put them upside down on the wax paper for five minutes. Next we placed them upside down in the oven which was at 400 degrees just like the directions specified. Seven minutes into the thirty minutes needed for them to bake, my mom noticed that the blue of one of the mason jars was already beginning to lose its coloring. All of the paint that had dripped out was also bubbling! Then with seven minutes left I checked on them once again, the kitchen was somewhat hazy and there was still color on the jars. The timer went off and surely enough when we opened the oven door, ALL four mason jars were a blackish brown color (the pictures show all). Needless to say my friend is NOT getting those jars. I'm not entirely sure what went wrong, I keep going back to the directions to see if I may have over looked something but every time I do, I can't seem to find how it went horribly wrong. We probably won't try this again. "


Caitlyn tells her adventure like this: "My roommate and I thought it would be cute to make tinted glass vases for some flowers we had just gotten from the dollar tree. We used food coloring and Elmer's glue to make a pretty aquamarine color and colored the whole inside of the vases, and then put the vases upside down on a cookie sheet for 30 minutes at 400 degrees. We started becoming concerned when, 7 minutes in we started to hear popping sounds coming from the oven, and then started to smell what seemed like melted plastic. We checked the oven, and even though the glue seemed a little bubbly, we kept going. Eventually, the burning smell became overwhelming, and after the 30 minutes were up, we pulled out the distorted, burnt messes that were our vases. We thought that that was bad enough, but then we started peeling the aluminum foil back from the tops, and released what had to have been the worst smell of my entire life. Maybe if someone had baked vomit, that would have been comparable? They are currently sitting outside because they gave one of us a nosebleed."

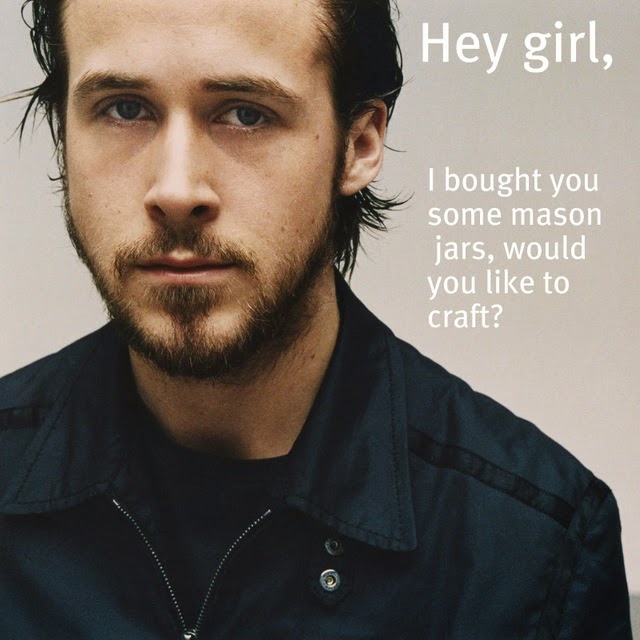
Definitely not what Ryan Gosling had in mind up there.

I went back through the blog post and didn't see any red flags that stuck out to me, so then I went through the comments to see if others had encountered similar misadventures and I found Tracy. She said, "IMPORTANT ADVICE FOR THOSE WHO HAVE DONE THIS PROJECT IN THE PAST OR ARE PLANNING TO DO IT IN THE FUTURE: After experimenting with this about six times, I have found that instead of wax paper (as described in the directions), you need to use PARCHMENT PAPER. Also, 30 minutes at 400 degrees IS WAY TOO LONG to bake these. 4 minutes @ 400 degrees is plenty. Also, don't overlap your edges when painting on the Mod Podge - this creates thick seams and bubbles - just nice, light coats next to each other. Good luck! After I made these changes, they turned out beautifully."

I love helpful comments! Thank you Tracy!


Thursday, June 19, 2014

Throwback Thursday Beachy Waves Round Up

Like Marquette yesterday I was thinking back on some of our more popular submissions and thought of this one. This type of pin also makes me think of summer because many times these pins are going for a "beachy waves" type of look and I am off to the beach later this week!! So I thought I would round them all up for you, and show you a few of my favorites! Be sure to go back through some of these and try out my tips and tricks to make this a Pin Win and not a Pinstrosity! Happy Thursday all!
*Click on the title to get to the original post!*