Showing posts with label Cookies. Show all posts

Tuesday, July 5, 2016

Tried it Tuesday: Pie Cookies

Yesterday we were invited to a neighbor's house for a Fourth of July Barbecue. Not wanting to show up empty handed, I looked around to see what I could make and kept coming back to a pie. I love making pies! Pies can be a mess though and only go so far with a crowd. 

And then I remembered some pins I'd seen in the past few years. Pie Cookies. That sounded yummy and easy and I figured that'd be perfect. Kids eat cookies great, they require little serving utensils, and it'd help the pie stretch more to give everyone a bite. 

So I searched on Pinterest for "pie cookie" and a plethora of pins popped up. Most of them were apple pie cookies, but I did see a few cherry or strawberry pie cookies as well. I opened up 5 of the recipes at random and read through the instructions and found they all were basically the same. 

Roll out the dough. Cover in pie filling. Top with dough. Bake. Stuff your face. 

I could do that. 

I used my normal pie recipe and did a double batch so I'd have enough for a bottom crust and a top crust.  All the recipes said to use your favorite recipe or buy the pre-made dough from the store. Either is fine!


If you are a video kind of person, the video below will explain the rest of what I did (and next time I'll dig out my tripod! I've totally got to work on my video skills if I'm going to do more of these-and make sure it's not a shaky hands day for Cameron). If you're not a video person (like me!) and would prefer to read, just skip and I'll explain what I did!


Once I had my dough rolled out I sliced one into thin strips for the lattice top. I tried to go with 1/2" strips so that the lattice pattern would be visible on the cookies. After the crust dough was all prepped, it was time to add on the pie filling. I was pretty sure one can of filling was going to be too much, but it fit well and spread out much more thin than I thought it would.

And then it was time for the lattice top. I forgot I don't like doing lattice tops. So time consuming and frustrating, lol. But, I got it on and done. And then it came time to cut the cookies. 

I was sure this would be one of a few places where problems would arise. It just didn't seem like it'd cut neatly without the filling oozing out all over. But I was wrong! They cut nicely and the top and bottom stuck together well! 

But then I ran into a problem I hadn't thought about. All the in-between pieces of crust. Normally with cookies I could just squish it back together and re-roll it, but now it had apply pie goop all in it. So much pie crust and filling there wasted. :( I used my 3" round cutter and got 11 cookies out it. 

I went to pull out the parchment paper to keep the mess contained and found we were out! So tin foil had to do. It worked, but not as good as parchment paper would have. I plopped the cookies on the pan with a metal spatula and then put them in the oven at 475. 

This is where I expected the next mess to come from. I was sure that the filling was going to leak out the sides and create a horrible goopy mess. But when I opened the oven about  minutes later I was shocked. There was little mess! They'd worked! Perfectly! They popped off the foil easy and went to the cooling rack intact. I couldn't believe it! 


But then I had the problem that I only had 11 cookies to take to a barbecue. So I decide to try a second batch, only mix it up a little. I did the double crust again, but this time I didn't cut the 2nd layer into strips, I left it intact. And for the filling I opened up a jar of my homemade blackberry prickly pear jelly and spread a good thick layer over the crust. Once the jelly was spread out I then put the top crust on and pulled out my 1 1/2" cookie cutter. I got way more cookies out of that and had much less waste. Before popping them in the oven I cut a slit in the top of each cookie, and even took a fork to some of the edges to try and seal them together and make them look more pie-ish. 


These leaked a little more than the apple pie cookies, but I made sure to take them off the pan and foil and transfer them to a cooling rack immediately after pulling them out of the oven so that the leaked jelly didn't have time to adhere the cookies to the foil. 


These ones were a HUGE hit and were gone well before the apple pie cookies. And fast enough that I realized that I never got a nice styled finished picture of them, darn it! But real life shots are always good, right? 

So, a pin (or set of pins) that I expected to be problematic totally turned out! And they were yummy!! I think I'll make more of these more often! 


Monday, April 25, 2016

The Em Life- Macaron Masacre!

I am in no way a baker. Sure I've made my fair share of my mom's chocolate chip cookie recipe, but I would never tout myself as a baker. Cooking in general isn't really my thing. Like at all.
 
When Marquette messaged me that we should try to make Macarons together (even though we live in different states) I was like, "Sure! How hard could it be?" And then I did a YouTube search of French Macarons and was in complete horror. What the heck did I sign up for?!
"These are the hardest cookie to make, by far."
"I've been a baker for 9 years and it took me 5 to get this cookie right."
"Don't be scared if you just get moosh the first few...years. That's normal."
 
What have I done?!
I was also the murderer of this cake...need I remind you. The two on the right are my Pinstrosity. If you haven't read that story, you can do so here, it's one of our earlier escapades.
 
Anyways...as we can see...baking isn't usually my thing. I love the décor part of it, but complex recipes and I just don't mix.
 
So here I am about to make some French Macarons and I realize I've never even tasted one before! This will be interesting.
 
Here goes!
I decide if I'm going to fall, I'm going to fall hard and I go with Martha Stewarts French Macaron recipe. Who would do it better than her am I right?!
I gather all my materials (two Wal-Mart trips and a Hobby Lobby stop later) and I am ready to go.
I decided the only way I am going to make this work is if I do this to the letter! So I do!
 
I have the 1/2'' piping tip, gel food coloring as opposed to liquid, I have the right flour, the parchment paper etc. I am ready.
 
 
I set out my eggs (which is a big deal apparently) Chip helps me crack them perfectly just to get the whites, we whip (with a hand mixer,  don't have a Kitchen Aide or anything, but we follow the timing with a timer and everything).  We pipe them onto the pan with exactness (she suggests 3/4" rounds and go off to the side when removing the piping from the round so as not to create a funny edge), let them set out for 10 minutes hit the pan on the counter to get rid of the air bubbles and put them in the oven.


She suggests to set the oven to 375 when you start and then when you put them in lower the temp to 325, we did that. She said to turn half way and I wasn't sure what she meant (did I mention we did this at midnight lol) so I didn't turn them, but now I know she meant turn the pan, so do that, I didn't though.
Ten minutes later I pulled them out and received perfection! I was floored! I jumped up and down yelled and had myself a kitchen dance party. Sorry neighbors, this French Macaron loveliness is too good to no be celebrated!
 
So now I had pulled off the impossible, how about the "easy" part, the filling. I didn't like any of Martha's filling recipes, so I went to the Food Network and picked out their mint white chocolate chip filling and went with that. I made the filling following the instructions and then I needed to color it, I wanted a mint green and tried my best and here was the real Pinstrosity...
 
 
Creature from the Green Lagoon.
 So so bad.
But it tasted like mint white chocolate, so I tried again and got a chartreuse, not what I wanted, but not so awful. We'll make it work. We put them all together and they were so good! Cripsy on the outside, gooey on the inside and just the right size to snack on! I was amped. I had successfully made the hardest cookie. Go team!


Now...any tips on getting my mint green with generic food coloring?? *Yeah right* lol


Friday, April 22, 2016

Kett Files: Results of the Macaron Massacre of 2016

I am a member of the Rising Tide Society, and each month, all across the nation, members get together to collaborate and support each other. I truly love the Community over Competition movement. I know not everyone does, but that's okay. We all don't have to like peanut butter either, although I don't know why you wouldn't! ;) 

But I digress. 

At this past month's meeting (the very first one I've been able to attend!) there was a mini styled shoot with the most delicious looking macarons ever by Sift Bakehouse. I was staying away from sweet treats that week and kept to my resolve not to eat them. And then I wished I had. They looked amazing. 


Even Foxy the Donkey wanted a taste! 

The more I looked at my pictures from the get together, the more I wished I'd tried one. And then I got a crazy idea. Why not try to make them?! I could do that! This coming from the girl who thought I could make a honeycomb cake and instead ended up with this: 
(via)
Yeah...I've totally got this. Pshhh. 

I read posts with tips. I watched videos. I got tips from Katie at Sift House. I was ready to rock out. 

I let my egg whites sit out, as per instructions in this post. I beat them into stiff peaks. This was going to be awesome. And the I realized I'd forgotten to pick up a kitchen scale, as suggested by the same post. Shoot. So, I found a conversion chart and tried to get everything as close as I could without weighing it. Did you know measuring out 1 and .834 cups of powdered sugar is hard?! It is. But I was still confident. 

I read in this post that over mixing and undermixing could be macaron killers. So when it came time to fold the macaron butter together I very carefully counted my strokes. 

I piped the macaron butter onto the nifty silicone macaron sheet I got at Michael's (50% off coupon! Woo!!), because the article said that silicone gave the best results.

They sat out to harden for the right amount of time, went in the oven, and I just knew it was going to work.

It didn't. They had spread rather than risen. Phooey. 

So the next tray I let them sit out and "harden" longer. Still the exact same results. And now I was out of macaron butter and time. I had to call it a day. 

Later that evening I got a Snapchat from Emilee with her GORGEOUS macarons! She'd figured it out and gotten beautiful results! High five to Emilee! No macaron massacre there. I can't wait for you to see hers!!!

She said she'd used Martha Stewarts recipe, followed it to a T, and didn't have any problems. 

I still had almond flour left, so I decided that the next day I'd try out the Martha Stewart recipe too. 

And it worked! 

At least the first pan did. The second pan I think would have worked had I not been holding a baby, fending off a two year old, and trying to turn the pan mid cooking. I think I spun the pan a little hard and bumped it, sending the fragile rising cookies toppling over to the side. 

The third pan I thought, "Hey, I want bigger cookies like Sift House had!" So I piped larger circles. That was a mistake. Apparently that batter couldn't support a larger cookie head. The cookie rose, got to heavy, and slid off the side, releasing extra batter out to spread beneath it. 

So out of my 5 pans...one turned out goodish. Oh well. One's not bad! I don't think they are quite right, but they were the closest I got before I ran out of powdered sugar to try more. 
 Top left (the golden brown one): 1st and 2nd pans. Top right: The pan that worked. Bottom right: The pan where I piped too big of cookies. Bottom left: The pan that got spun a little hard. 


So, once I had the cookies made it was time to fill them. After the first two pans I made the filling and it sat in the fridge hoping that it'd have something to go on. Guess the flavor!!
That's Prickly Pear Buttercream! I looked at a few fruit buttercream recipes and then just kinda made up my own. I took our prickly pear juice and boiled it down to try and get as much flavor and color into 1/4 cup of juice as possible. From there I added 1/4 c. butter, 2 c. powdered sugar, 1 tsp of lemon juice, and mixed! The Prickly Pear flavor isn't quite as strong as I'd like, but it's good. I think next time I'll boil the juice down even more.


The one pan of cookies that worked were small, bite sized little cookies. I want to try again and see if I can figure out how to get larger cookies that don't ooze and travel on the pan.


So there's my Macaron adventure! And, if you're wondering...I am spelling it right! I called these macaroons at first and then I saw that Sift House called them macarons, so I went to look it up. Macarons and Macaroons are totally different! Read about that here. 

Have any of you made macarons? What's your favorite recipe or filling?! 


Friday, May 29, 2015

A Near Pin-saster: Edible Cigars

Along with the Monthly Pinstrosity Challenge, I also follow and participate the Iron Craft challenge (I was actually introduced to it through a submitter here on Pinstrosity!). It's really fun to do both and to poke a stick at my creativity. As I often do, for one of the projects I decided to kill two projects with one pin. The two challenges were "E is for..." and "Gifts". It took me a while to figure it out but the day before the Iron Craft project was due I figure it out (it's always the day before).

Emilee and Chip just graduated and I wanted to give them something fun for graduation. Emilee loves cigar boxes, so I thought it would be fun to find a treat to put in it. Enter Pinterest! I found a neat pin for making "Cigares au Chocolat" and knew that was it! Edible Cigars for Emilee's Excellent Educational Efforts.  Amazingly I had all the supplies at home. The only hard part, the recipe was in french and metric measurements. I decided to try it anyway using Google Translate and ButterBaking.com for the translation and conversions. This was going to be awesome!
I got it mixed up and it looked like this:

Now I had no idea if that was how it was supposed to look, but it seemed okay so I just went with it. The first pan I didn't flatten the cookies enough and they were just blobs. The second pan I tried to flatten them with my fingers but the dough was super sticky and they had holes and didn't work well either. Finally the third pan I pulled out a spoon and a cup of water and dipped the spoon in the water and used that to flatten the dough. That worked fairly well. But they really weren't flat enough still.

They wouldn't roll. I had to start rolling them right away without them cooling because they stiffened up super super fast and ended up cracking and crumbling. It just wasn't working.
I set the bowl on the counter above the trashcan and went and browsed Pinterest, hoping I could find some other E project that I could whip out. While scrolling through I came across a pin for cookies I'd actually already made...successfully! I don't know why I didn't think of those earlier! They were so similar.

I had an idea for what I needed to do...I needed more of a batter than a dough. However, I was out of eggs so I couldn't add extra egg whites. I didn't have cream, I didn't have milk (we were so seriously out of groceries that day!), so I added about 1 TBS of water (maybe more, but not much) and stirred that into the dough to make more of a batter. It looked good, but now to see if it actually worked or if I'd ruined the remainder of the dough. Amazing the Pinterest Gods smiled upon my efforts and it worked! The batter spread thin enough without being too runny and thin, but still make a good pliable cookie. I'd almost given up on this! I'm so glad I didn't! Luckily I had just enough batter left to make a dozen cookies.

I got them baked, rolled, and then dipped in chocolate. I dipped the end in cocoa powder to look like the ash on the end of the cigar.


Last, I found a cigar box at the local antique mall to put them in. It was nice and cleaned out and didn't smell like tobacco, so it worked great!


So in the end these weren't spectacular (especially when you see the original inspiration), but they were fun to make and they made a fun gift to give!

All too often I think we give up too fast. I was pretty frustrated and ready to be done with these. Sometimes all you need is to put yourself in timeout from the project and come back to it later. Now I think I need to make these again, because I didn't even get to try a completely finished one! To get my version of the recipe (and the filling I made for these!), you can check out the blog post on Mower Cooking.

Sometimes though, even putting yourself in a project timeout doesn't work. Ever have a project that's a Pinstrosity before you even really get underway? I tried to take apart the light fixture and separate the dome from the light and chain for a project I had in mind. I got it all taken apart only to realize without unscrewing the entire thing from the ceiling and disconnecting wires there was no way I could get that dome off (without breaking it at least, and since we're in a rental that's not really a great option). So I went to put it back together...and it wouldn't go back together! I fought with it for an hour and finally had to let it just hang there lopsided and disassembled until Cameron came home. His years at the furniture store have served him well and he had it back together in no time! I felt a little sheepish though. "You run Pinstrosity...shouldn't you know better?" he teased. Of course not! I'll probably be making Pinstrosities as a 96 year old lady and he'll still be shaking his head and laughing at me.


Monday, December 8, 2014

Pay it Forward: Peanut Butter Cookies

Next up in our Show and Tell Pay it Forward Day is a scrumptious project from Cathy! We cyber met Cathy and her husband Rob through their amazing Creative Kingdom website. We were so excited to get to be a part of their website launch, and we're loving keeping up with the site. You really should go check it out!

Cathy took the Pay it Forward theme to heart and used something that was given to them in their project to give to others. Check it out:

A friend from Canada sent my husband and me a box full of goodies and gifts that would be very difficult to find in Britain. It wasn't a special occasion or anything, she is just a kind person who does nice things like that. I thought it would be a good idea to use one of the things she sent us to do something nice for someone else and pay it forward (see it all fits perfectly).

One of the things she sent us was a big bag of Reeses Peanut Butter Chips, so I thought I would use them to bake some peanut butter cookies and share them out with people. There are lots of delicious peanut butter chip cookies on Pinterest such as this one:

(source)
but they were all American recipies and I wasn't very confident on making the conversions.

So I cheated and used this triple chocolate cookie recipe from the BBC Food website and substituted half the chocolate chips with peanut butter chips. 
(source)
The results were pretty great and plentiful (think the recipe made around thirty) I took them down early to church to share with our worship team during sound check then Rob and Me took a batch each to work on Monday and shared them around the office. There were none left by Monday home time!


-Cathy 


I love how she jumped into the Pay it Forward challenge! Her cookies look soooo yummy. While blog-stalking I learned that these were her first taste of Peanut Butter cookies! How fun is that?! Cathy, if you ever make it to New Mexico (you know, just a hop, skip and a jump from Great Britain), I'll make you a whole big batch of Peanut Butter cookies! They are a favorite in this house. I may have to brave the conversions and try out this BBC recipe, because it looks fantastic. 

Thursday, November 20, 2014

Professional Help for the Cookie Bowls

So, when we announced our new schedule, we mentioned that we'd only have posts up on Sundays and Wednesdays unless we just had something really great that we didn't want to wait to share with you. Well, today I found something way fun that I want to share!

Remember back to our first Chocolate Chip Cookie Bowl post where Tessa sent in this Pinstrosity?
http://tessatauschek.blogspot.com/2011/12/i-hate-you-pinterest-i-hate-you.html
Well today I discovered (through the nifty gadget in our sidebar that plays a slideshow of all the Instagram photos tagged with #pinstrosity) that Tessa was on the Rachael Ray show earlier this month getting help from the pros with this exact project! How fun is that?! Way to go Tessa! Watch the clip to see what Chef Ryan Scott does to get these to work right. 


Sunday, October 26, 2014

Sunday Surprise: No Bake Oatmeal Cookies

Greetings everyone,

Happy Sunday! Oh boy, have I got a blog post for you today. The odds were stacked against me, and at two or three points during this recipe, I thought "This is going to be a genuine Pinstrosity". But, alas, I triumphed-ish.

So I should probably start this post by saying that I  really wanted to make these cookies for Pinstrosity's Pumpkin-tober.


But I ended up forgetting several crucial ingredients when I went to the grocery store (why do I think I can shop successfully when I don't make a list? I totally can't). Naturally, I didn't realize this until 9:00 PM, when I got the fever to bake said cookies.

Then, I thought I'd make some delicious oatmeal cookies. I was sure I had all of the items for those in the pantry already. But, nope, nope I did not. Being unable (and unwilling) to give up cookie making for my Saturday night project, I settled on these "Chocolate Oatmeal No Bake Cookies". Yummsies.


And note, when I type "settled", it wasn't like I was upset about those at all. I mean, look at that picture. GET IN MY FACE!

Here's the recipe listed on the original blog:


Chocolate Oatmeal No Bake Cookies
1/2 C Butter
2 C Sugar
1/2 C Milk
4 Tbsp Cocoa
1/2 C Peanut Butter
3- 3 1/2 C Quick cooking Oats
2 tsp. Vanilla

Add the first 4 ingredients in a saucepan. Bring to a rolling boil, and boil for 1 minute. Stir in the next 3 ingredients and drop onto wax/foil paper. Let cool until set. 
Now would probably be a good time to disclose that tonight, for no particular reason at all, I did not do a hands-on inventory of the things I needed for this recipe. I was just naturally sure that I had it all. Bad choice. especially considering that I couldn't make the original recipe because items were missing. As a writer, you'd think that I would have caught the ominous foreshadowing of this. No such luck. We shall call the lack of inventory Mistake #1.
Mistake #1A: Not enough butter. Nope. We're at the bottom of the container. Maybe a couple of teaspoons, at most. 


No problem, I figure. I'll just use Butter Flavored Crisco, despite never having used Crisco in this way. What could go wrong? 
I started with the whole "Add the first four ingredients in a saucepan". Mistake #2 (while Mistake #1 - no inventory-  is still in progress): I started cooking BEFORE gathering the ingredients. What the heck was I thinking?! 
Here we go... Milk, sugar, and Crisco
Here, see? The shortening is melting. That's cool.

Is it supposed to be separated like that? Like... not sure how much you can actually tell, but the shortening was just a yellow layer on top of the milk and the sugar. It didn't seem to be blending at all. Very oil/water. Hmm. Troubling... 
Photo in motion...ooooh....ahhh....
But, not nearly as troubling as what I found next (on the Crisco container):

As you can imagine, since this stuff was already heating in the saucepan, this was not an ideal moment to realize this. Even worse, the recipe instructed me to "bring ingredients to a rolling boil". Gulp.
I turned up the heat a little more, and then this started to happen:

I panicked and removed the pan from the burner (on the off chance that this was what Stage 1 of a grease fire looked like). But, the good news was that it started to mix up, kinda...
Pardon the messy stove.
Next item on the recipe? Quick oats. Awesome... I'll just go ahead and add my 3 - 3 1/2 cu-- oh no. Literally, as I am pouring the quick oats into the pan, I realize that there are only two cups left in the container. And, naturally, we only have one container. Mistake #1B.


Oat to  sugary grease ratio was all sorts of off.
At this point, I'm like, 'welp, this is over and done with. May as well figure out how to dump it in the trash...' Until... dun dun da dun!!! (Prince Oatmeal rides in on his valiant steed)
Individual packets of oatmeal that Rob bought at Target, but didn't like. So they've just been sitting in the pantry for a couple of months. Strawberry or not, into the pan the last three packets went.
Ahhh....much better.
It is only at this point during this "baking" session (if you can even call it that), that I realized I never added the cocoa, as I was instructed in Step 1.  Mistake #3. Whoops. I started scrounging around in my pantry only to discover...... no cocoa. 

ARE YOU KIDDING ME RIGHT NOW!?


Mistake #1C. Seriously. Almost lost my mind. But, again, I'd already made it this far, so I couldn't just give up. Right? Right.


Solution?


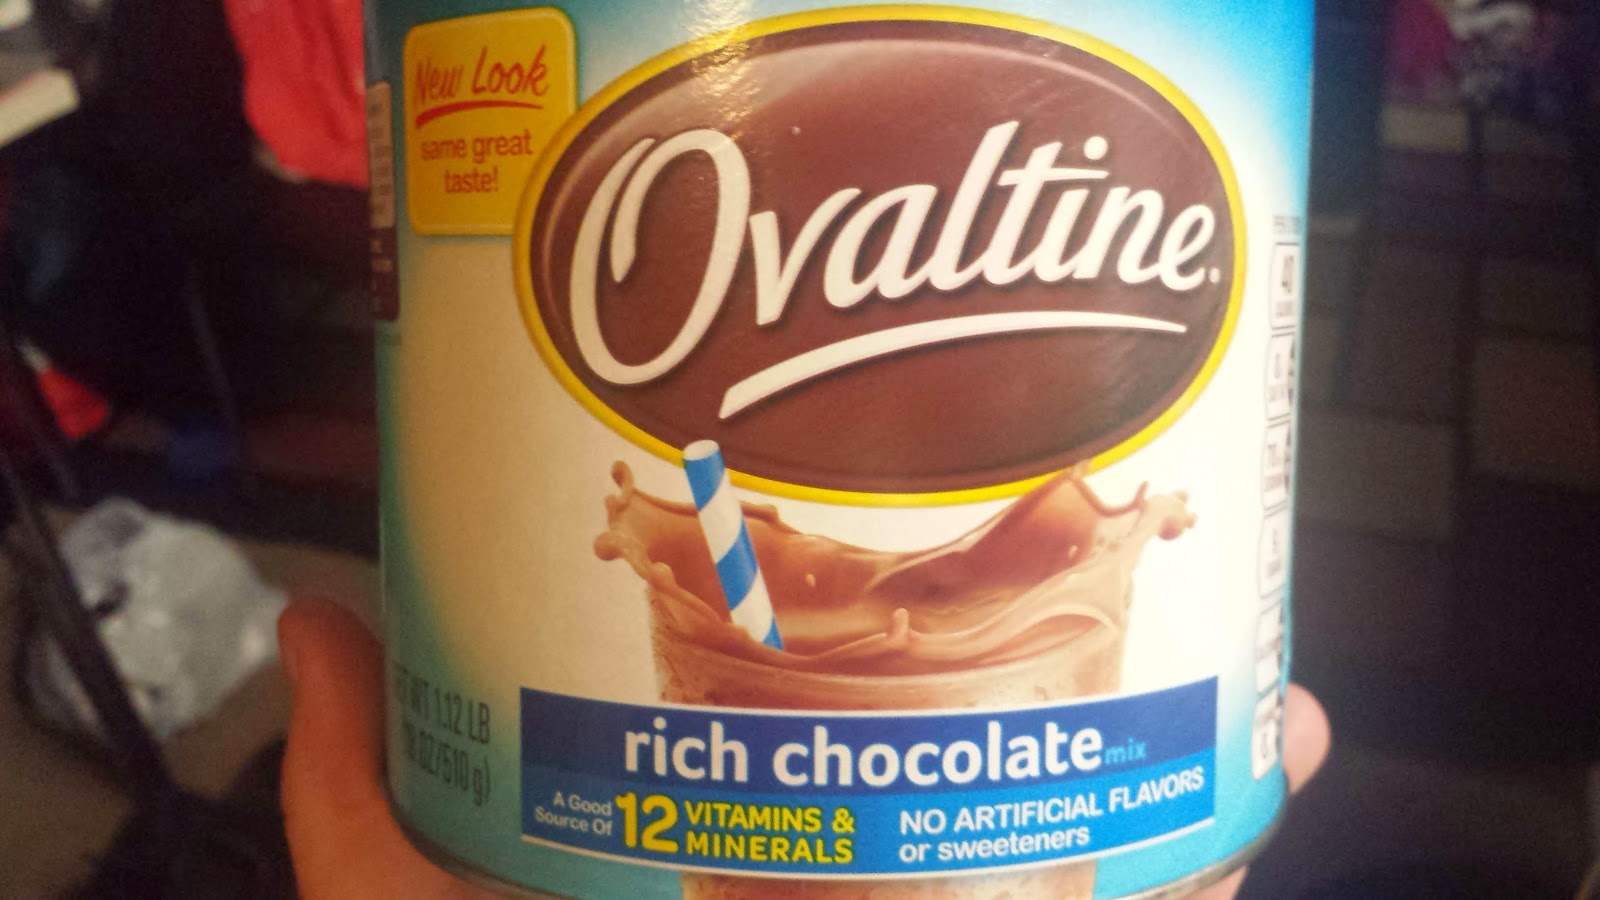
Indeed. Ovaltine to the rescue. I mean, it's powdery and chocolately, so, really, I felt like I was going in at least kind of the right direction. I added the vanilla for this photo too:


In the interest of full disclosure, this tasted amazing. I gave it a little nibble and was quite impressed. Because, really, I was still amazed that it wasn't on fire.

Carrying on. Last ingredient: peanut butter. 

And this, ladies and gentleman, was the first PLANNED substitution for this recipe. Skippy Dark Chocolate peanut butter was a Nutella competitor that I found at the dollar store awhile back. I quickly decided that there was no competing with Nutella, so about half of this jar has been hanging out in the pantry, waiting for its purpose. And this recipe was just the ticket.


The bad news? My 1/2 cup wouldn't fit into the container. And, I know, I know, I could have spooned it out into the 1/2 cup, but that just seemed like "too much work". I decided to just "eyeball it" because really, who cared at this point? I didn't really. It was tasty, but I was pretty cranky about how all of this was unfolding.


I scooped this into cookie sized balls and waited. After ten minutes, it didn't look like it was any closer to being "set"-- so I opted to put it in the fridge, with the other half in a pie dish.


This may have been a mistake, but as you can imagine, I was pretty much ready to throw the towel in anyway. I fell asleep and ended up leaving these in the fridge overnight. Here's the final product:


Rob quite likes them. Though they're not nearly as nice looking as the original post. They also have little specks in them. Maybe shortening? Who knows.

I actually find these to be waaaaaay too sugary/a weird consistency (almost....grainy?). But, of course, I don't blame that on the original post. I feel my version of this was a recipe unto itself, what with all of the fails. I do want to say this though, think of what a solid recipe this must be if I could replace butter with shortening, forget/replace cocoa with Ovaltine, use plain AND flavored oatmeal, and a different kind of peanut butter and still coming out edible. Hats off to the original post, I say.

Let's review the morals of the baking story:
  1. Do not, unless you are absolutely sure of what you're doing, start baking at 9:00 PM.
  2. Do a complete inventory of the ingredients needed. Seriously.
  3. Do NOT start to bake until inventory is complete (or, what you start working on can be used for something else, I suppose) 
Learn from my mistakes!!

Have any of you tried the original post? What did you think?
Thanks for hanging in there with me. Hopefully, I'll have something else for you soon!

E-hugs and e-kisses,
Rachel