Saturday, January 31, 2015

Craft Fail Book Giveaway Winners!

Woohoo! It's Giveaway time!

We had 40 comments (39 on here and one on Facebook for an entrant who was not able to leave a comment on the blog) on the blog post. It was fun to see everyone's favorites. Gives us an idea of what you all would like to see more of. I took those 40 comments, numbered them 1-40 and then turned to random.com to pick two numbers at random. The winning numbers/comments are:


Congratuatlions Stacie and Jessica! You both should have an email from us (if not, shoot us a message with your mailing address).

Any of you who would still like the book, it is available on Amazon in new, used, or Kindle formats.

Thanks again everyone for your fun comments!

Friday, January 30, 2015

Rag Rug Sombrero

I love it when my friends send me photos of their Pinterest projects, especially the ones that didn't go quite as planned. It seems odd for a person to enjoy the fact that their friends think of them when they see a "failed" project, but it truly makes my day. My friend Sandy (who is incredibly crafty and talented in so many ways) found a pin on Pinterest about making a toothbrush rag rug and gave it a try. 
The Original Pin
http://ragrugcafe.com/toothbrush-rugs-complete-video-instructions-part-1-beginners
The instructions on this site are pretty good. Her instructions are easy to understand, and you don't have to have any prior crochet or knitting knowledge before hand to do this as it is just the same knot over and over again. Neat! 

Sandy gave this one a try and didn't quite end up with a rug. 

The Pinstrosity

Unless you have a bowl shaped floor, this rug probably isn't quite what you're looking for. Luckily her husband found a great use for it anyway!

I don't have the fabric strips on hand to personally test this one out so I turned to the original site, Google, and perused rag rug sites and discussion boards to find an answer. In her picture it looked like she made the knots more and more loose as she went around. Finding that perfect looseness though can be hard, especially for a newbie to rag rugs (or so I'm reading on sites I have found on rag rugs). I finally happened on the jackpot of knotted or crocheted rag rug tips for rugs that won't lay flat.

Some of the suggestions from the discussion board to prevent a rug from turning into a bowl are:

  • "Just add another stitch every 4 or 5 stitches all around the whole thing whenever I wanted to increase OR, do the regular stitch for 3 or 4 rows, then do 2 stitches in a hole every other stitch for one round, then go back again to one stitch per hole for 3 or 4 rounds" -Cyinda
  • "Lay the rug down quite often to see if it is staying flat. When ever it looks like it is going to start turning up I crochet a extra crochet stitch in the same hole." -Suzin
  • "If you are trying to make a round rug you have to increase the amount of stitches at the ends. When you go around the end of the rug put two stitches in every other stitch until you get back to the long sides. It is much easier to do a square or an oblong rug rather than a round or an oval rug.
    Good luck." -Judy Bond-Tucker
So to try and get a flat rug you need to monitor it as you go along. If it looks like one side is starting to pull, add in extra stitches! In the few round crochet projects I've done you have to add extra stitches in each time around. The first time you do one stitch in each hole. The 2nd row you do a pattern of 2 stitches in one hole, then one stitch in the next, 2 stitches in one hole, one stitch in the next. The third row you'd do two stitches in one hole, then one stitch in each of the next two holes. The rows increase like that each time. I imagine it would be the same idea with a round rag rug. 

Some suggestions to try and flatten an already bowled rug are:
  • "You might try steam ironing it. Mist lightly with water, then
    place a towel underneath and iron it directly on the floor." -Lesley
  • "Dampen it then set something heavy on it until it's dry." -Cyinda
  • "If it was made of wool, you could block it with pins & then steam it with an iron. These may force it down. But, this technique won't work if your fabric is polyester or not a 'natural' fiber." -Cyinda
  • "I had the same issue on mine I made from old flannel plaid sheets i used. It turned out wonderful but wants to rise up in the center much like a bowl with sides. I laid a heavy item on it for days and it helped some by still not completely flat." -Julie

If none of those tricks work and you really wanted this to come out well, you may have to go back through and pick out your work and redo (which will be quite tedious with this knotting pattern). 

I just love that the internet makes it so easy to find answers, and to share your knowledge and help others. There are a lot of negative things you can say about the internet, but there are a lot of positive things too! 

Thank you Sandy for sending your project to me and letting me share it on here! What a fun way to use up extra scraps!

P.S. Don't forget to enter the Craft Fail Book giveaway by tonight at 11:59 PM MST! 

Monday, January 26, 2015

Gluten Free Thanksgiving Cake + Patterned Frosting Decor

Hello all!
We spent this last Thanksgiving with Chip's family, most of whom are gluten free. I like being able to bring dishes that everyone can enjoy, and the past few years I have brought a gluten free cake. This year I decided to decorate the cake because why not? I get the urge to decorate cakes every once in a while and this year I wanted to do something different! I scrolled through my neighborhood Wal-Mart and got a few ideas here and there and went home with a few new items and got to work.

I thought maybe I would try one the latest trendy patterns with some of the gold food spray paint that I picked up at Wal-Mart, I also got some pink icing (the canned kind), and gold sprinkles.

Here is my process!

I googled "Fleur-de-Lis pattern" and scrolled through till I found what I wanted. I then copied the image, put it in word and changed the size until it was where I wanted it. I printed it out and cut the inside pattern out with an Exacto knife on a cutting board. Some of the thinner pieces of paper between patterns broke or I accidentally cut through them and I had to tape them back together. This process took me about 20 minutes and I did about three-ish rows. It was a little slow and painful, but I thought the end result would be worth it!!
Here is the pattern I used:
 
 
Here is the pattern on the cake, this was a gluten free yellow cake with store bought chocolate (GF) frosting. I crumb coated the cake, set it in the fridge to solidify a little for a few hours, then iced it again,  refrigerated it again, then pulled it out and decorated it immediately so that the icing would still be cold and stiff.


I used the Wilton Gold Food Color Mist Spray paint (bought at Wal-Mart). I followed the directions and sprayed at about 6-8 inches away from the cake in short strokes. Don't do it too thick or it will run and smear your design.
 
Here is where I Pinstrositized. Next I attempted to make my own chocolate Fleur-de-lis, put it in the freezer and then quaintly put it on the cake. All did not go as planned, first off I didn't melt the chocolate enough, second of all I cut the hole in the piping bag too big and this was the result. "Is that poop or chocolate?"
Also, there is a Symphony bar in the side of this picture but I didn't use that for melting, (I used melting chocolate for that), the chocolate bar was for consuming while baking. Have to keep my strength up ya' know.
 
I messed with the chocolate for a good half hour before I gave up and decided to use the pink frosting for my big fleur-de-lis. I cut out a larger pattern ( I did it by hand, which also took me forever, I should have just printed out a larger one) and traced it with pink frosting, and filled it with gold sprinkles.
 
 
The whole thing turned out great and tasted really good, I got lots of compliments on it. With that being said I need to fine tune my chocolate skills as seen from above. Anyone have any tips for me with decorating chocolate??
 
Happy Monday all!


Friday, January 23, 2015

Craft Fail Giveaway

A while back we received an email from Heather Mann, the creative genius behind Craft Fail. She was putting together a book of Craft Fails and wondered if we had anything to submit and if we wanted to help her with her book. We were excited about the idea and of course we wanted to help.


You can preview the book via Amazon here.

The projects of our own that we submitted didn't actually make it in the book, but people who submitted projects to our site also submitted projects to her book and some of those made it in. So some of the projects you've seen here on Pinstrosity are in print for all the world to see as well! How cool is that?! In addition to those projects are pages full or awesome and hilarious crafting fails you probably haven't seen yet. This book makes a great coffee table book to thumb through, a funny book to have by your bedside when you need to relax and have a good chuckle, a book to set in your crafting room to remind you that a craft fail/Pinstrosity isn't the end of the world, or it even makes an excellent gift for a friend.

Speaking of giving this book as a gift...

We were sent 2 copies of the book as a thank you for our involvement in the book, and we now want to spread the cheer and share those with you! We're giving away 2 copies of this book to two lucky Pinstrosipeeps!

How do you enter? Leave a comment below with the Pinstrosity post you hope to see in the book! The giveaway closes Friday, January 30th at 11:59 PM, and the winners will be posted Saturday morning!

Monday, January 19, 2015

Crazy Coconut Bread Crumbles

Hello all!! It's a Monday and there's a post?! What?! I know, it's different, but we are trying to shake things up a bit here and what better way then to start your week off with a Pinstrositeer Pinstrosity?! Yes, I am guilty, I think I broke at least 6 cardinal Pinterest/Pinstrosity rules when attempting this pin :/ I was hungry and weak. It happens to the best of us. Alas, here is my folly for all of the internet to see!

The Original
 
So I have been on a health kick lately and did a good month of no dairy, gluten, sugar, or grains...this means getting rather creative when cravings come along. For this I really only had one day where I needed some sort of bready substance, here is where Pinterest comes in handy! I found this pin a  while back and decided to give it a shot. Let me preface the photos below...I altered the recipe a bit (I didn't have all of the ingredients it called for...the first red flag, I should have stopped here lol) and obviously had disastrous results. This post is in no way stating that the above recipe is bad, I wouldn't know because in essence I didn't really follow it, but it does look delicious and eventually I will try it and stick the recipe! Check it out.
 
The Pinstrosity


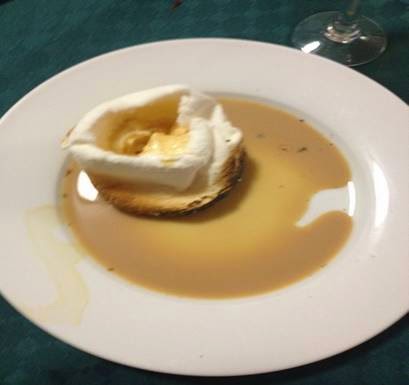
The pieces that turned out really delicious were the ones with browned spots on them at the top of the paper towel pictured here.

Look how tiny this one was! Also, it was so crumbly it fell apart shortly after this picture when I asked him where he was from...too much pressure I suppose.
 
 
Pretty bad right!! It was comical how crumbly everything turned out. So here's what happened;
the original recipe calls for 3/4 cup tapioca flour and 3 Tbs. of coconut flour. There was a little voice in the back of my head that thought just doing coconut flour would be ok (that's all I had at the time)...that little voice was so wrong! Every Pinstrosity bone in my body knew this wouldn't work out, but my stubborn self had to see it in the flesh, err um crumbs haha
So we mixed everything else the same (we substituted the full fat coconut milk for unsweetened vanilla almond milk...like I said the recipe was extremely altered here). Can I also mention that this was at like 10 at night and I hadn't had food for a good 15ish hours?? I needed bread and I needed it RIGHT then, so maybe I wasn't in my right mind when I made all these alterations lol
 
Anyways, we subbed the tapioca flour for coconut flour and I knew we needed something to adhere everything together so I added some xanthum gum (according to the ratio directions on the back of the package). What was supposed to be like a pancake batter was more like a peanut butter cookie textured dough. I put a big spoonful on a olive oiled pan and mahsed it flat to make a sort of flat bread, and then tuned it when it started to look more bread like.
 
Fortunately the very first one I did actually did taste like bread! It was thick like a flat bread, and wasn't tortilla like at all (like the original pictured). It feel apart and kind of turned into pieces of a flat bread but it was REALLY tasty and the texture was right on!
 
Now, enter in my sweet good intentioned Chip. He decided to roll out the dough by hand, make them into little cakes and coat each side with additional coconut flour and then brown them. Here is where things got real weird, they literally crumbled if you looked at them wrong. It tasted like straight coconut flour and it ATE up the olive oil so the texture was like a oil/flour mix and they were awful! That being said, Chip ate every single piece anyways haha!
 
So we all learned a few valuable lessons late that hungry night. Follow the directions, that you can variate a little with not so awful results (our first little cake), Chip will eat absolutely anything if he is hungry enough , and just follow the directions.
 
I will play with our first little flat bread some because it was awesome, I'm thinking it probably needs some more xanthum gum so that it doesn't fall apart. I'll keep you updated!
 
Hope you all got a good chuckle out of my kitchen misstep and will take this as a warning...follow the directions! Happy Monday all!


Haha oh man that's good! Oh geeze.


Friday, January 16, 2015

Blorping Buffalo Bites

The Super Bowl is coming up, and you know what that means?! Awesome snacks and hilarious commercials. Oh...and a bunch of guys throwing a ball to rules I still can't seem to fully understand (I'm slightly sports impaired). But seriously...is it a true Super Bowl party without great snacks? Not so much. I've seen boards devoted to Super Bowl snacks. There are some pretty epic looking eats out there waiting to be devoured during The Game.

One snack I've seen on various game night snacks boards are the Buffalo Bites from My Slice of Sunday.

(I actually had to find this photo on Pinterest as the photos on the original site are not working-or they aren't right now while I am writing this, but Pinterest assures me this is the missing photo). 
I'd call that a touchdown with the snacks! Mmmmmmm. Leslie found these on Pinterest and whipped them together for her friends. Only, it didn't quite work like she'd hoped. Here's what she had to say:

"I'm calling this a pinstrosity because they came out so ugly and were very difficult to make, but a pin win because ultimately they tasted good, and that's really the point isn't it?  :)"

"I did change the buffalo sauce to sriracha because my friends hate their taste buds.  The recipe calls for Pillsbury crescent dough, but I would suggest making your own dough or using dough that comes in one piece because even though I pinched the seams on both sides the roll was threatening to burst open all the time."

"Also the original poster does not seem to know what 1 1/2 inches actually is because I only got 9 'bites' out of 2 rolls.  They must have done 1/2 inch, and at that point you would have to shred your chicken, not dice it, because even at 1 1/2 inches the chicken pieces were blorping out the side.  It was very hard to cut, but I don't know if there's anything to be done about that except move very quickly with a very sharp knife.  I had to hold the roll together with one hand hand while I sliced."


These still look like they'd be tasty!
If you'd like to give these a try, here are a few tips I'd suggest:
  • Shred or dice your chicken very well. The fewer chunks, the less trouble you'll have with chicken pieces blorping out of the bite. 
  • Use good crescent dough. We have a favorite dessert recipe that calls for crescent dough and we found that the cheap brands just don't hold up and are often a little smaller than the good brands (or homemade). This could help your bites hold together better, and it could also help give you more dough to work with (more dough means bigger bites or more bites!). 
  • Be sure to follow the original directions and press all the seams of the dough closed, front and back. Don't just do one side. 
  • Spread only half of the sauce over the dough at first. If that doesn't quite cover it, spread more. You don't want to over sauce this dough or you'll end up with filling spewing out all over. If you have leftover sauce, serve it up as dunking sauce!
  • I'd start with 1" slices to give more of a bite size and less of a roll. This will also give you more bites to serve out. 
What snacks are you planning up? What are your favorite traditional game time snacks? I'm still trying to decide what we're making.  Buffalo Balls are always a hit, (a delectable recipe I found on Pinterest which looked iffy upon reading of the ingredients, but which have proven itself over and over again), maybe I'll make those!

Friday, January 9, 2015

Marshmallow Cups

Are you ready to have your mind blown? Here you go. You can make a miniature glass from a toasted marshmallow. Well...maybe. There is a pin with a video showing how to make them, but as you can imagine it's a little finicky. How finicky? Well, Jane tried this one out and sent it our way.

First, I'm sure your asking what you could drink out of marshmallow cups. Chocolate milk, warmish cocoa, or the original pin even suggests liqueur (but as I don't drink I can't attest to how that would taste...however chocolate milk out of marshmallow cups sounds phenomenal).

Now, what would these concoctions even look like?

This.

image from The Watering Mouth
Yum. Triple yum. If I had marshmallows in my house I'd totally blow off this health challenge I'm doing and go try this. Alas, there are no marshmallows to be found. Health challenge intact.

I may not have marshmallows on hand to show you how this turns out, but Jane took a stab at this. Here is what she sent over to us:

Toasted marshmallow cups for drinking Baileys out of?  We had to have a go at this one!  I specifically bought an American brand, “Rocky Mountain mega marshmallows” as we really wanted this to work. 

We used a gas hob instead of an electric element, but the video says use electric or gas.  Here is the result of our first few tries – we also tested a New Zealand brand but that just melted into goo almost immediately (it’s the pink blob in the middle of the plate).


You can see our main problem here – the marshmallows kept catching fire.  This is because we held them too close to the flame.  So we had more patience and finally got some actual toasted and not-on-fire marshmallows! 

But the top didn't collapse, as in the video, so it wasn't a cup shape.  We kind of cut a hole in the top and poured in some Baileys liqueur anyway.


And it promptly ran out the bottom!


But we enjoyed them anyway – here’s my daughter, Poy Ling, trying to eat one elegantly:


On the GCT fail scale, this really went through every stage – from white to literally in flames!  As we drank quite a bit of liqueur in the end, one way or another, we happily rate this Two-toned.

(Flaming marshmallows and alcomahol – I think it’s a win that we didn’t have to call the Fire Brigade!)

Thank you for reading,
Jane, Ruth and Poy Ling


So, maybe this isn't so easy. The original instructions even say so. She says, "Well, it does work, turns out. Half the time. It is a really finicky thing to make, but when you get it right, it is so so super cool. [...] So when I went to go make this, I had to try about 12 different marshmallows to figure out the best way. Make sure the marshmallow is really perfect looking, the less oblong the marshmallow, the better luck you will have." If you want to try this out, go read her entire post, watch the tutorial video, give it a shot, and let us know how it went! 

-Marquette

Monday, January 5, 2015

January 2015 Challenge

Whew! It's a new year! We're excited to get to do our first full calendar year of monthly challenges. 

In coming up with this month's theme, we were trying to make it match the new year. We thought about organize, or goal, or new, or something like that...but those just seemed like they would be a little challenging. We didn't know what to do for a while, but finally decided that the best place to start is at the beginning. 

So...


A is for...anything! Come up with a pin that has a project that starts with A (aquarium wall), use a color that starts with A (aqua), learn or use a technique that starts with A (applique), a recipe that starts with A (apple enchiladas), etc. Just incorporate A! 


Now, what exactly are we asking you to do again?

1. Browse through your Pinterest boards, and then your sister's Pinterest boards, and then your high school BFF's Pinterest boards, and then your cat's previous owner's Pinterest boards, and then even the Official Pinstrosity Challenge Pinterest Board (we'll be adding ideas to it all the time) and find pins that fit the theme that inspire you. They can be food, decor, costumes, aprons, painting color schemes, etc. This month's theme leaves things wide open!
2. Once you've found some pins on Pinterest that inspire you, build on that inspiration! Make some yummy and healthy apple chips. Paint your dresser aqua. Applique your child's shirt. Arrange your wall hangings from a pin you saw. Adopt and aardvark. You can follow the pin instructions to a T, or you can just work off your inspiration and go for a Pin Spin.
3. Take a picture of the outcome. We want to see the Pin Wins, Pin Spins, and Pinstrosities!
4. Email us your pictures, the link to the project you were inspired by, and any bit of the story you want to tell. You have until 8:00 AM (MST) on February1st to send us your "A is for..."project.
5. Saturday, February 7th we will do a Round Up post and show you the projects we were sent in. If we have too many for one post, we'll do multiple Show and Tell Saturday posts!
6. All projects submitted as part of the challenge need to have been completed in January 2015. No submitting projects you did last year. The point of this challenge is to get you to actually use Pinterest to inspire your life!
7. Feel free to submit as many times as you want!

Have fun with this!

Saturday, January 3, 2015

December Challenge Projects: Minter!

I hope you all had a lovely December, and a fabulous Christmas and New Year. It was lovely down here. We even ended up with snow! For a bunch of desert rats, that was the perfect topping to a lovely season.

Today I have the wrap up of the Minter projects. Between Nicole and I, we have 4 mint projects to share with you! We'll start of with Nicole's yummy treats!

The first one I did was peppermint whipped cream found here [I can't get the link to work...it keeps telling me there's a database error when I try to open anything on the realmomkitchen website. Hopefully it will start working again soon so we can all have the recipe!]. Mine was definitely not as pretty, but still very yummy! A winner!


The second one I did was peppermint popcorn barkI forgot to put the peppermint extract in the melted almond bark, but I don't think it needed it. This stuff is SWEET by the way. Really good, but really sweet. I could only have a little bit at a time. And I'm glad I halved the recipe because even halved it still made a ton. Also a winner!


And the third one was these chocolate cupcakes with mint chocolate chip frostingMy husband rated these 7 or 8 out of 10, while I would probably put them at a 5 or a 6. They're not bad, they're just not my cup of tea. I halved this recipe too - and thank goodness because I only had 8 cupcake liners left! By the way, these come out greener in real life (doesn't show in the photo). An...EH.


Those look so yummy! Thank you Nicole! For my Minter project I tweaked a recipe I found on Pinterest. The original recipe is for confetti style cake batter truffles. I decided to make them Peppermint Cake Batter Truffles. MMMmmm!

You can find my tweaks and instructions here.


Check back on Monday for the January challenge and the start of the 2015 Pinstrosity posts!