Showing posts with label Throwback Thursday. Show all posts

Thursday, May 12, 2016

TBT: EAC For Good

Today I have a very special combination Throwback Thursday/What College Taught Me Post. Or at least it is quite special to me. 

Today marks ten years that I graduated from Eastern Arizona College. 
(via)
EAC is truly my Alma Mater, the Mother of my Soul. I learned so much and grew incredibly there.

After two years of home school and 1 year of public school for high school, I stepped foot on campus as a shy, unsure seventeen year old. I had no idea just how amazing of an adventure I had just embarked on. I wouldn't be the same person when I left. 

If I had to choose just one thing to be the biggest lesson I learned there it could be summed up in those eternal words spoken by Alan Rickman on screen: "Never give up! Never surrender!" 
It took 6 semesters to finally make it into A Cappella Choir (and only because I was at the top of the list of people who didn't make it, so a sweet friend gave up her seat so I could be in choir).
It took lots of homework and a plate of brownies to pass College Algebra.
It took a few heartbreaks to find my eternal best friend.
It took organizing my DVD's weird, seeing someone fall in a bush, and Astronomy labs to make some of the most amazing friendships of my life.
It took driving around an old car the color of baby poo to get around sometimes.
It took a whole bucket load of guts to run for Student Council, and a whole stack of papers to make fliers for campaigning.
It took a lot of knocks of pride when I got my papers back with a big red C on them rather than the A I thought I would see.
It took an oil painting class to teach me that my medium of choice is photography.
It took the trust of a great advisor handing over the first DSLR I ever touched and giving me free reign of photographing all the events on campus to give me the confidence I needed to try portraits.
It took tears, fears, joys, friendships, late nights, tests, trials, and love.

And I don't regret a bit of it!

I had the honor of speaking at Graduation 10 years ago and spoke on this same topic. In talking about the lessons I'd learned while at EAC, I found that "one lesson I learned many times is that life doesn't slow down, even if you stumble and fall. You just have to get back up and keep running. It would have been easy so many times to quit trying, but if we don't get up and start running again, we never get to see what is down the road and we never grow. I know that getting back up is easier said that done, but it's worth it!"

So my message for today is to Never Give Up, Never Surrender. Don't be afraid of hard things. Don't shy away from change. Keep pushing on, because without realizing you may be making progress you'll build on for the rest of your life! You never know who's life your are touching. You never know who and what will leave a hand print on your heart, and touch your life for good. 


Thursday, September 11, 2014

Throwback Thursday- Sensory Fail

Em here,
Fall is drawing closer and with it comes the end of summer and its fabulous weather. I am sure that more than a few of our readers have kiddos who aren't in school and are still itchin' to be out playing while the sunshine lasts. Here is a pin with some inspiration and advice for an activity to do when the weather cooperates, and when the kiddos (may or may not) cooperate.
Happy Thursday all!

Sensory FAIL
My nephew is incredibly active and curious. Toys and gadgets don't keep him entertained for long. He wants to be exploring, dismantling, jumping, and moving. The two things he'll sit still for are Elmo music videos and videos of himself. While this really is cute and funny, I know it wears my sister out. She is a trooper though and has worked hard to find activities for him to do that will help keep his attention, focus his curiosity, and let him explore things. She's found things that work well...she's found things that don't work (she's kept a log of the various toddler/baby activities, which you can find here). Anytime I see something cool on Pinterest for her to try out with her boy I tag her in it. She probably gets tired of her obnoxious childless (okay...technically I do have a child right now, but I'm not really raising him yet...just growing him) older sister sending her activities and links...but what is an older sister for but to annoy and meddle? Two traits I found I mastered in my life (I'm typing up my old journals from when I was a kid...if I weren't already pregnant that'd serve as a pretty good prevention technique). Today's post has an activity I would have definitely tagged and sent to her on Pinterest. It looks like a blast. Sarah thought it looked like a great idea as well. Bubble Wrap and shaving cream combined into a fun kid's activity? What could go wrong?! 

The Original Pin
http://www.growingajeweledrose.com/2012/05/play-with-bubble-wrap-and-shaving-cream.html
Look how happy she is! It makes me want to play in shaving cream and bubble wrap. Ultimate slip and slide?! 

Sarah says, "I was trying to get creative with sensory activities for my boys. Enter, Pinterest's "The Bubble Wrap Sensory Slide". The picture of the adorable little girl looking thoroughly pleased and shrieking with joy as she played in the bubble wrap and shaving cream had me sold...Shame on me for thinking this seemingly effortless activity would turn out like it was supposed to AND that my kids would actually enjoy it.  I recruited my mom to bring us bubble wrap from work, went to the dollar store and stocked up on shaving cream and planned the showdown with the ever-fickle game of perfectly timing organized activities with nap time, meal time, potty time, daddy-comes-home time, bed time, etc. I put a notable amount of energy into making this deceptively uncomplicated project into a three-minute reality for my family."

"It is important to note that my children are familiar with both shaving cream and bubble wrap. This is how it played out:"

The Pinstrosity
I'll just give you Sarah's play by play in her own words:
  • Laying out the bubble wrap on the grass really just involved me chasing it around the yard as it blew in the wind."
  • It took more than five 12-oz cans of shaving cream for "desired effect".
  • The kids wanted *nothing* to do with that strange mess mommy made on the ground.
  • After I enthusiastically demonstrated what they were supposed to do by jumping up and down, popping bubble wrap with my feet and using my best supportive and overdone, over-zealous mom voice to encourage their participation (and realizing it is way harder than it looks to stand on slippery plastic covered in shaving cream), I picked up each boy and set them right on top of the bubble wrap and made them try it.
  • My 16-month-old sprung right up and off the bubble wrap like a wind-up toy the second I set him down. I'm pretty sure he levitated; irate baby #1.

  • My almost-3-year-old stood up and fell down and stood up again then tried to walk but the bubble wrap stuck to his feet as he tried to walk away and it "followed him" - you can feel the passion in his fury in these pictures. 

  • The worst part of the bubble wrap sensory slide was every time you lifted your foot to walk or take a step, the bubble wrap would stick to your feet; it stuck to everything.
  • It was over in three minutes.
  • Side note: Food coloring plus children is a stupid idea.
  • Thank you Pinterest, for underhandedly bringing me an experience of foolishness I never knew existed, in front of my children, husband and on-looking neighbors. Not cool, Pinterest...not cool.
Poor Sarah! All that hard work and excited anticipation for a let down. Magdelyn and Stephanie I'm sure could say, "I know how you feel!". Even though I don't have kids yet, I feel like I can commiserate as I do with with the teenage girls at church (I love them, but sometimes I feel like I'm beating my head against a wall). Having a highly anticipated activity flop is so disheartening. But kids' fickleness does have a plus...in a year, this activity could be the coolest thing those to boys can imagine. Or it could be a repeat trauma for all involved. I'd give out advice on how to help a kid like an activity like this or on how to try this activity again and making it a positive experience...but I'm pretty much a zero on the experience meter here. Oh I could make something up and still give out ideas and advice...but I don't imagine that'd be all that helpful, lol. Mom's out there...any suggestions?  

Thursday, September 4, 2014

Throwback Thursday- Fall Crafts...All Warm and Fuzzy

Hello!! It's ALMOST Fall!!!! (commence happy freak out!!) It's time to break out all the amazeballs Fall crafts I've you've been hoarding all year! Here is one I have seen around, before and after we posted this one back in October of 2012. Our reader Camille found out the hard way that some crafts are easier pinned than done. Check it out and Happy Thursday!
-Em

Seasonal crafts are a fun way to celebrate the coming months and get you in the mood for the holiday's. With that  usually comes thinking that you have to spend lots of time money and energy on such crafts, but thanks to Pinterest we all know that isn't always the case. Camille found this to be true as she started decorating for fall, she decided to use acorns to adorn her barren table for a fun seasonal touch, and the craft was one that seemed to need little to no directions. Seeing as it was a no brainer, she gathered her acorns, put them in her lovely vase, and then made one for her mom, how sweet! That's when things went...fuzzy. Check out today's Pinstrosity!

The Original
but it was originally posted on the Pottery Barn website (http://www.potterybarn.com/products/acorn-vase-filler/?pkey=cvase-fillers)

Simple.Elegant.Seasonal.


The Pinstrosity

This isn't the Pinstrosity, but this is Camille's piece the day she put it together. Nice touch with the leaves, no?!

Fast forward a few days....


Here's your Pinstrosity, there is now a lovely fuzz ball of an acorn making it's way around the vase, to ALL the other acorns...


Camille said this about her piece after discovering the mold:
"I think Pinterest is like an old-woman who purposely withholds one of the main ingredients from her famous-cookies recipe just so no one else will ever be able to make them quite as well as she does."

In this case she is right, there was information being withheld. Camille guessed that perhaps they waxed their acorns first because they looked perfect and shiny, and I think she is right about that one. But there is still one important piece that is missing.
You have to let the acorns "dry out". Little insects sometimes make the acorn their home and as they are left in this confined space (the vase), they start to mold up due to fungus growing in a moist atmosphere, the vase.
I did some research and there are a few ways to fix this, there are a couple of  steps, first you pick them outside from under the shade of the oak tree. Even if they have been on the ground a while doesn't mean they are dry...set out a tarp or a towel and lay the acorns in the sun for a day or two. If you have lots of squirrels in your area, you are going to have to be diligent in keeping them away or you will have to find a good hiding spot for the acorns or the squirrels will think you just put out a  free and easy buffet for them. 

Wash them once you bring them inside, get rid of dirt, debris or insects that may have made them a mess. Next you will need to bake them, grab a cookie sheet, line it with aluminum foil and spread the acorns out on the pan, bake at no higher than 175 degrees for a few hours. Make sure you check on them frequently and turn them so they don't burn (probably about every half hour or so). Also keep the door of the oven open slightly so the moisture can escape the acorns as they dry.
After they are baked and cooled, take a cloth and some wood polish to shine them up and make them pretty. Place in your vase of choice and enjoy!

Now I haven't had a lot of experience with drying acorns, not a common nut in my neck of the woods, but does anyone have a lot of experience with drying and using acorns for crafts, are there any tricks or the trade?! Let us know!
 
**Be sure to check out the comments from the first time we featured this post back in 2012, there are some helpful tips and tricks! You can find that here.**

Wednesday, August 27, 2014

Throwback Thursday- Wax On Wax Off

Hello! As Fall quickly approaches, (I'm ready!!! Hurry Up!!!) I think about how it's candle season! Yummy cranberry candles, spice, cinnamon, and for all you pumpkin lovers out there, pumpkin spice too I suppose (never been much of a pumpkin fan). Well, to prepare for this glorious season I have a pin for you to keep in mind when you start pulling out all that fall décor. I would think it might be too hot in many places during the summer for candles, so fall just seems to fit here and it just happens to be right around the corner. Here is a pin Marquette wrote back in 2012, Happy Thursday and Enjoy!!
-Em
Wax On Wax Off
This whole Upcylce and Reuse movement that's going on has led to some pretty fun ideas and crafts. Sometimes it reminds me of the Depression verse "Use it up, Wear it out, Make it do, or Do without" (can you imagine how much money everyone would save if we all lived by that). I have a box of things that normally would have gone in the trash but now they're waiting to be used for some grand new idea (I really do make things from that box...the proof is here). This Pinstrosity submission gave me more ideas of Upcycle projects to do...only I have to finish burning the candles I have.

The Original Pin
The cold temperature will cause the wax to shrink and loosen from the sides of the jar. Get a dull knife and carefully stab the wax to break it apart.
http://snapguide.com/guides/remove-residual-candle-wax-from-candle-jars/
How many of us have burned a candle down to the bottom and have a lovely little jar with a small layer of wax at the bottom (and on the sides-not because fingers have been dipped in the melted wax of course)? Okay, I currently don't but that's because I was given quite a few candles all at once and I haven't gotten to the bottom of any of them. But I will before too long. Lizzy had  a few lying around and saw a pin on how to get the residue wax out and decided to give it a try. 

"I'm not really into manual labor, so I very rarely DIY. But i saw this pin and thought it was a no-brainer, plus I have several candle jars with like 2 mm of wax left, and it felt like a waste not to try this one out. Directions were easy: pop into the freezer, pull out, scrape, peel label, voila! I planned on turning my jar into a mini flower vase." 


"So I put mine in the freezer, I take a dull knife out, and as I begin to scrape out the wax, I see that it's frozen solid and ready to slide out. Easiest. Pin. Ever. "


The Pinstrosity

"But apparently, I squeezed the glass a little too hard, and the glass shattered in my hands. Something so simple, a toddler could have done it, and I end up almost slicing my hand open."

"The problem: Perhaps it was too frozen? The directions said to leave the jar in for an hour and than jokingly, the author notes that s/he left in for days by accident. So did I because I totally forgot about it for about 4 days."

The glass being really cold could definitely have been the cause of it's breaking. As things get colder their particles contract and pull closer together causing a high level of brittleness in some cases (like with glass). I don't think it's terribly common to be able to squeeze a cold glass and have a break, but if there was already some structural damage (a chip, a small fracture, or sometimes even an air bubble) the glass can be weakened enough where it will shatter easy. 

The idea of the pin sounds plausible and easy enough. It's a new method to me, but I know chipping away at a frozen glass would make me a little nervous (I'm a little clumsy sometimes). Let me share a few other ways to get rid of the candle remains from those pretty little jars. At the end I'll tell you how to get the thin residue layer of wax off the sides. 

1. Microwave Method: Put the jar in the microwave and nuke it for about 30 seconds. The wax should melt enough that it can be popped out with a butter knife. I've nuked a jar longer than that so the wax is melted all the way and then I pull the jar out (with hot pads of course...DON'T just grab it with your bare hand) and I stuff napkins in to absorb the melted wax. 

2. Place the jar in a pot of boiling water (make sure the jar is room temp) or in an oven at 200F. Let the wax melt either to wear it is easy to pry out or allow to melt completely and then remove the jar with hot pads. Either pour out the wax (in a paper cup or the trash, NOT the drain as it will make instant clogs) or soak/wipe it out.  

3. Wikihow suggests to "Pour boiling water into the jar. The wax will melt and float to the top. Leave the jar for a few hours, and when you come back the water will have cooled and the solid wax will be floating on top."

After removing the main chunk(s) of wax, there will likely still be a residual sheen of wax on the jar. This can be removed with hot soap water, baby oil, or olive oil. If there is still a strong smell leftover from the candle that you want to get rid of pour baking soda OR vinegar (NOT both) in the jar and let it sit overnight and wash it well in the morning. 

And one final method I recently discovered to rid the jar of the extra wax: leave a candle up-side-down in your car on a hot summer day and the wax will melt out of the jar. Yeah...don't try that one actually.

Thursday, August 21, 2014

Throwback Thursday- Back to School Supply Cake

This Throwback Thursday post is by Marquette from the end of last summer. I think it applies as school is just starting and what is more school-ish than school supplies?? Check it out! Happy Thursday!
-Em

Welp. We're nearing the end. It's been a good run, but all things must come to and end sometime unfortunately. The clouds here today reminded me of winter clouds and I had a mini panic attack. I'm just not ready for summer to be winding down, but sadly it is. School is just around the corner (a few school districts start up next week! I think that's insane!). Luckily we still have another month before school starts back up here, unless you're taking summer courses...poor unfortunate souls (please tell me at least a few of you thought of Ursula). A while back we were sent in  a great idea for a supply "cake" that you can give as a gift. Know a recent high school graduate heading off to college? A teacher you just really love? A new teacher jumping into the pool of public education? This could be a really fun idea to do for them to help them jump start their semester. Or...give this project a pin spin, as our submitter did, and adapt it to any occasion. I have a friend who will be leaving with the Peace Corps and this may be really fun to do for her!

The Original Pin:
"Pack up a shower caddy with tools and essentials for surviving freshman year in college – all the little things they might forget. A small sewing kit, shower flip flops, laundry instructions, ear plugs, and a screwdriver." http://www.studentadvisor.com/articles/12-cheap-and-diy-graduation-gifts-that-youll-actually-use

Fun stuff, no? I love it. Bri took this idea and morphed it into what worked for her and her sister. Here's her story:

"My name is Bri and I have a story for you!! I am LDS and my sister last week got called to serve an LDS trial mission. She lives in Salt Lake City and had 5 days to get ready for the first 3 months of her mission where she will stay in Salt Lake for the time being. I currently live in Oregon so I hopped on a plane the day after we found out what was happening so I could help out. So I had ZERO crafting supplies with me. My mom decided to throw a party together and I knew that she would need "supplies" Like paper and pens and notepads etc. So I headed off to Wal-Mart. My first "failure" was going while my sister was with me... I would come back to the cart with all the things and she would be like "Your doing that Pinterest thing, aren't you!?" And she would wink her eye. However there was no way to go to Wal-mart without her. So I just brushed it off and said "Heck No! I have not crafting supplies and would I really buy stuff for a Pinterest project for you while you are here, these are for the poor people mom drives by everyday." She of course knew this was the worst excuse in the world and came back with "why would homeless people need pens and paper!?" By this point I was out of comebacks so I smiled and walked away. And every time I saw her she would ask how the homeless people would use the various thing I would find. I just went with it and I sure the people around us were laughing at my crazy stories.  Her party was on Sunday and I got the stuff Friday night. But I knew looking at the picture and not being able to find any instructions I would have to have help with it. So my friend came over and brought even MORE pens and pencils. And we got to work. I had gotten 2 beach towels to use as the center. I tried stacking them on top of one another and taping the crap out of it. But it kept toppling over. So we stood the towels next to each other on the big notebook. We then took wider items and placed them around the "bottom". I was dead set on having this thing look like the picture, but newsflash 3*5 cards when stacked together do not bend. My mom even told me to unwrap each pack and "layer" the cards into a circle! I about died. Cards would have flown everywhere. This would have been ten times worse than 52 card pickup. So I finally had to give in and make it "square", If you can call it that. So we took the next items and made a second layer. Luckily we had some smaller items that could be put in the corners and it made that layer "roundish". The top layer had a pen holder and going to Wal-Mart at 11 at night made me forget that's what I needed. So the pens, pencils, and highlighters I bought we used for the cake part. And the loose pens, pencils, and highlighters my friend brought we used as fillers. My friend also made a cute jar with thoughts and quotes to help my sister out so it was decided that would be top. However when we placed it right on top of the towels it looked sooooo stupid. Luckily my friend brought my sister some snacks. So we taped the boxes together and put those boxes on the towels and then the jar on the snacks. Now if you look very carefully you can see scotch tape around each layer. We call this our insurance plan. We tried to get the ribbon to hold onto everything (which I only bought one spool. I thought it had to be enough! Wrong I was!) So we dug through my moms black hole of a craft room and found sequins and thin green ribbon. We tied the ribbon on and decided the tape had to stay or the whole thing would collapse. When it was all done we were turning it and the jar toppled over. So ribbon went up and down it as well, as the secondary insurance plan. Over all it turned out okay."

The Pin Spin: 


"Was it what was in my head? Heck no! But she liked it. There is a picture of her holding it and after she held it the whole thing fell apart. And we hadn't even got to the party yet. So we did a quick fix. A lot of people were confused and asked if it was a tower. After a while of having to explain that it was a cake I gave up and said "sure is! I was trying to make the tower of babel!" I guess only the crafty women get it! On the GTC scale I would give it a 3. I think if I had instructions maybe it would have turned out more cake-ish!" -Bri


I've never made a supply cake, only one diaper cake and one diaper tricycle (I know...some of you think those things are hideous, just bear with us). It's easier to get a round cake with diapers because you can fold and mold them. I imagine making a bunch of square items into a round cake would be hard. I love that they just went with the and made a square tiered cake (aka, tower of Babel). Sometimes you just have to do what works! Thanks for the great idea Bri!

Thursday, July 31, 2014

Throwback Thursday- DIY Pastel Jean Pains

Hello all! Here is a Throwback-Thursday that I think is still really relevant! I am still seeing pastel jeans ALL over the place. This post serves to say, you have been warned! haha Hope you all have a great Thursday!!
-Emilee

DIY Pastel Jean Pains
Meredith sent us this pin worth testing, and I thought it was genius, and well she did the work of figuring out why certain things just don't work, everyone say "Thank You Meredith". Here is tonight's Pinstrosity!

The Original

Super cute right! Well, I am not much of a pink person, however I love the idea of a non-traditional jean color, the tutorial on the sight is fairly simple, and yet if you try to improvise on this one it WILL come back and bite you in the butt, here is what Meredith got...

The Pinstrosity

The Break Down:
The tutorial says to use bleach in a large Rubbermaid bin, and has specific measurements  for the bleach (3 cups for 3-4 gallons of water, but I suggest if you are going to do this project go to the original tutorial and read the directions). Meredith didn't have a Rubbermaid bin, so she used her bath tub, but that wasn't working so she switched to a large metal bin, trouble proceeds. Then the cap on her bleach wasn't coming off, so she chopped it off and used WAY too much, more trouble proceeds. Next the metal bin caused rust stains (Are we surprised? Using metal for things like this will almost always result in rust :( sad day.) and so she washed the jeans to try to get the rust stains out. You guessed it, more trouble. The bleach combined with the washer completely thrashed the jeans. The blog says to use quality jeans because the bleach will totally trash lower quality jeans to threads (that results in what we see above!).

How to fix it:
1. Use a Rubbermaid bin, preferably a large one that you might use for storage.
*The original blogger said that the jeans need room to move freely*
2. Follow the measurements of water/bleach ratio.
3.Use quality jeans.
*If you are following the directions from the original blog, you will bleach them three times, not all jeans can handle this process, hence the reason to use good jeans*
4.Follow the directions of the blog, the writer also mentions to soak them in warm water before you begin the process, then she later uses Rit Dye to make them pink, read her directions and then follow them for this one to work out best. her directions were easy, and she seems like she has had trial and error for this one, so she (and Meredith) have done the work for you!!

We would love to hear from you guys, have you done this project? How did it turn out, more trouble? Or did you end up with some totally-awesome-super-trendy-DIY pastel jeans?! Let us know!
Happy Tuesday!

                                        -Emilee

Thursday, July 10, 2014

Throwback Thursday- Dishwasher Throw-Up

Hello all! When deciding what to post for throwback Thursday it occurred to me that some of you are new to Pinstrosity and may have missed one of our most laughable an popular posts. So check it out and have a good laugh today! Happy Thursday!

Dishwasher Throw-Up:

One day in our second little apartment I heard a weird gurgling noise coming from the kitchen. I ran in and found my dishwasher had thrown up all over my kitchen floor. This was the first run through with the new dishwasher detergent, but I had added the amount the instructions directed so I figured something was up with the machine. The apartment manager thought my description of the dishwasher throwing up was hilarious and called the maintenance guys in right away (I guess humor gets you good service?). After reassuring them multiple times that I didn't add more soap than needed (or the wrong soap) to the dishwasher, they pulled it apart to see what was up. Apparently the tenants before us tried to hold a Barbie sauna party in the dishwasher because they found a barbie arm and scalp lodged in the drain, and it had caught enough soap during previous runs that the new soap was able to react with it and produce the bubbly spew of dishwasher throw-up. 

Why do I tell you all this? Because it's still funny to me and to let Ellen know, "I feel your pain." How did Ellen's come about? Well let's start at the beginning. A very good place to start. When we read we begin with A-B-C, when we Pinterest we begin with "That's for me!" Ok, enough Sound of Music. We've all seen this pin, right? 

The Original Pin
http://www.onegoodthingbyjillee.com/2012/02/how-to-clean-your-dishwasher.html 
Cleaning the dishwasher with vinegar (and a later cycle of baking soda). I tried it once upon a time...made the surfaces pretty but it didn't make the machine quit spitting food chunks on the dishes (which I didn't figure it would as it's only really a surface cleaner, but it was worth a shot). 
http://www.onegoodthingbyjillee.com/2012/02/how-to-clean-your-dishwasher.html 

Ellen told us, "I'm not sure what happened - I think maybe my (admittedly crappy) dishwasher just hates vinegar, because when I tried the vinegar as Jet Dry trick a while back it caused a stain. Anyway, I tried cleaning the dishwasher with vinegar as instructed in this pin and when I happened to walk back into the kitchen about 15 minutes into the wash cycle, this is what I found. Oops."

The Pinstrosity

See, her dishwasher threw up too! But if you look on the bright side, mopping the floor was easy. 

Vinegar doesn't foam up like that by itself, so I have a few ideas as to what went wrong but having not been there and without getting into the dishwasher I can't be certain. So here are some theories, and they're worth everything you're paying for them. 

  • The original instructions say to run the vinegar through first, and then the baking soda. When I tried it I almost missed the line that says to run them through separately, but luckily I caught it in time. Vinegar and Baking Soda will react in foam, and if you run the two cycles through together you will get foam throw-up. That's is NOT what happened here, Ellen ran them through separately following the directions. I'm just saying it could happen. 
  • This may be a similar case to mine...not necessarily the Barbie arm and scalp, but if there was enough residual detergent in the dishwasher the vinegar could have reacted with it causing the spew. 
  • The only other thing I honestly can think of is that if you're like me you reuse some of your food containers. I've forgotten that the jug does not have the original contents once or twice (my vinegar jug had dish soap in it once...just about had the most interesting chicken marinade ever). Anyway, perhaps there was something else in the vinegar jug and not vinegar? I know it's a slight chance...but hey, it could happen, right? 
Other than that, I honestly am stumped. There was something in the dishwasher that the vinegar reacted with, but all I can do at this point is guess. 

To make the original pin work, make sure to try and clean out any chunks from the drain (as the directions suggest) and to run the vinegar and baking soda cycles through separately. This isn't the best pin for getting chunks out of the dishwasher's system (we still had chunks of food being thrown up on our dishes...sometimes the dishes were dirtier coming out than they were going in), but it is a great pin for those of us who don't really want to get on our hands and knees and climb into the dishwasher to try and scrub it down by hand. We tried a number of specific dishwasher cleaners and we even tried taking the machine apart and had no luck until we tried the Lemon Shine Machine Cleaner. If you're having troubles, this stuff is awesome and comes at a great price. 

Thursday, July 3, 2014

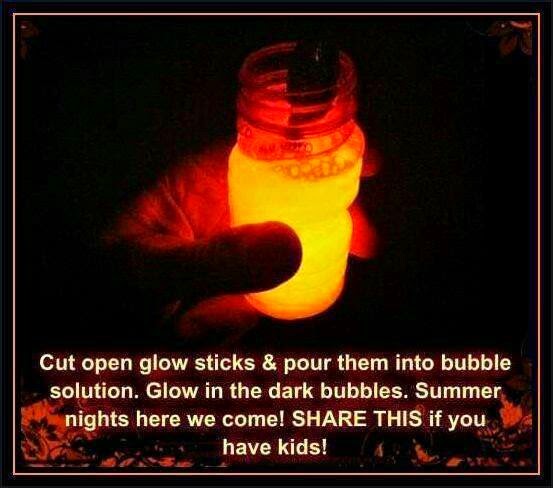
Throwback Thursday-Glowing Bubbles Popped

Summer makes me think of sitting outside eating popsicles, watching the sun go down, sidewalk chalk, and lightning bugs! But sadly we don't have lighting bugs in the desert (although I did see a glow worm the other day which was AWESOME!), so we have to make our own glow adventures!! This post from 2012 debunks one of Pinterests most popular pins! Marquette did the leg work on this, check it out!


Glowing bubbles would most definitely be the coolest thing since sliced bread. I'm an "adult" (by age only) and I still love bubbles, so glowing bubbles would just be even more awesome, right?!

The Original Pin:
 

The directions said to break the glow stick, add the glow stick liquid to the bubble solution, and Voila! glowing bubbles! 

I pinned this one on my "To Test" board because I was already a little skeptical. My first thought was "Won't the glow-in-the-dark liquid change the consistency of the bubble solution too much to work?" I decided that I wanted to test it out, because if this worked it was going to be awesome. 

I went to the store and they either had HUGE bottles of bubble solution (and I mean huge) or packs of small bottles. It took me forever to find just a single bottle of bubble solution that didn't come with a bubble gun or something of the sort. Of course of all the different characters/movies I was offered through my bubble selection, I had to go with Toy Story. 
My bubble and glow stick selections. 

Before I dumped in the glow-in-the-dark liquid, I wanted to know how well this bubble solution worked first. It was awesome! Lots of bubbles, all sizes of bubbles...definitely To Infinity and Beyond Bubbles. So I knew the bubble solution was working perfectly...now to see how the glow-stick stuff affected it. 

The Pinstrosity:

Cool glowing bubble solution...but no bubbles! I couldn't get a single bubble to form once I added the glow-stick liquid. I tried light breaths, hard breaths, sideways breaths, etc. No bubbles. The consistency just did not work at all. So I then had a glowing bottle of bubble-less solution.

Perhaps this would work with the huge bottle of solution as it wouldn't get as diluted down...but I don't know. That's an experiment for another day.
 

Thursday, June 26, 2014

Well That's Just Ducky

I have so many friends and family members due with babies in the next 6-7 months, it's crazy. I can't wait for the baby showers to start. I love the food, the socializing, seeing the fun gifts, and some of the games (not the clothespin game, or the guess the melted candybar in the diaper game!). I like baby showers even more now that I have Darrow. Parties are just fun!

One thing that really tickles me with baby showers is seeing how the themed baby showers are put together, and how they incorporate the theme into food, decorations and games. There are some really creative ideas out there!

One theme that is gaining popularity, especially if the sex of the baby is unknown, is a Rubber Ducky party. It's such a cute baby theme while still being fun and versatile. One creative lady found a way to carry the Rubber Ducky theme all the way to the punch she served.

The Original Pin
http://tidymom.net/2011/ducky-baby-shower-punch/

If you've been with us for about 2 years, or if you've gone back through our old posts at all, you may be thinking that this looks familiar. 2 years ago Diana sent in how her punch turned out when she tried to make this:

http://pinstrosity.blogspot.com/2012/07/rubber-ducky-youre-not-one.html

Today, for Throwback Thursday, I have two more submissions of punches inspired by this same pin. 

Stephanie made this punch for her cousin's baby shower. "Unfortunately, I failed to read the directions carefully. It calls for white grape juice....I bought regular grape juice.  It calls for lemon sherbet....I couldn't find any, so figured orange sherbet would do just the same........"

Pinstrosity #1
She said, "my family affectionately nicknamed it the "pondscum punch".  Woops." It makes me think of some of the "Where's My Water" levels (anyone else play that game? I'll admit to it!). 

Stefane (it crack's me up that our two submitters today have the same name, what a funny coincidence!) told us this story: "I found your page through a link at Epbot (Jen is awesome!) and have been looking through your blog.  When I found the rubber ducky punch pinstrosity (http://pinstrosity.blogspot.com/2012/07/rubber-ducky-youre-not-one.html), I had to share my own tale."

"My sister absolutely loves rubber duckies, so it was easy for me to start planning her baby shower even before she found out the sex of the baby (it was a boy, born in July!), I found this punch and deemed it perfect for the shower.  In the days before the shower we tested out all (and I mean dozens!) of her rubber duckies to find the ones that would properly float and I washed the ones we selected.  I did my shopping, had all of the ingredients in a cooler at the shower site, and the last thing I did before people started arriving was to mix the punch up.  I had bought a blue packet of kool-aid, but apparently kool-aid in a blue packet is still red (tropical punch)...and there was nothing we could do at that point, so we plopped the duckies in anyways!  Luckily my sister found it funny- she started calling it a ducky blood bath!"

Pinstrosity #2

"I have since done some research and found that blue packets of kool-aid are difficult to fine nowadays...but I did find that tropical punch kool-aid (the flavor I used) is actually blue in the juice boxes, just not in the mix!  Everyone still said that it tasted great, but I mourned the loss of my beautiful ducky bathtub punch for awhile, lol!"

Finding the right ingredients for this is key. You definitely need the white grape juice, the blue kool aid (or any blue beverage mix...just as long as it's blue), and either pineapple or lemon sherbet. When it comes to making your punch blue, the original post the author added in this note: "Blue Kool Aid – Look for Ice Blue Raspberry Lemonade or Berry Blue flavors. Many people are having a problem finding blue Kool-Aid.  A reader used berry blue typhoon Hawaiian Punch, ginger ale white grape juice and sherbert… and NO SUGAR! (the Hawaiian Punch is sweetened so no more sugar is needed)". 

Some people also have had trouble getting their ducks to float. The author suggests buying bathtime rubber duck toys from the baby department. 

These may not have fit the baby shower themes just like they wanted them too, but I'm sure they put smiles on faces, and that they tasted great. Not a total loss! 


Thursday, June 19, 2014

Throwback Thursday Beachy Waves Round Up

Like Marquette yesterday I was thinking back on some of our more popular submissions and thought of this one. This type of pin also makes me think of summer because many times these pins are going for a "beachy waves" type of look and I am off to the beach later this week!! So I thought I would round them all up for you, and show you a few of my favorites! Be sure to go back through some of these and try out my tips and tricks to make this a Pin Win and not a Pinstrosity! Happy Thursday all!
*Click on the title to get to the original post!*


Thursday, June 5, 2014

Throwback Thursday-Pop Pops

Hello all! It's Throwback Thursday here at Pinstrosity, and for todays throwback I couldn't think of a better post. Lately (seeing as it is summer break) all I can think about are popsicles!! It's been close to 95 degrees everyday here and so popsicles are a main staple in our diet right now. Seriously not complaining, I LOVE popsicles! Well my train of thought brought me to this post from last summer, hope you all enjoy, and go eat a popsicle because it's SUMMER!!!!!


Schools are starting back up and the summer weather is not as intense, but I'm still holding on to each bit of summer that I can. I love fall...but after fall comes winter and that's not my favorite season. It seems like I get to this point each summer and I realize all the summer foods and treats I haven't done yet and suddenly my menus and plans get a kick of summer. Summer salads, ears of corn, fruit pies, popsicles, etc. The big summer treat around would be the ever favorite popsicles. Otter pops, homemade pops, karate pops, you name it, we love it. Popsicles are referred to as cracksicles around here...once you have one you just can't stop and before you know it the whole box of otter pops is gone and sadness fills your soul. 

As a kid I always loved it when Mom would pull out the popsicle molds and we'd get to help her mix up the Koolaid and pour it in. It seemed like it took days for them to freeze and be ready to devour! I remember making Koolaid pops and juice pops, but it never occurred to me as a kid that you could make soda popsicles. Or can you? 

Melissa sent us in the following pin and her results when she tried to make them:

The Original Pin:
I have been looking for the original site for this photo for a while now and I just keep going in circles. Many link to http://www.diy-queen.com/2013/02/gummy-bear-popsicles/ as the source, but she even put up a link to a tumblr account she got the photo from. I followed the sources for a while and never found the original. Google Search failed me on this one too. So I have no idea where this photo originated from.  *update*: The original source was sent to us in a comment. Read to the end to find out what these really are and who made them.

The recipe on the diy-queen site has these as gummy bear and sprite popsicles, so that is what Melissa tried, and she wasn't too impressed with her results:

The Pinstrosity:

Definitely not the pretty and clear pops from the original photo. Melissa said "I don't think Sprite can be clear like in the picture while freezing.  I know distilled water freezes clear, but not Sprite. I think the picture is not Sprite!" And I think I agree. 

I've only tried to freeze soda once. For our last Halloween party that Em and I threw together we were going to make the frozen hand floating in punch treat. 
http://simplystated.realsimple.com/2009/10/06/creepy-treats-for-halloween/
We were serving clear soda (for our color changing cups) and didn't want the soda to get watered down with just regular ice, so we thought we'd freeze the soda into an ice hand. We filled the gloves and put them in the freezer...and forgot about them for the party. The day after the party I found them in the fridge and was said that we forgot the awesome ice hand. I opened up the gloves and out fell crumbly sprite ice. It didn't form a solid hand and it was more like separate ice crystals than a solid ice block. So even had we remembered to pull the hands out of the fridge, they wouldn't have worked anyway. So from that experience I learned that pop doesn't freeze solid...at least not really fizzy pop. 

So I'm thinking that Melissa is completely correct in saying that the original popsicles were not made with Sprite...or at least not fizzy Sprite. Maybe flat Sprite. Looking around online I did find a blog post with the same original picture but the caption said, "These ice lollies are perfect for your little ones, and look incredibly pretty too- simply place lemonade in an ice lolly mould and sprinkle in a few gummy bears for a unique treat." Now, that blog is based out of the UK, and UK and USA versions of lemonade are different. My cousin's fiance explained to me that the American lemon-lime soft drink and the UK lemonade are similar to each other. The American lemonade is called "traditional lemonade" or "homemade lemonade" in the UK. So I assume the writer was talking about UK lemonade/American lemon pop, but this did make me think that you could use U.S. lemonade (if you make it yourself with lemon juice-fresh or bottled-lemonade isn't as yellow as commercially produced and dyed lemonade)  and have this turn out a little more successfully than with Sprite. 

I did find pictures of a lady who made the Sprite version and her pops are slightly less cloudy and crystallized than Melissa's, but still not the pretty clear version of the original picture:
http://zoomyummy.com/2013/07/15/gummy-bear-and-sprite-popsicles/
So I think this pin is popped. What do you think?

Update:
You readers are awesome! If you see in the comments below the mystery was explained, but I'll tell you what they pointed out. These didn't turn out like the original picture because the original picture isn't even edible! Welll...it's not edible unless you like to eat soap. This is another case of a mis-captioned and mis-blogged photo. Check out the original soap item here: http://www.etsy.com/listing/99146372/gummi-bear-popsicle-soap-gummy-bear. This lady makes the coolest soaps, and they all look so yummy and edible. Bacon soap?! Chocolate Eclair soaps?! That's just awesome.


P.S. Does anyone else get a shudder of chills go through them when they think of the gummy bears in the pops? I know kids would love them, but it seems like they'd be really hard at first and then be slimy...hmm.