Showing posts with label GCT Level 5. Show all posts

Friday, January 9, 2015

Marshmallow Cups

Are you ready to have your mind blown? Here you go. You can make a miniature glass from a toasted marshmallow. Well...maybe. There is a pin with a video showing how to make them, but as you can imagine it's a little finicky. How finicky? Well, Jane tried this one out and sent it our way.

First, I'm sure your asking what you could drink out of marshmallow cups. Chocolate milk, warmish cocoa, or the original pin even suggests liqueur (but as I don't drink I can't attest to how that would taste...however chocolate milk out of marshmallow cups sounds phenomenal).

Now, what would these concoctions even look like?

This.

image from The Watering Mouth
Yum. Triple yum. If I had marshmallows in my house I'd totally blow off this health challenge I'm doing and go try this. Alas, there are no marshmallows to be found. Health challenge intact.

I may not have marshmallows on hand to show you how this turns out, but Jane took a stab at this. Here is what she sent over to us:

Toasted marshmallow cups for drinking Baileys out of?  We had to have a go at this one!  I specifically bought an American brand, “Rocky Mountain mega marshmallows” as we really wanted this to work. 

We used a gas hob instead of an electric element, but the video says use electric or gas.  Here is the result of our first few tries – we also tested a New Zealand brand but that just melted into goo almost immediately (it’s the pink blob in the middle of the plate).


You can see our main problem here – the marshmallows kept catching fire.  This is because we held them too close to the flame.  So we had more patience and finally got some actual toasted and not-on-fire marshmallows! 

But the top didn't collapse, as in the video, so it wasn't a cup shape.  We kind of cut a hole in the top and poured in some Baileys liqueur anyway.


And it promptly ran out the bottom!
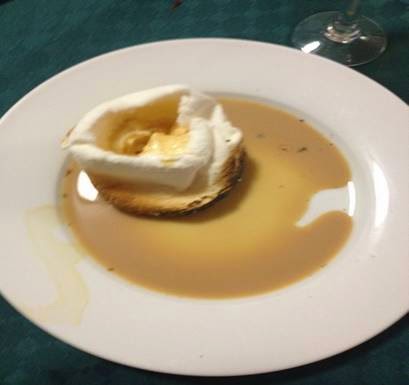

But we enjoyed them anyway – here’s my daughter, Poy Ling, trying to eat one elegantly:


On the GCT fail scale, this really went through every stage – from white to literally in flames!  As we drank quite a bit of liqueur in the end, one way or another, we happily rate this Two-toned.

(Flaming marshmallows and alcomahol – I think it’s a win that we didn’t have to call the Fire Brigade!)

Thank you for reading,
Jane, Ruth and Poy Ling


So, maybe this isn't so easy. The original instructions even say so. She says, "Well, it does work, turns out. Half the time. It is a really finicky thing to make, but when you get it right, it is so so super cool. [...] So when I went to go make this, I had to try about 12 different marshmallows to figure out the best way. Make sure the marshmallow is really perfect looking, the less oblong the marshmallow, the better luck you will have." If you want to try this out, go read her entire post, watch the tutorial video, give it a shot, and let us know how it went! 

-Marquette

Thursday, July 10, 2014

Throwback Thursday- Dishwasher Throw-Up

Hello all! When deciding what to post for throwback Thursday it occurred to me that some of you are new to Pinstrosity and may have missed one of our most laughable an popular posts. So check it out and have a good laugh today! Happy Thursday!

Dishwasher Throw-Up:

One day in our second little apartment I heard a weird gurgling noise coming from the kitchen. I ran in and found my dishwasher had thrown up all over my kitchen floor. This was the first run through with the new dishwasher detergent, but I had added the amount the instructions directed so I figured something was up with the machine. The apartment manager thought my description of the dishwasher throwing up was hilarious and called the maintenance guys in right away (I guess humor gets you good service?). After reassuring them multiple times that I didn't add more soap than needed (or the wrong soap) to the dishwasher, they pulled it apart to see what was up. Apparently the tenants before us tried to hold a Barbie sauna party in the dishwasher because they found a barbie arm and scalp lodged in the drain, and it had caught enough soap during previous runs that the new soap was able to react with it and produce the bubbly spew of dishwasher throw-up. 

Why do I tell you all this? Because it's still funny to me and to let Ellen know, "I feel your pain." How did Ellen's come about? Well let's start at the beginning. A very good place to start. When we read we begin with A-B-C, when we Pinterest we begin with "That's for me!" Ok, enough Sound of Music. We've all seen this pin, right? 

The Original Pin
http://www.onegoodthingbyjillee.com/2012/02/how-to-clean-your-dishwasher.html 
Cleaning the dishwasher with vinegar (and a later cycle of baking soda). I tried it once upon a time...made the surfaces pretty but it didn't make the machine quit spitting food chunks on the dishes (which I didn't figure it would as it's only really a surface cleaner, but it was worth a shot). 
http://www.onegoodthingbyjillee.com/2012/02/how-to-clean-your-dishwasher.html 

Ellen told us, "I'm not sure what happened - I think maybe my (admittedly crappy) dishwasher just hates vinegar, because when I tried the vinegar as Jet Dry trick a while back it caused a stain. Anyway, I tried cleaning the dishwasher with vinegar as instructed in this pin and when I happened to walk back into the kitchen about 15 minutes into the wash cycle, this is what I found. Oops."

The Pinstrosity

See, her dishwasher threw up too! But if you look on the bright side, mopping the floor was easy. 

Vinegar doesn't foam up like that by itself, so I have a few ideas as to what went wrong but having not been there and without getting into the dishwasher I can't be certain. So here are some theories, and they're worth everything you're paying for them. 

  • The original instructions say to run the vinegar through first, and then the baking soda. When I tried it I almost missed the line that says to run them through separately, but luckily I caught it in time. Vinegar and Baking Soda will react in foam, and if you run the two cycles through together you will get foam throw-up. That's is NOT what happened here, Ellen ran them through separately following the directions. I'm just saying it could happen. 
  • This may be a similar case to mine...not necessarily the Barbie arm and scalp, but if there was enough residual detergent in the dishwasher the vinegar could have reacted with it causing the spew. 
  • The only other thing I honestly can think of is that if you're like me you reuse some of your food containers. I've forgotten that the jug does not have the original contents once or twice (my vinegar jug had dish soap in it once...just about had the most interesting chicken marinade ever). Anyway, perhaps there was something else in the vinegar jug and not vinegar? I know it's a slight chance...but hey, it could happen, right? 
Other than that, I honestly am stumped. There was something in the dishwasher that the vinegar reacted with, but all I can do at this point is guess. 

To make the original pin work, make sure to try and clean out any chunks from the drain (as the directions suggest) and to run the vinegar and baking soda cycles through separately. This isn't the best pin for getting chunks out of the dishwasher's system (we still had chunks of food being thrown up on our dishes...sometimes the dishes were dirtier coming out than they were going in), but it is a great pin for those of us who don't really want to get on our hands and knees and climb into the dishwasher to try and scrub it down by hand. We tried a number of specific dishwasher cleaners and we even tried taking the machine apart and had no luck until we tried the Lemon Shine Machine Cleaner. If you're having troubles, this stuff is awesome and comes at a great price. 

Tuesday, July 1, 2014

DIY Foundation Powder

Good morning all!
Today I have a fun one for you from our reader Holly. Holly wanted to make her own DIY foundation powder, and used her precious nap-time to do it (that is some REAL dedication there). Did her results end in a Pin Win or a Pinstrosity??? Check it out!!
The Original


The Pinstrosity
 
Well that would certainly cover blemishes wouldn't it?
 
So what happened here???
"Here is a lovely picture of myself using my homemade foundation powder. I wanted to try making foundation because I was running out and didn't want to go threw choosing a foundation and hating it because it never matches my skin color. I thought it would be nice to know what is in my foundation and that it would be all natural. I looked threw pins and chose this pin. I went to my local health food store and collected the ingredients. I was getting pretty excited to try this. I had to what till I had my most important me time of the day to mess around with Pinterest, NAP TIME! Nap time= my only time. By then I'm so ready for this amazing adventure. Imagine never having to buy make up again! Heck I was thinking maybe I will make a ton and sell it at my local farmers market. Yes! That's right I will be rich and have my own make up line, and be on Oprah or even better Ellen. (Welcome to my crazy mind!) Well when it was all said and done it was horrible! Blotchy, definitely too dark, not to mention it felt like my flesh was melting off my face! Oh well, back to the drawing board of get rich off of other peoples brilliant ideas on Pinterest!"
 
There is nothing wrong with the recipe from the original website, but the original writer does warn that that recipe might not work for everyone, and we can totally see that it didn't here!
Some of the ingredients include cinnamon and ginger (probably why Holly's skin was feeling funny), and nutmeg, along with cocoa powder. The original writer states that her skin is fairly light and of Swedish decent, but I can tell you right now that that particular mix would NOT work on me. I am VERY fair,( like the store never has a "low" enough level of foundation for me fair. The "lightest porcelain" which is a 1 still looks like I smeared chocolate all over my face...what I need is a -4 "basically see through" foundation). Even by looking at the original picture of the powder I can tell it would be TOO dark for me. The second I read cocoa on the ingredient list I knew it would be too dark.
 
That being said Holly had somewhat of the same problem. This is one of those pins you will just have to tweak and tweak until you get just the right combination for you. Another thing is to REALLY mix all the ingredients together so that you avoid the splotchyness. I do really like this idea though and the original recipe is a good base to start at. Many of us will probably have to search out some alternative ingredients but in a way that might be kind of cool having to get super creative for this one.
Has anyone else been awesome and made their own foundation powder?? Let us know what did and did not work for you!!
 
Happy Tuesday Pinstrosipeeps!


Wednesday, June 25, 2014

Popcorn Method of Doom

When it comes to things going wrong in the kitchen we usually can expect things like smoke, spills, nasty flavors, gooey messes, and flipping through the phone book to order a pizza when dinner flops. Rarely do we expect flying shards of glass. That's just not conducive to one's health and it should be avoided. What can cause flying shards of glass in the kitchen? Well, for two of our submitters, this pin was the start of their kitchen of doom:

The Original Pin
http://www.everythingbutthe.com/2011/09/08/blow-your-mind-microwave-popcorn/
According to the website, "Glass bowl + ceramic plate + popcorn kernels = perfectly popped popcorn in the microwave." According to our submitters though, "Glass bowl + ceramic plate + popcorn kernels = near death." 

The Pinstrosities
The stove. Perfectly situated to be easy to stand and cook at...and to have flying glass shards enter your abdomen. Yikes!
Tiffany said, "I normally make microwave popcorn in brown bags but I saw this pin and thought I would save the bag and pop it in the same bowl.  Upon reading the directions I was curious about the time 2 mins 45 secs.  Normally with a brown bag I only cook it for 2 mins or less.  But I tried it. It did take at least 3 mins to cook and the bowl and plate were both VERY hot just like the pin said.  Then I tried their suggestion of recooking the left over corn - cause there was quite a bit.  Once again I had to cook it for quite awhile before getting the popcorn to pop. After 3 mins I gave up because the popcorn that had popped smelled like it was burning.  So I pulled it out and right after setting it down on the stove top it sounded like a gun went off and the pyerx bowl exploded all over my kitchen! My guess is that the microwave is warming up the bowl and plate more than the popcorn.  I'll just stick with my brown bags!"

The microwave turned jack-in-the-box-of-death. 
Angela said, "I was super excited to try the microwave popcorn in a mixing bowl covered with a plate. I've actually had luck with the popcorn in a brown paper bag but thought this would be less wasteful. I was hearing pleasant popping and then heard a loud CRACK and opened my microwave to this. As I was not excited to eat glass shards, I would rate this a GCT of 5."

Thankfully neither lady was hurt. I have awful images in my head of opening the microwave just at the moment the bowl blew up and having a glass shard fly into a face. Or the shattering bowl on the stove/counter sending a glass spearhead into someone's stomach. These could have been bad. 

When objects heat up, they expand. Glass does not expand well, especially if there is even the tiniest flaw in it anywhere. We've had a Pyrex dish explode in our kitchen, but that was because we were idiots and didn't realize we'd left a burner on and pulled out dinner out of the oven and set it on the burner. A few minutes later it got way too hot and exploded. Don't leave burners on. Don't set anything down on burners unless you are actively cooking on them. And now we learn, don't put a glass bowl in the microwave for too long (in this case too long really isn't that long at all). Just because of the danger level with this one, I know I won't be trying this method here at home. 

Friday, June 20, 2014

Burnt Mason Jars

Mason Jars still seem to be a huge rage. I thought it would have died out by now but it hasn't. Our Walmart even carries mason jars in the crafting section now. Weird.

http://media-cache-ec0.pinimg.com/originals/d2/84/5a/d2845a480d14227f9e8dbfc4c98c821a.jpg

http://media-cache-ak0.pinimg.com/originals/fb/8e/6d/fb8e6d355ff8059815c06361105bf5d4.jpg

http://www.crumpleandtoss.com/pins-needles-10/

If you haven't guessed, today I have a mason jar Pinstrosity for you, and we've had 2 submission for it!

The Original Pin
http://www.doodlecraftblog.com/2012/07/blue-tinted-mason-jars.html?m=1

Don't want to buy glass spray? DoodleCraft has a cheap and easy way to make tinted glass jars. Easy at least until your oven decides to turn on you...again.

The Pinstrosities
Samantha explains the above picture: "So, I decided to try tinting some of my old mason jars for a friends birthday. BIG MISTAKE. My mom and I took four old jars, coated the inside with modge podge mixed with food coloring like the link told us to. The whole time we were thinking "This is so cute and beautiful!". Once the jars had become fully covered in the mixture, we put them upside down on the wax paper for five minutes. Next we placed them upside down in the oven which was at 400 degrees just like the directions specified. Seven minutes into the thirty minutes needed for them to bake, my mom noticed that the blue of one of the mason jars was already beginning to lose its coloring. All of the paint that had dripped out was also bubbling! Then with seven minutes left I checked on them once again, the kitchen was somewhat hazy and there was still color on the jars. The timer went off and surely enough when we opened the oven door, ALL four mason jars were a blackish brown color (the pictures show all). Needless to say my friend is NOT getting those jars. I'm not entirely sure what went wrong, I keep going back to the directions to see if I may have over looked something but every time I do, I can't seem to find how it went horribly wrong. We probably won't try this again. "


Caitlyn tells her adventure like this: "My roommate and I thought it would be cute to make tinted glass vases for some flowers we had just gotten from the dollar tree. We used food coloring and Elmer's glue to make a pretty aquamarine color and colored the whole inside of the vases, and then put the vases upside down on a cookie sheet for 30 minutes at 400 degrees. We started becoming concerned when, 7 minutes in we started to hear popping sounds coming from the oven, and then started to smell what seemed like melted plastic. We checked the oven, and even though the glue seemed a little bubbly, we kept going. Eventually, the burning smell became overwhelming, and after the 30 minutes were up, we pulled out the distorted, burnt messes that were our vases. We thought that that was bad enough, but then we started peeling the aluminum foil back from the tops, and released what had to have been the worst smell of my entire life. Maybe if someone had baked vomit, that would have been comparable? They are currently sitting outside because they gave one of us a nosebleed."

Definitely not what Ryan Gosling had in mind up there.

I went back through the blog post and didn't see any red flags that stuck out to me, so then I went through the comments to see if others had encountered similar misadventures and I found Tracy. She said, "IMPORTANT ADVICE FOR THOSE WHO HAVE DONE THIS PROJECT IN THE PAST OR ARE PLANNING TO DO IT IN THE FUTURE: After experimenting with this about six times, I have found that instead of wax paper (as described in the directions), you need to use PARCHMENT PAPER. Also, 30 minutes at 400 degrees IS WAY TOO LONG to bake these. 4 minutes @ 400 degrees is plenty. Also, don't overlap your edges when painting on the Mod Podge - this creates thick seams and bubbles - just nice, light coats next to each other. Good luck! After I made these changes, they turned out beautifully."

I love helpful comments! Thank you Tracy!


Friday, June 13, 2014

Elusive Rainbows

We would all love to be the one to finally find the end of the rainbow and snatch up that pot of gold. Although if any of us ever did actually find it, it would probably shift and move while we were taking a selfie to show all our facebook friends how cool and lucky we are. And then off in the distance we'd here a small cackle, and floating on the breeze we'd hear "You'll never get me lucky charms!"

Today I have 3 Pinstrosities for your viewing pleasure of people who tried to capture the rainbow and missed.

Original Pin #1
http://pixelatedcrumb.com/2012/03/25/rainbow-cake-and-a-giveaway/
Sam said, "So this was my birthday cake this year, made by my flatmate. As you can see it didn’t quite go to plan – we live in North QLD where it’s very hot and icing doesn’t cope too well! It still tasted delicious and we had such a good laugh over it, it turned out to be my most favourite birthday cake ever!"

Pinstrosity #1

No pot of gold here! Icing and heat definitely do not mix well. Warm cakes, warm rooms, warm plates...warmth is just not icing's friend. 

Original Pin #2


Aren't those awesome?! I love the whipped cream clouds. Kailey (who happens to be one of my beautiful and awesome cousins) sent in her rainbow waffle:
Pinstrosity #2

Maybe this is what it looks like from inside the rainbow? Good thing waffles are still yummy anyway! If you're going just for colorful waffles, this works great! If you want the rainbow effect though you'll need to carefully (but quickly) pour the batter on the waffle iron in thin concentric circles, starting at the middle and working your way out. 

Original Pin #3
https://www.etsy.com/shop/JKCreate/sold?ref=shopinfo_sales_leftnav (this artist promotes her work as the original crayon art, the art that started this whole craze...that's kinda cool!)
We've seen this one here before, and I'm sure we'll see it again. This rainbow can be elusive! It was for Kim. She said "I followed the instructions [of the pin] perfectly. I hot glued the crayons down, Melted them. Tip the canvas and what I got was the ugliest colors imaginable. With the flower pot inspired one; nothing about the melted wax looks "stem-like" like the picture!":

Pinstrosity #3


As the original pin is a link to an etsy shop, I am assuming the instructions were written as a Pinterest caption instead. Having tried the crayon art myself I can say it isn't as easy as it looks. You do want to have the canvas tipped while heating up the crayons rather than melting the crayons and then tipping. Tipping after melting allows the waxes of the crayons to combine in a pool and the colors to mix weird while melting, resulting in color sadness when you tip the canvas. Keep the canvas tipped upright while melting the crayons so the wax can run down as soon as it's melted. There will still be some mixing, but not nearly as bad. 

Submitting a Pinstrosity rainbow may not have been the pot of gold Sam, Kailey, and Kim didn't were looking for, but these made me smile. Perhaps this is what is on the other side of the rainbow? 


Friday, May 30, 2014

Cream of Play-Dough Soup

Here in the U.S. we love our food. Well, actually I'm sure that's a global thing. If we ever meet an extraterrestrial race and they ask about earth life I'm pretty sure we could say, "We love food!". We love it so much in fact that we try to make everything edible.

Edible Jewelry
http://www.gingerbread-house-heaven.com/edible-jewelry.html
Edible Clothes
http://avaxnews.net/charming/The_Edible_clothes.html

An Edible Pen
http://www.foodiction.net/2011/09/matitizia/

Edible (chocolate!) candles
http://fxballery.com/index.php?/news/fujisan/

Even Edible Spray Paint
http://www.geekosystem.com/edible-spray-paint/

So with all those odd edibles, why not make kids stuff edible? Darrow puts everything in his mouth. Everything. He discovered yesterday that he doesn't like the taste of dead moths (seriously, if there's anything weird or out of place on the floor, he will find it). Gross. When he gets older it'll be fun to play with clay with him, but I know that'll also go in his mouth. Since it's going in anyway, might as well make it at home and make it edible! 

Sam had the same thoughts and found herself a great edible play-dough recipe. It's edible, but it doesn't taste good so as to discourage your tot from scarfing it all for lunch.
The Original Pin
http://theimaginationtree.com/2012/04/best-ever-no-cook-play-dough-recipe.html

Sam decided not to go full blown with this project, which may have been a good thing: "I must admit that I changed the recipe a little bit. First off, I cut it in half {which should have worked, right?}. I also didn't add glycerin...but that was an optional ingredient. I had {almost} everything on-hand so I thought I would give it a whirl... a few minutes later and I ended up with this..."

The Pinstrosity
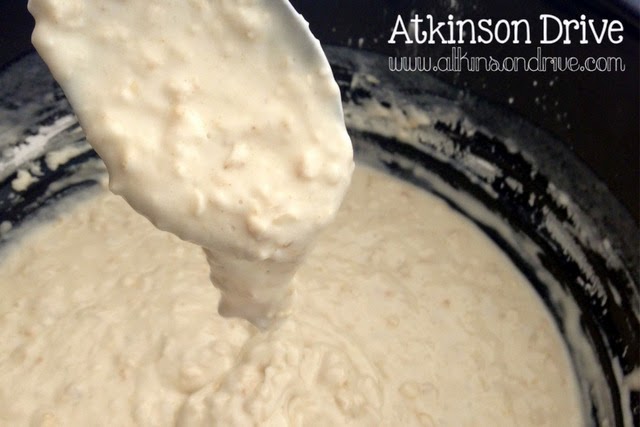
"It's more like cream of play-dough soup than actual play-dough!"

"To end up with my soup as pictured above, I actually added some oats, extra salt, and more flour. That was when I decided to give up and try a whole new recipe...to me, there was no saving it! For those looking to make this play-dough in the future, I'm sure you could continue adding flour, or maybe with less water it could work. "

Did she let this get her down though? Nope! Check out her blog to get the recipe for edible Pumpkin Pie Play Dough!


Thursday, February 6, 2014

Throwback Thursday: Valentine Crayons

We have another Throwback Post for you featuring one of our earliest posts. In 2012, melted crayon everything was all over Pinterest. It's still there, just not as popular as it was at that point in time. We had crayon art submissions of every shape and color and GCT level. I thought for today I'd pull up one that has to do with Valentines Day, as that's just right around the corner. 

The Throwback
The submitter tried to make this:
http://www.chefmessy.com/2009/02/happy-valentines-for-crayon-out-loud.html 
and ended up with this instead:
http://pinstrosity.blogspot.com/2012/03/pinstrosity-and-amazing-technicolor.html
Now, on to today's submission from Alicia. 

The Original Pin
http://gailmade.blogspot.com/2011/02/valentine-heart-crayons.html
Cute little heart crayons to send to school for Valentines Day. 

Alicia says: "I decided to try the heart-shaped crayons for my daughter's preschool Valentine's class gift. Great idea, right? Cute, useful, and doesn't come with a corresponding blood sugar surge and crash...win win."

"I found the Gail Made pin. It looked like a breeze. I ordered the heart-shaped Wilton mold off of Amazon prime, bought a Crayola 64 pack, and sat down to start peeling. I remembered the paper wrappers on crayons being a whole lot easier to remove. We always had a ton of naked crayons floating around. Didn't everyone? Well, they must have improved the glue recipe since 1990. Those buggers didn't want to come off. We finally resorted to cutting the paper longways, then peeling the paper off in pieces."

"I placed all my pieces of crayon in the mold, heated up my oven to 200, and covered the crayons with a layer of water as stated in the directions. I watched closely. After 10 minutes, nothing. My crayons were happily enjoying their lukewarm bath. So, I bumped up the temp. 10 minutes at 225 and we had the beginning of meltage. 250 would be even better then, right? After about 5 minutes, the crayons were melted, but then disaster struck."

The Pinstrosity

"I assumed that the water would evaporate. Instead, the melted wax did what it always does when mixed with water...float. I had colors floating out of their molds and visiting their neighbors. Colors flowing out over the sides and onto the cookie sheet. Floating wax all over the place."


"I tried to soak up the water with paper towels. That just made it worse. I tried pouring off the water. That made it WAY worse. Sigh...I think we'll just stick with message candy hearts."

I'm not exactly sure what the point of the water is as water and wax do not mix well, and the wax will float. Perhaps eventually all the wax is supposed to float so that the water is on the bottom making it easier to pop these out of their little homes? In the original pin it looks like there is just a thin layer of water on the wax. Perhaps just a nice mist of water from a spray bottle? As Alicia found out, you don't want to drown the crayons, or even just let the go wading. A fine mist should do the trick if you even use any water at all. Perhaps next time just spray Pam on the molds before hand? Would that work? Hmmmm....


Tuesday, February 4, 2014

Jell-Oh No! Snacks

I love when we're visiting my nephews and they want fruit snacks. One for nephew. One for me. One for nephew. One for me. It works out quite well in my opinion. I almost bought me my own box of fruit snacks the other day. I don't know why I didn't...I should have. In fact, they sound really really good right now. If I were brave like Hannah, I'd try to make my own. 

Who is Hannah you ask? Hannah is today's awesome submitter, and she has a great story for you today. 

Back in early December, Hannah was craving some fruit snacks, but was locked in by the weather. Good thing she had seen a pin on Pinterest with instructions on how to make your own at home!

The Original Pin
http://www.joyofjello.com/?p=999
Aren't those pretty?! Mmmm. 

Here's how Hannah's attempt turned out:

The Pinstrosity

Here is what she had to say about this:

Fail #1: Not knowing the difference between plain gelatin and Jell-O mix. The recipe called for a 3-ounce package of cherry Jell-O, which I didn’t have, and because I’m snowed/iced in today I wasn’t going to go out and buy it. Instead, I used 3 ounces of plain gelatin. I didn’t realize until afterward that Jell-O mix has way less gelatin in it than 3 ounces.
Fail #2: The gelatin itself. We have this generic bulk gelatin in our cupboard that I think we got from  an Amish store in Oklahoma. When I put it in the pan with the water, I immediately began to smell it cooking. It smelled like a barnyard. And then it hit me, this gelatin smelled likeHORSES. I’ve had the argument before with people who say gelatin is made out of horse/cow hooves, and my opinion so far has been that it CANNOT be true. But, my friends, you are looking at a horse-gelatin convert.
Image
I’m scarred for life. That stuff smelled like HORSES. I put in Kool-Aid flavoring to keep it from deterring my plans, but I still can’t get the smell out of my head.
Fail #3: The clean-up. After having recovered from the horse smell, I let the mixture dissolve in the pan and prepared to empty the contents into a Tupperware container. As soon as I took it off the stove, however, it was already setting in the pan. I hurried to get it all out, but most of it stuck to EVERYTHING. It was like this stuff called Goooze that was really popular in the early 2000s, you could play with it like Play-Doh but it was more like an amoeba than dough.
Image
Image
Yet another non-food comparison that wasn’t making these horse-hide fruit snacks very appetizing. Anyway, when I finally got the most of it in the container, I tried to wash off the utensils and pan the best I could. And when I tell you the stuff was not coming off, it would’ve taken the government of an entire country to exile that stuff out of the pan. I had hot water running and Bon Ami in the pan and it wasn’t coming off!! My mom finally put the pan back on the stove and got it to come off, but I’m never making fruit snacks this way again.
Fail #4: The finished product does not cut well. Instead it kind of stayed in this plastic-like sheet when I peeled it out of the plastic container. My mom got the idea to cut it with scissors because our knife wasn’t working. When it came out it looked like a mousepad. When we cut it, it looked like a cut up horse-hoof-gelatin mousepad. Not delicious fruit snacks. :(
Fail #5: Not edible. As mentioned above, the stuff didn’t even cut with a sharp knife. We tried eating it and the taste wasn’t so bad, but it was like chewing on dense rubber, like those little sticky hands you get out of the gumball machine. Not that I’ve eaten sticky hands from a gumball machine, but I got the full experience today. Ugh.
Needless to say, I was disappointed. And will be staying away from gelatin for a while. At least until I can forget the barnyard smell that was wafting from my kitchen.
Eat real fruit, guys. It’s easier. It’s cleaner. It’s less horsing around. 
No longer horsing around with homemade fruit snacks,
Hannah H.http://secondhandpoem.wordpress.com/2013/12/07/pinterest-fail-of-the-year/

If we hadn't used all our unflavored gelatin for making jellies and syrups in October (love me some prickly pear jelly!), I'd run in the kitchen and try this out myself right now. Perhaps I'll have to pick up gelatin while I'm in town tomorrow, because this sounds yummy!