Showing posts with label Prickly Pear Week. Show all posts

Friday, October 7, 2016

The Autumnal Equinox Tradition

Traditions are some of my favorite things to learn about. I love knowing what people do, and why. I love seeing the bits of heart put into things, and how these traditions bring people together. 

When we were first married traditions seemed hard. We hadn't been married long enough to have any traditions together. We borrowed traditions from growing up and from what we saw people doing, and tried them out. Some we loved. Some didn't work. 

But one tradition that has stuck around, and that may be one of our favorite traditions now, is our annual Autumnal Equinox Dinner. This dinner tradition started as a spin-off of a tradition Cameron's family had. 

On the Winter Solstice, the Mowers would all get dressed up in their Sunday best and come together for a traditional Christmas meal, as Christmas day they had the traditional New Mexican feast. For the solstice they'd have ham, potatoes, and the whole works. We wanted to carry this on, but as students we weren't likely to be home for the Solstice each year and we wanted this to be a tradition we could do at our house. So we chose the Autumnal Equinox, because it's smack in the middle of the semester and we knew we'd be home the new couple of years and could do this as something special for us. 

A few weeks ago we had our 6th Annual Autumnal Equinox Dinner. 


Last year it fell on Day 2 of the Keeping Up Appearances challenge and I definitely bit off more than I could chew. So this year we tried to keep it a little more simple with the food prep. No crazy melted cake this year! We ended up with some super yummy parts of the meal, some meh parts, but somehow thankfully no Pinstrosities other than me not starting food prep early enough and us starting about 40 minutes later than planned. But that's doable.

Instead of getting the whole meal from Pinterest this year, I decided to mix and match. I turned to our favorite cookbook for the chicken, because every single recipe we try out of the America's Test Kitchen cookbook (with every recipe they've tried from 2001-2014) turns out phenomenal. We've never had anything not turn out. Well, except the time I forgot to make the sauce. That time the meal was meh...but that was my fault. I trust that book over anything I find on Pinterest.

But, I can't throw a party without Pinterest being involved somehow of course! 

Pinterest successes #1 & #2: The Pumpkin Shaped Buffalo Ranch Cheeseball


This one is a double win! While looking for cheese ball ideas (because that in and of itself is becoming an Autumnal Equinox Dinner tradition), I came across a pin for a pumpkin shaped cheese ball. I was sold.

I made the cheese ball from this recipe and tasted it. Super salty and intense! So I added another block of cream cheese, and then threw in more grated cheese to get a better consistency. After that it was just right. I rolled it in finely grated cheddar cheese to get the orange color on the outside and because there were nut allergies in our guests.

Then it came time to shape it. I didn't have rubber bands on hand, but I did have yarn. So I cut three lengths of yarn, and then used each one to tie around the plastic wrapped cheese ball, tying it tight enough that it cut into the cheese to create the divot. When it came time to put the platter together I cut the yarn, took the cheese ball out of the plastic wrap, added in the stem from a bell pepper, and it was ready!

This one was fun because it looks fancy, but is super easy. Our friends thought at first that I'd molded it or spent a long time getting the shape right. So A+ for this pin!!

Pinterest success #3: Curried Carrot Soup

This was one we'd actually made before from a pin we'd found on Pinterest. It's simple to make, but so so so yummy! No pictures from that night, but here's a picture from when we made it before:

Pinterest Success #4: Prickly Pear Lemonade

And by the time this got put together and out to serve, the party was in full swing and my camera was safely stowed away from the kids. But, it looked just like the pictures in the original link. And we "dirtied" it up redneck style with Almond Joy creamer (our grocery store here didn't have plain coconut cream creamer, so we went with the Almond Joy, and that touch of chocolate flavor was yummy)!

And the Pinterest Meh: The Snickerdoodle Pie


I was pretty excited about this one. Super excited. Which maybe is why it ended up meh, because I had it built up so much in my head. I even did a series of pigs running around the outside for the crust (because naturally I have a pig cookie cutter, but nothing remotely fall-ish likes leaves or anything). 

First thing that went weird was the amount of filling. It didn't even fill the crust half way. I made a deep dish pie (as always), but normally even regular pie recipes come up higher than that on my deep dishes. I reread the recipe and the comments and it didn't say anything about it puffing up or anything, so I decided to make another batch of the filling to get it to the top of the pie. 

And in the oven it went. But of course because there was double the filling, it took much longer to bake. But the crust didn't burn (wrapped it in foil), and it smelled and looked delicious. Anticipation was high! 

Dinner got over and it was time to cut into the pie (and just now as I am sitting here typing this I realize that I completely spaced getting the whipped cream out for it!). I cut the first slice, pulled it out and it was a pake! For anyone who's not a Drop Dead Diva fan, that's a pie and a cake combined. The filling was cake basically. It didn't taste bad, but it was just kinda meh, and a bit of an odd consistency. I think I was expecting more of a baked custard pie for some reason. No one disliked it, but it looked yummier than it ended up being sadly. 

So I might try tweaking it a little and seeing if I can't come up with my own snickerdoodle pie that's more what we were expecting. We'll see.

But altogether it was a fabulous meal!

Menu:
  • Peruvian Garlic Lime Chicken (for a subscription fee you can find the recipe here, or in the cook book, which is totally worth buying!)
  • Buffalo Ranch Cheeseball shaped like a pumpkin, served with Smoked Gouda Triscuits, Ritz crackers, and blue corn tortilla chips
  • Curried Carrot Soup, served with blue corn tortilla chips to crush over the top
  • Oatmeal Rolls (these are Cameron's favorite rolls! I burned the bottoms slightly on accident, but they still weren't bad)
  • Fresh corn on the cob from the neighbors fields (a kind neighbor with a field full of corn opened up his fields to all of us, and our friends brought down a basket of steaming fresh corn! It was super yummy!)
  • Red Cabbage Slaw (I need to get the recipe for this one from our friends who brought it! It was super yummy!)
  • Prickly Pear Lemonade
  • Snickerdoodle Pie

The "rule" (or tradition might be a less harsh way to put it), is that the fall decor doesn't come out until the day of the Equinox dinner. It was fun to pull out my wreath, garlands, and table runner again! But then I got an idea and before everyone came Cameron and I ran around the yard and the empty lot across the wash from us and gathered bits of nature for a tablescape. We cut down some of the sunflower stalks to make a table garland for the center. Cameron also found an Osage Orange tree (also known as a hedge apple) and we picked a few to go into the decor (because I think they look so funky and cool! Topping it all off was the gorgeous autumn bouquet my friend Wendy brought. The colors were perfect! It's still on my kitchen table and other than a few flowers we've had to pull out, it's doing beautifully! 


Overall, each portion of the meal and the evening was simple, but when combined all together it was such a nice evening and a yummy meal! We loved the time we had to visit with our friends and celebrate the goodness of life. I can't wait for next year's dinner already!

What is your favorite tradition? How'd it come about?


Wednesday, October 5, 2016

Prickly Pear Barbecue Sauce

Some of you may have noticed that Prickly Pear Week came to an abrupt stop with no explanation. 

Well, it turned into a Pinstrosity of it's own. Without going into details (because you don't want them)...I forgot one important thing about Prickly Pear fruit. They are very high in fiber. And I totally didn't think of that when I was putting the prickly pear juice in everything we ate that week (morning smoothies, lemonade, cupcakes, waffles, marinades, etc). So for the sake of our internal systems, it had to stop immediately. 

But I did want to share one recipe with you that we came up with that we LOVE! Prickly Pear Barbecue Sauce! 


That's not all it makes...that's just what's left and only because I had to save some to take a picture of. 

This sauce is tangy, slightly sweet, and has an amazing flavor and color! After reading a number of barbecue sauce recipes, we combined tactics on some, used a regular barbecue recipe as our base, and then jumped in! 

Ingredients: 
  • 1 can tomato sauce
  • 1/2 c. apple cider vinegar
  • 1 TBS flour
  • 3 TBS brown sugar
  • 3 TBS sugar
  • 1 TBS Worcestershire sauce
  • 2 tsp garlic powder
  • 1/2 tsp ground mustard
  • 1 tsp paprika
  • 1/2 tsp onion powder
  • 1/2 tsp salt
  • 1/2 tsp ground black pepper
  • 2 cups prickly pear juice
Directions: 
  1. Mix all ingredients together in a medium saucepan until combined. 
  2. Bring the mixture to a simmer, whisking until smooth. 
  3. Simmer the mixture for 50 minutes, or until the sauce reaches your desired thickness
  4. Store in a sealed, glass jar in the refrigerator for 2-3 weeks. 


Wednesday, September 14, 2016

Prickly Pear Cupcakes

In my plan for the week, I actually didn't intend to make Prickly Pear cupcakes, or much by way of desserts. But things change. 

For a few weeks I'd casually mention to Darrow that if he'd use the toilet I'd make him any treat he wanted. He'd say "Nope!" or "No, thank you." and we'd leave it at that. Well yesterday it happened and he promptly remembered the promise of treats and cupcakes were the prize of choice. So I got to looking for Prickly Pear cupcakes (because he doesn't have a preference yet). 

I almost just did a substitute in a cake mix like I did for the waffles, but wanted to find something that might have a stronger Prickly Pear flavor. Through Pinterest I found a great recipe by Cupcake Project. It looked like it'd have good flavor and would be very doable. And it was! It was easy to put together and baked up beautifully. I got 23 cupcakes out of my batch. Weird. But oh well. 

But then it came time for the frosting. I didn't wan to make the prickly pear lemon bars to blend into the frosting that she had, and it sounded like there wouldn't be much prickly pear flavor, so I went on the hunt for a frosting that would do the flavor justice. 

In my searching, I remembered reading about a flour frosting, so I searched it and found an easy recipe quickly. It involved combining flour and milk, and cooking until you get a thick batter before adding vanilla, butter, and sugar. With the recipe calling for 2 cups of milk, I got curious if I could substitute the prickly pear juice for the milk in the recipe. I wanted to use as much juice as possible in the recipe, and this one fit that bill. I figured it was worth a try!

And it worked!! That was the best frosting I've ever had. Light, but so totally yummy! The substitution worked perfectly! I only did a half batch because a full batch covered 3 dozen cupcakes and I didn't need that much frosting.

Now, I'm not an expert frosting applicator. So my frosting looks meh...but we weren't going for pretty, we were going for yummy! Taste before beauty!


So they baked fine, and the frosting held together. But if it doesn't taste good, what's the point?


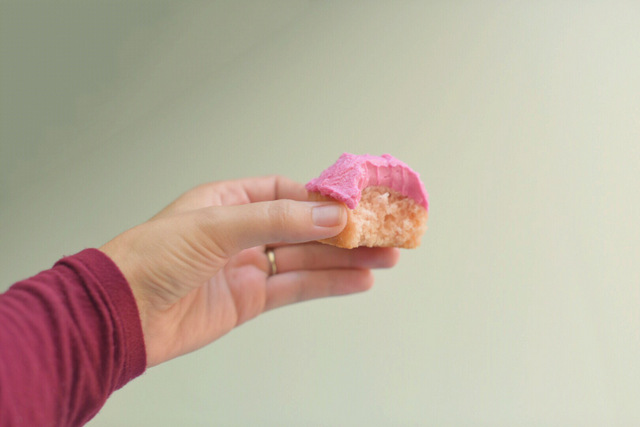
Luckily these taste great! There is a subtle fruity flavor without being truly fruity. Great description there, huh? The frosting was light, fluffy, and had the perfect flavor without tasting like sugar! It was sweet, but not overwhelmingly so like many frostings. The cupcake was moist and yummy while being fluffy and cohesive. These are definitely some new favorites!!

So there it is! Prickly Pear recipe test #2 done! And it was a success! 


Tuesday, September 13, 2016

Prickly Pear Waffles

The first food I decided to try out for Prickly Pear week was Prickly Pear Waffles! I did a quick search online for a recipe and didn't see one come up, so I decided to just go for it and see how it came out! 

I thought about going completely from scratch, but then I decided with the lazy and easy route. Krusteaz mix for the win!! We actually really like the Krusteaz mix pretty good. It's yummy on its own and easy to tweak if you want something more. 

So I did the basic recipe, just substituting Prickly Pear juice for the water. 


It mixed up nicely and looked like normal batter, only prettier because of the natural color of the prickly pear!

But we all know that something can look good and taste bad. And we still had the cooking to do. I was worried that somehow the juice would change the consistency and that it'd crumble or stick to the waffle iron bad.

It was a slightly thicker batter than normal but not by much so I left it thicker, scooped some onto the waffled iron, and crossed my fingers.

This is where I left you all off on the Instagram Story. What's your guess...fail or yummy goodness?


Did you guess? 


Okay...here were the results:


Beautiful pink waffles that held together perfectly (better than normal waffles in fact)! They were a little more dense than a normal waffle, but I like that. I served Darrow's to him with regular maple syrup and that tasted good. The waffles sucked up all the syrup faster than normal. If you've had a whole wheat pancake or waffle, think of that syrup suction action! It was the same.

The flavor of the waffle wasn't as strong as I'd hoped, but it was definitely different from a normal waffle. It had a slightly sweet after flavor, and an almost watermelony taste to it. That's the closest I can describe it. But it was good! After that bite of Darrow's I knew I needed to get me a plate made up!

But then I got to thinking. This needed a different flavor of syrup to complement it better. Something less sweet and more subtle. So I found a vanilla pudding sauce by This Grandma is Fun on Pinterest (where else!) and whipped that up. I discovered I didn't have any corn starch though, so took a risk and substituted flour. It worked! And it was the PERFECT flavor combination with the prickly pear waffle. Yummy yummy!!

Prickly Pear Recipe #1: Success!! We will be having these again! P


Monday, September 12, 2016

How to Juice Prickly Pear Cactus Fruit

If you saw our Instagram story today, you know that this week is devoted to Prickly Pears! All across the Southwest the Prickly Pear cactus fruit are either ripe or very rapidly getting there and it's time to harvest and enjoy!

I have quite a few jars of prickly pear juice that I am going to use to make meals with this week. I have sweet recipes, savory recipes, and experiments I want to try out. Prickly Pear is one of my very favorite flavors and my favorite cactus. We've read different processes to getting prickly pear juice from the fruit, worked at it and combined ideas, and have come up with our process that we feel yields the best juice. What makes this the best juice? The intense color and the AMAZING flavor!

Too often we get prickly pear products from restaurants or stores that leave us feeling a little disappointed. It's basically just the prickly pear coloring with a smidgen of flavor. But nothing true to the fruit really. If we're going to eat Prickly Pear, we want it to taste like prickly pear! Because the flavor is like nothing else!

Our process is more labor intensive, but we like the end results much better and find it well worth the effort. So here is what we do!

This is a post I wrote up last year with our process when I went to visit my parents and to restock our Prickly Pear supply.

Bountiful Baskets in their area was offering a 12lb box of red prickly pear fruit that week. I put in an order, but I wasn't really sure that 12lbs would be enough. So my parents went up to the family ranch in the mountains and picked me a bucketful the week before I came down. Now, when I saw a bucketful I really should saw a Bucket Full. This was a 5 gallon bucket packed to the gills, along with a 1/2 gallon bag that wouldn't fit. They called and asked if one bucket was enough. We thought it might be, but if not we could go pick more. I didn't realize how packed they got that bucket though. We definitely didn't need more! 

Prickly Pear Cactus Fruit


They put the whole bucket in their freezer to keep these perfectly ripe fruit all ready for me. It took forever to thaw those out, but they sure were pretty!

But then it came time to juice these babies. We've used electric and commercial juicers before, but they gave a watered down juice, and we like ours to be nice and concentrated. Cameron read different techniques and ideas online and we've come up with our own method to get the juice as concentrated as we like it without having to spend hours boiling off water and ending up with minimal juice.

Once I finally got the prickly pears thawed enough, I put some in the big pot and added about 2-3 inches of water. I figured out later in the day that smaller batches worked better than big batches, but by then I was on a roll and didn't take more pictures...so these are pictures of the first big batch. I steamed these until they were completely soft and mash-able.

Juicing Prickly Pear Cactus Fruit

Next comes the straining, mashing, and more straining. We tried using cheesecloth at first but it let through more fibers than we wanted in our juice, so we use a clean pillowcase (of course I had to use an orange one). After washing and sanitizing a five gallon bucket, we put the pillow case in and slip the edge over the lip of the bucket to hold it on. Well, that's what I did. When there are two of us at home I can help hold the bag while Cameron pours or vice-versa but I was all alone this day and this is the method I came up with to do this flying solo.


Once the pillow case is in place I pour off the juice in the bottom of the pot, trying to not pour off any of the fruit or pulp. Once the juice is out of the way it is really easy to mash the fruit. We just use a potato masher.


You want these as mashed as you can get them. The skins won't mash down too much, but the insides should be pretty much pulp. 
Juicing Prickly Pear Cactus Fruit

From there carefully (this is very hot prickly pear pulp!!) pour the prickly pear pulp into the pillow cased bucket.
Juicing Prickly Pear Cactus Fruit
Mmmm, doesn't that look appetizing. 
Now it's time to squeeze. Again, I realized I couldn't do this like we normally do. With two of us one can hold the bag while the other twists and squeezes. With only two hands, I couldn't really do that, and you do need both hands to squeeze the juice out.

So if you're flying solo on this, here's how I figured this out. I went and found a good sturdy broom and tied the bag to the top. This was a little tricky to do without splattering all over the place, but I finally got it. I put the bucket up on a little chair (regular dining room chairs were too tall, but I found a little kids chair and that was the perfect height for the bucket. With the bucket on the floor there were too many splatters going on; having the bucket higher caught more juice and made less of a mess (but you will still get some splatters). I propped the broom up on the corner of the cupboards so that the bag hung into the bucket on it's own.
Juicing Prickly Pear Cactus Fruit
The prickly pear juice doesn't stain cloth (at least not easy at all...I used a white washcloth to wipe the counter and there's not a speck of color on it after rinsing it out), but I didn't know if it would stain wood and didn't want to find out, so I was careful to quickly wipe up splashes on Mom's nice hickory cupboard doors and protected the chair with an old towel.

From there I needed all hands on deck and the pictures had to stop, but it's pretty easy to explain from here. You will want some gloves on (I just used regular cleaning gloves, but you can go thicker if you want). The spines and glochids get soft in the steaming process and most of them don't make it through the bag, but a few will. The gloves will help protect your fingers from stickers (not 100%, but much better than bare hands). The gloves will also help protect your hands a little from the heat. I wore a pair of gloves and then used another pair out loose as "hot pads".

Once your gloves are on start twisting the bag slowly and squeeze out the air until you get the bag tight around the pulp. From there then just keep the pillowcase twisted up tight and squeeze that pulp as much as you can. You may have to loosen the pillowcase a little and move the pulp around some here and there. You want to get as much of this pulp juice out as you can as it's the concentrated good stuff.

And that's the juicing process! Once I had every single prickly pear juiced I ended up with nearly 5 gallons of juice!! We definitely didn't need to go pick more fruit.

Having two different varieties of prickly pear fruit was fun to try out. The one has a much deeper and more vivid color, and has a stronger flavor, but the other is more naturally sweet and has a mild flavor. I personally prefer the wild prickly pear (the stronger flavor and color), but the cultivated prickly pear was yummy too.
Juicing Prickly Pear Cactus Fruit

I spent the rest of the evening making 28 half-pint jars of jelly (recipe at the end of this post) before I decided to call it quits for the night and put everything away for the next day. I had one batch set up really good, one batch set up okay, and one batch stayed syrup. Prickly pear jelly seems super temperamental, but luckily if it doesn't set up the syrup is super yummy anyway!

Prickly Pear Jelly Recipe: 

Ingredients

  • 2 1/2 c. cactus juice
  • 1/2 c. lemon juice
  • 1 pkg pectin (we like Surejell)
  • 4 c. sugar

Directions:

  1. Dissolve the pectin in the lemon juice. 
  2. After the pectin is dissolved in lemon juice, stir in the cactus juice. 
  3. Bring to a rolling boil. 
  4. Add sugar. 
  5. When it comes to a rolling boil (stirring occasionally), cook for exactly 3 minutes. 
  6. Pour into jars and seal. (You can get sealing instructions here). 

This will fill 5 half pint jars. A single batch sets up really well usually. A double batch is iffy. The chemistry gets off when you double this. I need to work on tweaking this and figuring out the correct proportions for a double batch so that this doesn't have to be made in single batch quantities.

I'm so excited to try out all these new Prickly Pear recipes this week! Stay tuned for fun new recipes!