Showing posts with label Sunday Surprise. Show all posts

Sunday, February 1, 2015

Sunday Surprise: Low Sodium Quinoa Corn Chowder

Hi Pinstrosipeeps--

Boy, oh boy, it has been a really, really long time since I posted to this here blog. At the risk of just babbling for three paragraphs about everything that's been going on, I'll condense it down to this: typical holiday insanity, combined with really sad family news, and then becoming insanely ill for two weeks in January. I mean seriously, the boyfriend and I each had 103 fevers (yuck!). Result? No Sunday Surprises for a few months.  But, any ol' how,  I've sure missed blogging and even having time to look at Pinterest. But, in the spirit of January's theme (since I technically tried and wrote this post in January)-- A is for Anything-- you know I had to cook something crazy for you.

As I'm sure many of you are doing, since it's the beginning of 2015, Rob (the boyfriend) and I decided that we really wanted to eat healthier. We have been trying to cut out down on eating out, and making more food at home, from scratch. Since, in general, I haven't had a lot of success cutting out one type of food completely (read: carbs, sugars, meats, etc...) because all I'll end up doing is craving that one thing. I've decided to try a new approach: find substitutes for things that I love that are a healthier choice.

Enter: quinoa. Serious biz, have y'all read up on this stuff? I know I'm super late to the quinoa party, but it is pretty amazing. Functions like a rice, but is actually a seed. Bonus? Pinterest is FULL of recipes using this stuff. I figure, limit the rice, replace with quinoa? Maybe? Yeah, gonna give it a try. I'll have to let you know how it goes.

Annnyway... upon searching quinoa on Pinterest, I came across this recipe on The Recipe Rebel for Quinoa Corn Chowder. Can you say yum?!?!

http://i2.wp.com/www.thereciperebel.com/wp-content/uploads/2014/09/quinoa-corn-chowder-3.jpg?resize=610%2C915
Instantly, I was all in. The Recipe Rebel calls for the following ingredients:
  • 1 cup quinoa
  • ¼ cup butter
  • 1 medium onion, diced
  • ¼ cup flour
  • 1 red pepper, diced
  • 1 tsp minced garlic
  • 3 cups chicken broth
  • 3 cups milk
  • 4 cups frozen corn (or fresh)
  • 1 can white kidney beans, drained and rinsed
  • 1 tsp dried parsley
  • ½ tsp dried thyme
  • 1½ tsp salt
  • Optional: shredded cheese to garnish

I've already mentioned some of Rob's dietary restrictions in terms of needing low sodium meals (you may remember the low sodium sloppy joe post)-- so for this recipe, I went with unsalted butter, sodium free chicken broth (from sodium free chicken bouillon), and used a few dashes of salt substitute instead of salt.

The instructions for the recipe are as follows:
  1. In a large pot, toast quinoa over medium heat for 3-5 minutes. Remove from the pan.
  2. In the same pot, melt butter. Add onion and pepper and saute over medium-high heat for 3-5 minutes, until soft and starting to brown. Add garlic and cook 1 minute.
  3. Stir in flour until combined (you don't want to see any white left -- add gradually and if there's a litle left over that's okay). Whisk in broth and then milk one cup at a time, whisking and waiting until the soup has thickened slightly before adding the next cup.
  4. Add corn, beans, quinoa, parsley, thyme, and salt. Bring to a boil, stirring frequently. Reduce heat to medium (or medium-low) and simmer uncovered for 15-20 minutes until quinoa is cooked, stirring often.

Good news, I took some photos (and by "some" I mean, WARNING: this post is gonna be photo heavy!!) of this, so let's kick it off.

Step 1: Toast 1 cup of quinoa in a large pot.


I say be really careful with this, my quinoa went from "wow, that looks nice" to "$%&$*#!!! Almost burnt!" pretty quick. Use caution and pay attention.

Step 2: Remove the nearly burnt toasted quinoa from the pot


Step 3: This is not included in the original recipe, but I had to make the 3 cups of chicken broth, so water into pot, bouillon into water, and go...

Step 4: Cut and melt the butter.


D'OH!!!! But don't burn the butter. I plopped it into the pan without realizing to how hot it was. I then failed to save it because I was completely distracted by the realization that I hadn't chopped the red pepper and the onion yet. So really, I wasn't even ready for the butter. *facepalm*

So.... let's repeat:

Step 4: Chop yo veggies (or, in my case, drop the onion and pepper in the the Ninja Prep Master thing, and just blend it. Knives are for squares. Hehehehe, just kidding)


Step 5: Use the other half of that butter block thing, and don't burn it this time.


Step 6: Dump the veggies into the melted butter


Step 7: Saute the veggies. The smell? Ermehgerd. Delishiz. But strong (my eyes were watering).

Step 8: Add yo' minced garlic.

It's there in the center, I promise. I also added a half a teaspoon more later in this process. Because, no vampires for me.
Note: it was at this point in the process that I realized something important: I really don't like the consistency of cooked onions OR cooked bell peppers, even though I love how they taste. I know, I know, I'm one of those weird texture people, so in a moment of pure spontaneity, I decided to deviate from the recipe, which brings us to step 9.

Step 9: Dump your sauteed veggies back into the Ninja and puree them.
GREATEST IDEA EVAAAAR FOR THIS CHOWDER!
Step 10: Be proud of yourself for thinking to do that. But also, dump the veggies back into the pot after you've reached the desired texture.


Step 11: Look back at the original recipe. Oh, yes, it's time to add the flour (note: I only had whole wheat, and it tasted delish). Add the  flour gradually until no white is visible.

Does anyone else see the chameleon shape here? Or, at least a dino?
Step 12: Whisk the chicken broth into your veggie paste, allowing the soup to thicken slightly as you add the liquid. I wasn't entirely sure what this meant, so, I allowed the soup to sit for a minute or two between each cup of broth that I added.

I forgot to mention this earlier, but do remember to take the chicken broth off of the heat.

Step 12 continued -- now time for the milk. I used Lactaid 1%.


Step 13: Add the quinoa, beans, corn (I used the whole frozen bag), parsley, thyme, and salt substitute into the liquid.


Step 14: Bring it to a boil. Then, reduce the heat, and allow it to simmer for 15-20 minutes (until quinoa is cooked), stirring frequently.


 Step 15: Taste your chow-dah! YUMMO!!! (also, here's a photo of my face, you're welcome!)
Remember when I decked out my fridge? Doesn't it look awesome?! Still totally loving it.
I totally opted to deck this out with grated cheese (especially since it was pretty low sodium, it was a touch bland). Also, add some cracked wheat sourdough toast, and you are good to go!


This recipe was definitely a win. Here's some other stuff I learned:

  • This kept in the fridge quite well. It made it a full five days while we worked through the leftovers (this recipe makes a lot!).
  • The second and third day of this are the best. The flavors congeal and it becomes more like a casserole than a chowder. That may not be your thing, but I loved it.
  • The red pepper flavor ends up coming out more the longer this is in your fridge. It is lightly smokey, but not spicy.
  • You really can't add too much cheese to this. Really, you can't. 
  • I bet this is still really tasty if you use the ingredients called for in the recipe (no need to make it low sodium if you don't want)
  • This is mad filling! No kidding, three bites in, I was like "I dished too much, I can already tell". But, the great thing is, it's one of those stay with you for a few hours kind of foods. Much likey.

I think we can file this under pin win. I'd definitely encourage you to give it a try. if you've tried this already, what did you think?

Love you guys,
Hugs, hugs, hugs,
Rachel

PS: Holy cow! Can we talk about the giveaway-- guys, how freakin' awesome is that?! Thanks to everyone for their comments!

PPS: Can you BELIEVE IT'S FEBRUARY!?!?!? Gahhhhhh.

PPPS: Happy Super Bowl to those of you who dig American Football. I live in Phoenix (where the Super Bowl is being hosted this year), and it's been a mad house. I'm staying in tomorrow and letting the football crazies duke it out on their own.

But, in the spirit of Super Bowl humor, I found you this. I can't stop laughing at it.

Sunday, October 26, 2014

Sunday Surprise: No Bake Oatmeal Cookies

Greetings everyone,

Happy Sunday! Oh boy, have I got a blog post for you today. The odds were stacked against me, and at two or three points during this recipe, I thought "This is going to be a genuine Pinstrosity". But, alas, I triumphed-ish.

So I should probably start this post by saying that I  really wanted to make these cookies for Pinstrosity's Pumpkin-tober.


But I ended up forgetting several crucial ingredients when I went to the grocery store (why do I think I can shop successfully when I don't make a list? I totally can't). Naturally, I didn't realize this until 9:00 PM, when I got the fever to bake said cookies.

Then, I thought I'd make some delicious oatmeal cookies. I was sure I had all of the items for those in the pantry already. But, nope, nope I did not. Being unable (and unwilling) to give up cookie making for my Saturday night project, I settled on these "Chocolate Oatmeal No Bake Cookies". Yummsies.


And note, when I type "settled", it wasn't like I was upset about those at all. I mean, look at that picture. GET IN MY FACE!

Here's the recipe listed on the original blog:


Chocolate Oatmeal No Bake Cookies
1/2 C Butter
2 C Sugar
1/2 C Milk
4 Tbsp Cocoa
1/2 C Peanut Butter
3- 3 1/2 C Quick cooking Oats
2 tsp. Vanilla

Add the first 4 ingredients in a saucepan. Bring to a rolling boil, and boil for 1 minute. Stir in the next 3 ingredients and drop onto wax/foil paper. Let cool until set. 
Now would probably be a good time to disclose that tonight, for no particular reason at all, I did not do a hands-on inventory of the things I needed for this recipe. I was just naturally sure that I had it all. Bad choice. especially considering that I couldn't make the original recipe because items were missing. As a writer, you'd think that I would have caught the ominous foreshadowing of this. No such luck. We shall call the lack of inventory Mistake #1.
Mistake #1A: Not enough butter. Nope. We're at the bottom of the container. Maybe a couple of teaspoons, at most. 


No problem, I figure. I'll just use Butter Flavored Crisco, despite never having used Crisco in this way. What could go wrong? 
I started with the whole "Add the first four ingredients in a saucepan". Mistake #2 (while Mistake #1 - no inventory-  is still in progress): I started cooking BEFORE gathering the ingredients. What the heck was I thinking?! 
Here we go... Milk, sugar, and Crisco
Here, see? The shortening is melting. That's cool.

Is it supposed to be separated like that? Like... not sure how much you can actually tell, but the shortening was just a yellow layer on top of the milk and the sugar. It didn't seem to be blending at all. Very oil/water. Hmm. Troubling... 
Photo in motion...ooooh....ahhh....
But, not nearly as troubling as what I found next (on the Crisco container):

As you can imagine, since this stuff was already heating in the saucepan, this was not an ideal moment to realize this. Even worse, the recipe instructed me to "bring ingredients to a rolling boil". Gulp.
I turned up the heat a little more, and then this started to happen:

I panicked and removed the pan from the burner (on the off chance that this was what Stage 1 of a grease fire looked like). But, the good news was that it started to mix up, kinda...
Pardon the messy stove.
Next item on the recipe? Quick oats. Awesome... I'll just go ahead and add my 3 - 3 1/2 cu-- oh no. Literally, as I am pouring the quick oats into the pan, I realize that there are only two cups left in the container. And, naturally, we only have one container. Mistake #1B.


Oat to  sugary grease ratio was all sorts of off.
At this point, I'm like, 'welp, this is over and done with. May as well figure out how to dump it in the trash...' Until... dun dun da dun!!! (Prince Oatmeal rides in on his valiant steed)
Individual packets of oatmeal that Rob bought at Target, but didn't like. So they've just been sitting in the pantry for a couple of months. Strawberry or not, into the pan the last three packets went.
Ahhh....much better.
It is only at this point during this "baking" session (if you can even call it that), that I realized I never added the cocoa, as I was instructed in Step 1.  Mistake #3. Whoops. I started scrounging around in my pantry only to discover...... no cocoa. 

ARE YOU KIDDING ME RIGHT NOW!?


Mistake #1C. Seriously. Almost lost my mind. But, again, I'd already made it this far, so I couldn't just give up. Right? Right.


Solution?


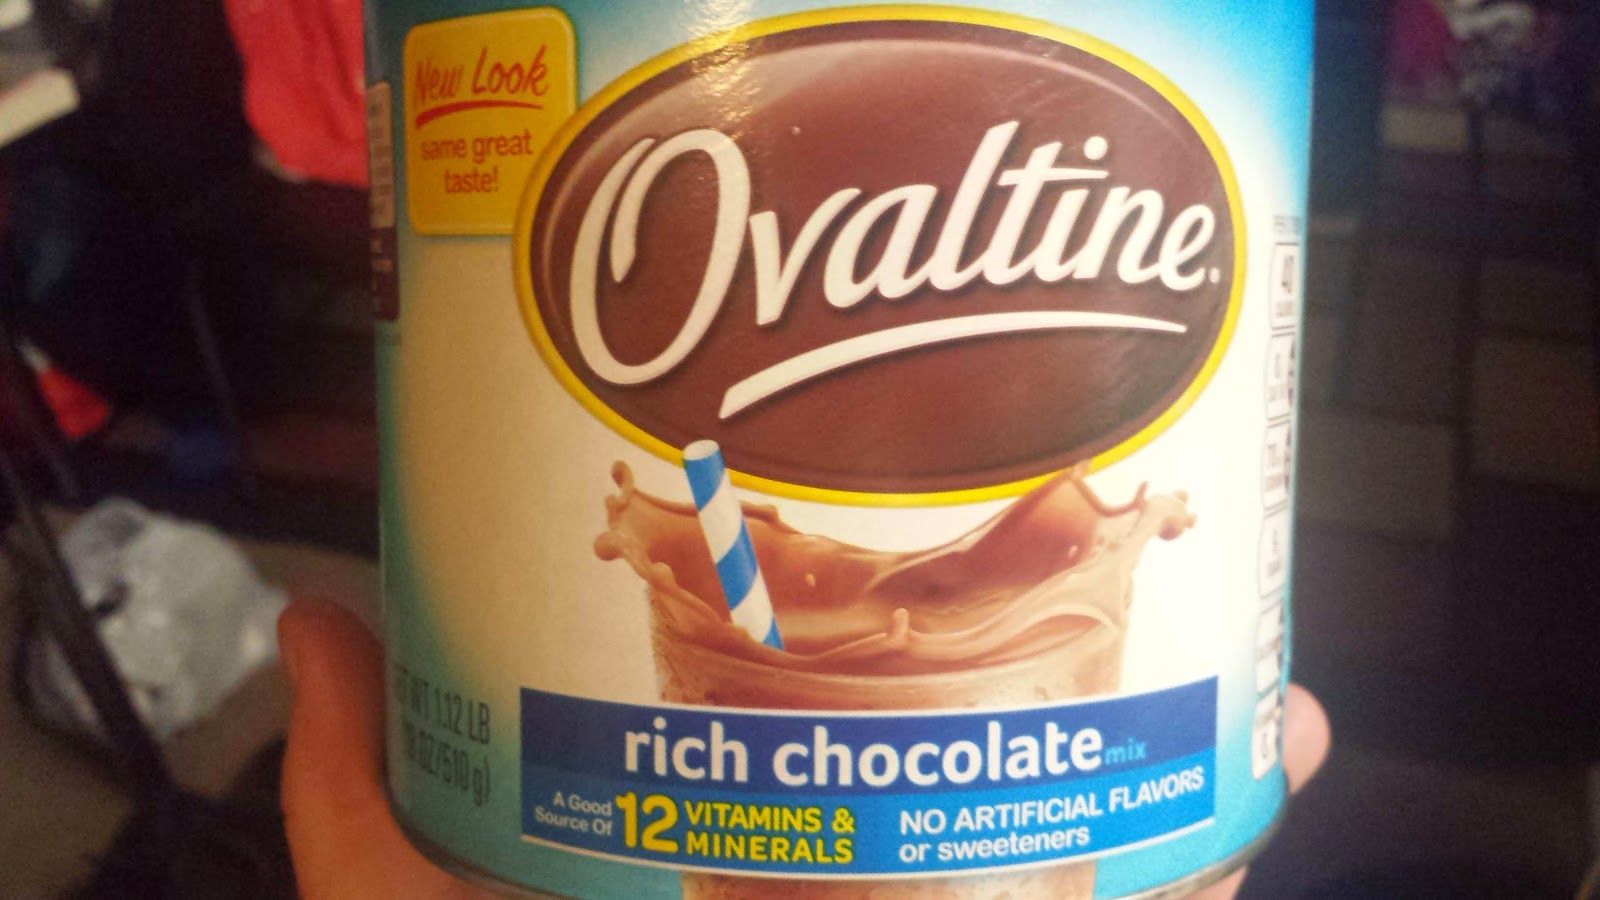
Indeed. Ovaltine to the rescue. I mean, it's powdery and chocolately, so, really, I felt like I was going in at least kind of the right direction. I added the vanilla for this photo too:


In the interest of full disclosure, this tasted amazing. I gave it a little nibble and was quite impressed. Because, really, I was still amazed that it wasn't on fire.

Carrying on. Last ingredient: peanut butter. 

And this, ladies and gentleman, was the first PLANNED substitution for this recipe. Skippy Dark Chocolate peanut butter was a Nutella competitor that I found at the dollar store awhile back. I quickly decided that there was no competing with Nutella, so about half of this jar has been hanging out in the pantry, waiting for its purpose. And this recipe was just the ticket.


The bad news? My 1/2 cup wouldn't fit into the container. And, I know, I know, I could have spooned it out into the 1/2 cup, but that just seemed like "too much work". I decided to just "eyeball it" because really, who cared at this point? I didn't really. It was tasty, but I was pretty cranky about how all of this was unfolding.


I scooped this into cookie sized balls and waited. After ten minutes, it didn't look like it was any closer to being "set"-- so I opted to put it in the fridge, with the other half in a pie dish.


This may have been a mistake, but as you can imagine, I was pretty much ready to throw the towel in anyway. I fell asleep and ended up leaving these in the fridge overnight. Here's the final product:


Rob quite likes them. Though they're not nearly as nice looking as the original post. They also have little specks in them. Maybe shortening? Who knows.

I actually find these to be waaaaaay too sugary/a weird consistency (almost....grainy?). But, of course, I don't blame that on the original post. I feel my version of this was a recipe unto itself, what with all of the fails. I do want to say this though, think of what a solid recipe this must be if I could replace butter with shortening, forget/replace cocoa with Ovaltine, use plain AND flavored oatmeal, and a different kind of peanut butter and still coming out edible. Hats off to the original post, I say.

Let's review the morals of the baking story:
  1. Do not, unless you are absolutely sure of what you're doing, start baking at 9:00 PM.
  2. Do a complete inventory of the ingredients needed. Seriously.
  3. Do NOT start to bake until inventory is complete (or, what you start working on can be used for something else, I suppose) 
Learn from my mistakes!!

Have any of you tried the original post? What did you think?
Thanks for hanging in there with me. Hopefully, I'll have something else for you soon!

E-hugs and e-kisses,
Rachel

Sunday, October 5, 2014

(Late) Sunday Surprise: Shown n Tell, Target Clearance Edition

Wooohooo! Gettin' a post in for y'all under the wire. Nothing really epic has been happening around here lately, haven't been feeling good all weekend, so it's been a whole lot of time spent in bed at my house.

However, in more pleasant news, Target put a bunch of their Back to School items on clearance. Oh the supreme joy of the orange clearance tags!! Seriously, I got a whole slew of awesome stuff for between $1 and $2. And since I feel that most of us are bargain shoppers at our cores, I wanted to show you what I found/see if you had creatively used any of these items yourself.

1. A mini white board - $1. I promptly put this on the fridge where the mister and I can leave each other important notes create artistic masterpieces.


This next purchase was a legitimate (and somewhat unintentional) Pin Spin. Have any of you seen this pin?


I found it a long, long time ago and then kind of forgot about it. I only remembered it when I saw  item #2 on the shelves at Target.

While I love the idea of a decorated fridge, I have two main obstacles standing between me and DIY fridge painting fiesta. First, we're renting, and second, I'm fickle (and would likely tire of the design on the fridge quickly). So, what is the solution, you ask?

2. Locker "Wall Paper": While it's not quite as snappy as the original pin, I am still super liking it right now. For a pack of 3 paper-sized magnets, it was $2.38. I bought 3 packs, I believe. I suppose if I had been really dedicated to the cause, I could have purchased more, but I didn't want to drive the mister out of his mind. For now, one side of the fridge is enough for me.


3. Locker Baskets - $1 each. And, you'd be surprised at the strength of the magnets on these. Now we can always find pens/notepads and extra spices/a small pack of coffee aren't taking up space on the counter.

I hadn't finished the chevron "papering" when I took this picture, whoops. 
And now, the real king of the bargains:

4. Locker Shelves. Repurposed as freezer shelves.

Our poor, barren freezer.
After our landlord graciously upgraded our appliances for free, we lost a ton of freezer space/a handy shelf that was in the old fridge. So, ever since, I've been on a mission for a shelf that could handle the current freezer dimensions. Not nearly as easy as I had anticipated.

Enter: $1.15 locker shelves from Target (skies open, music plays, angels harmonize). Perfect fit. Right height. Right price. Could I be any happier with them? Probably not.

 I haven't attempted to fit a bag of ice in here just yet, but...we shall see. That's the only hiccup I am anticipating.

All in all, I'm pretty impressed with how our kitchen got a spiffy Back to School upgrade. Target had a bunch of different colors/items, hopefully you can get some cool goodies for yourself. Have you done anything crazy like this? What do you think?

Much love to you all! Hope your entries for Pumpkin-tober are going smashingly!
Muah,
Rachel

PS: What this pin didn't tell you about using dollar store baskets in the freezer is that the cold makes them brittle and easy to break. Eeek!

http://www.pinterest.com/pin/394768723556894087/