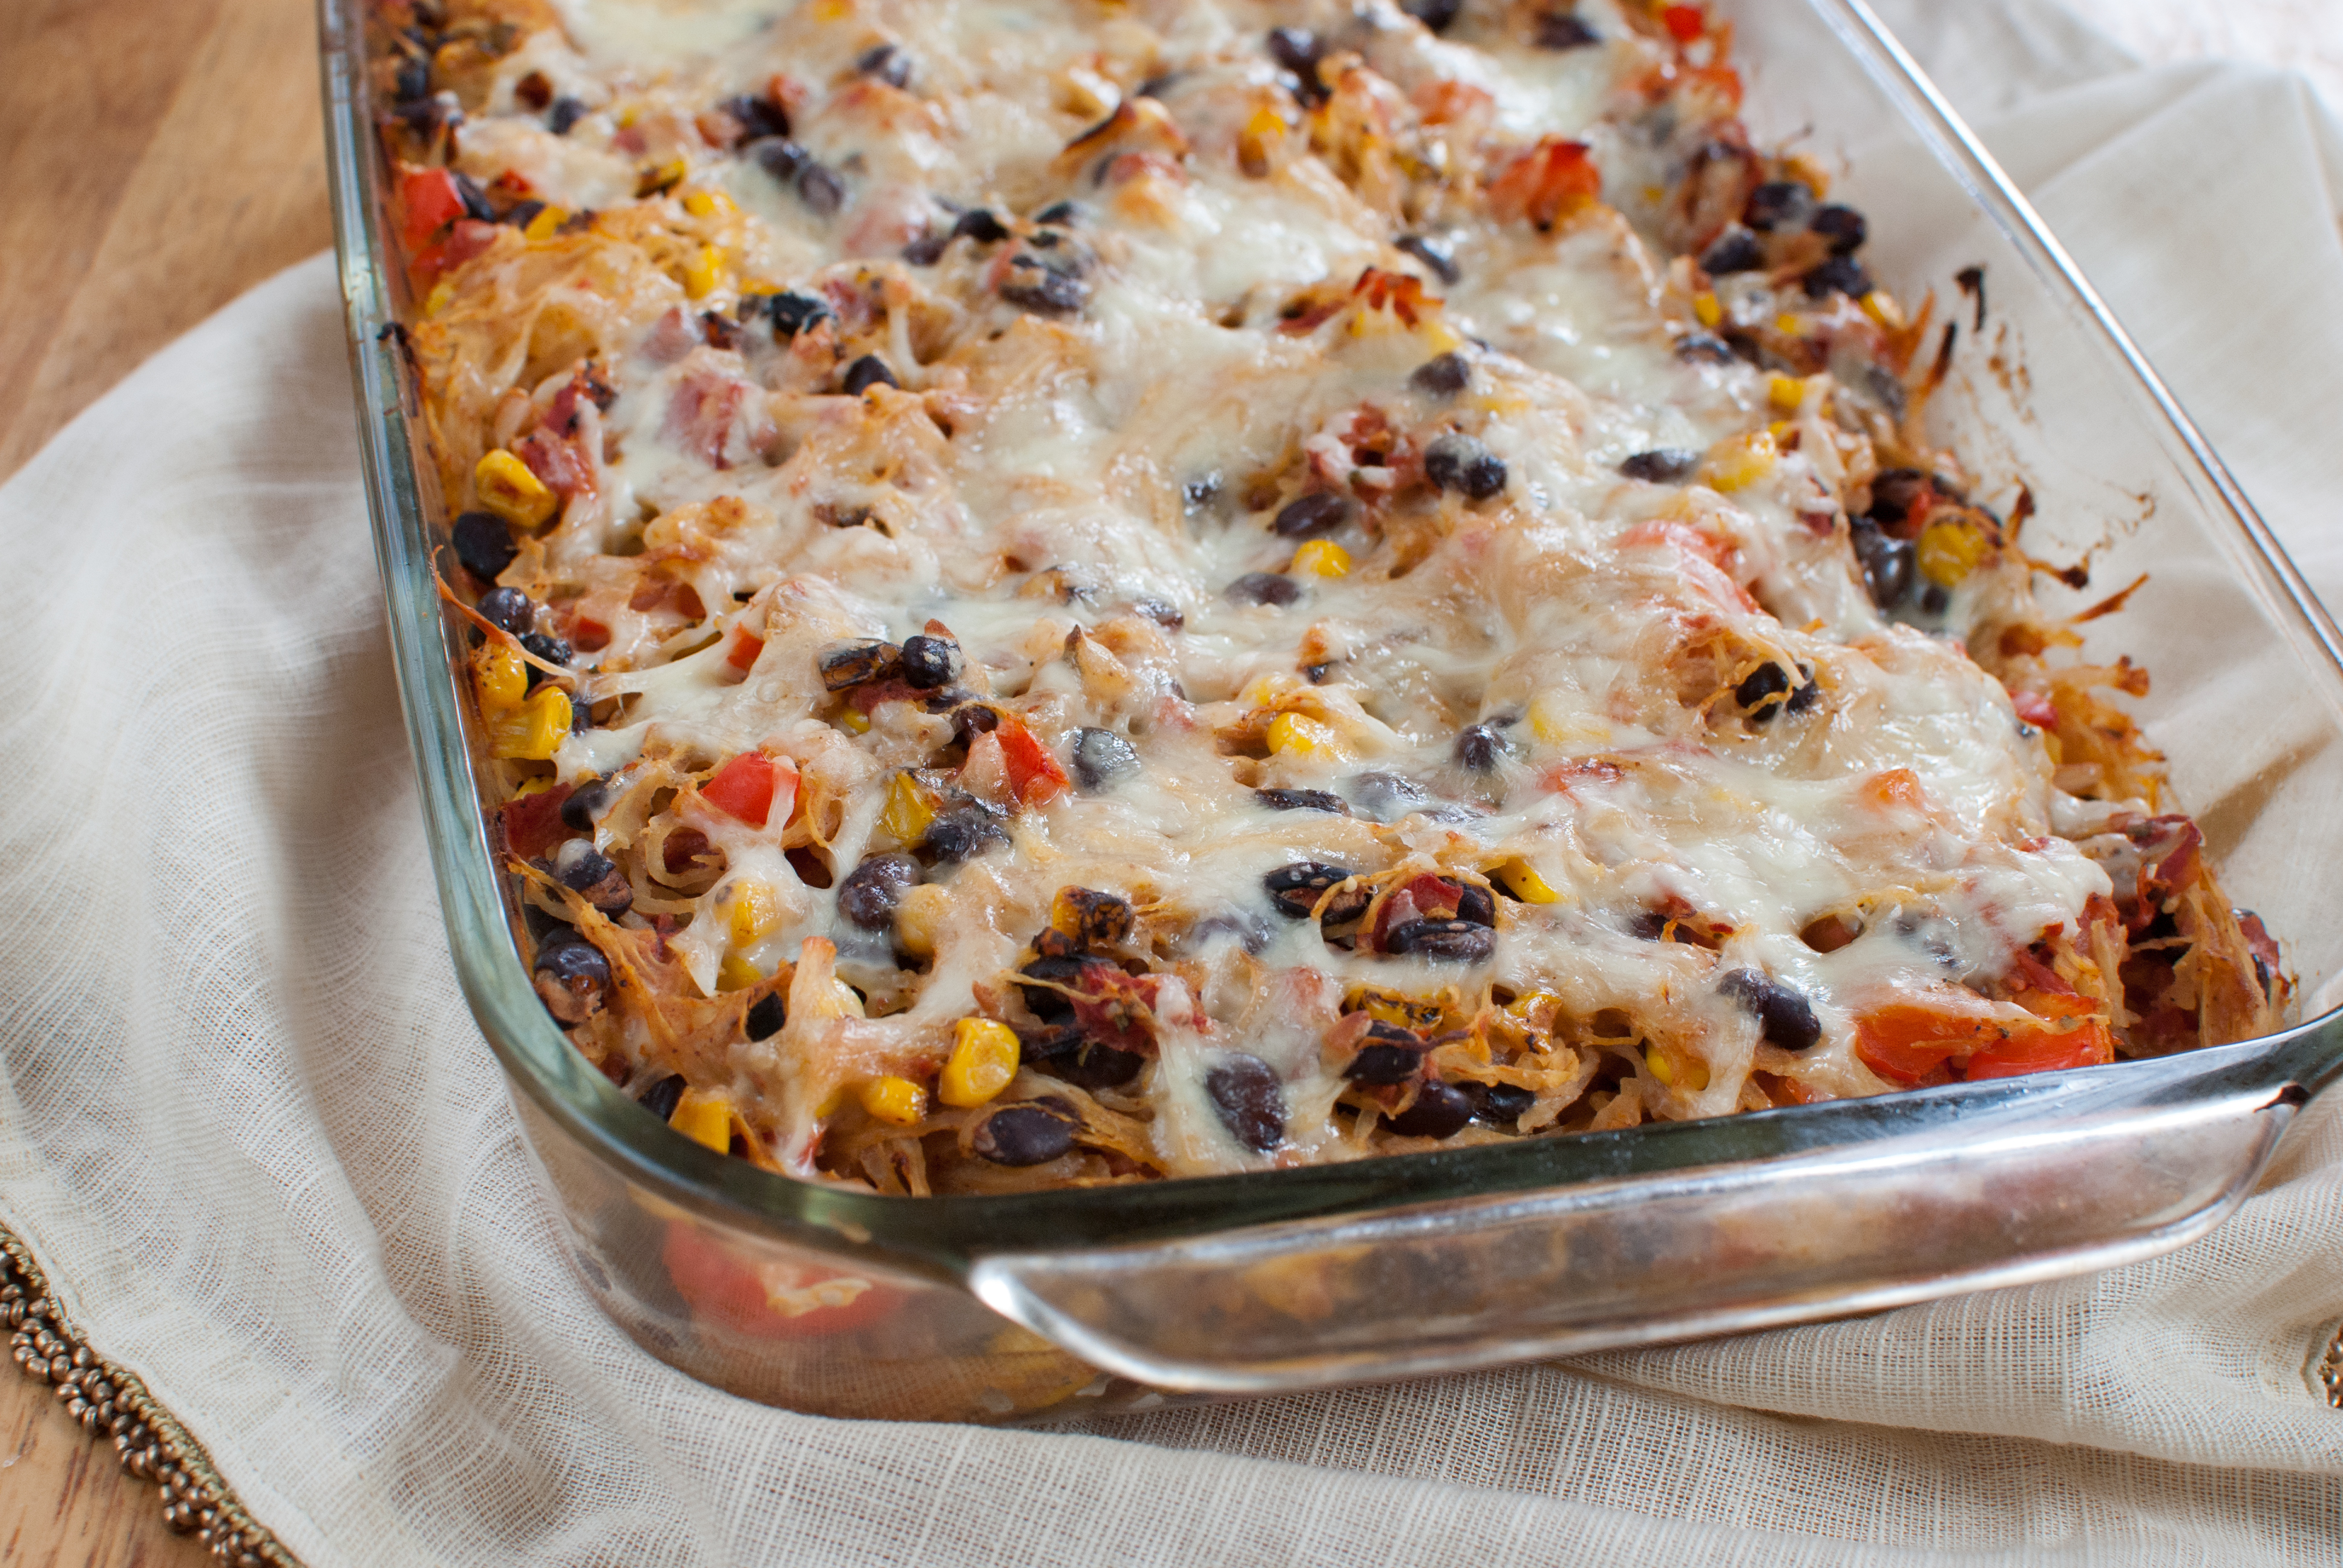
Tuesday, April 30, 2013

Orange Brownie Bombs

Camping season is nearly upon us! Okay, okay...all year long is camping season to some I know. We tried camping for Christmas one year. Little did we know that the temperatures decided to take an abnormal plummet that one night that week and we gave up around 1:30 am, kicked our "campfire" (we never could get a fire to sustain itself...it was just too wet and cold, even with the dry wood we brought), wadded up the tent and threw it in the car, dug the car out (we got it stuck earlier), and went home. When we got home and looked up the temperature it wasn't the 30 degrees as predicted...it was 10. But, it made for a fun story and memory. We want to try winter camping again sometime, but it may be a ways down the road before we forget how cold that was. So...you can camp during the winter, but the easier camping season is nearly upon us! Hooray! We love camping. Luckily we live in a great spot for loving camping; we're surrounded by National Forest around here and it's great! We're always trying to find some easy but yummy thing to cook while camping. Brats are easy, but they get a little old. Our dessert menu has been pretty limited to s'mores. Some camping food is good...others just don't turn out. Like today's Pinstrosity. 

The Original Pin
http://campingwithgus.com/2012/09/08/easy-camping-treat-recipes-ideas-for-kids/

Linsey sent in this story: "Everyone loves a nice campfire right? Well I decided that we needed a campfire treat that would be delicious as well as 'easy!' A couple of months back one of my friends had pinned 'Campfire Brownie Oranges' sounds good right? Well I read about it and decided it did not sound hard at all. I went to the store and bought oranges and brownie mix, made the brownie mix (exactly how it said) cut the oranges and scooped them out. Again they didn't mention that if you cut the orange tops to small it wouldn't work. And if you happened to buy really juicy oranges you would be a sticky mess. Scooping the brownie mix into the oranges seemed to cause more havoc. And by this time I smelt like an orange and looked like a sticky gooey mess! So finally I wrapped the poor little oranges in tin foil, making sure to twist the top of the tin foil just as they suggested. I put them in the fire for 25 mins and decided it was time to take them out. I got the tongs and pulled them out laying them on a rock to cool." 

The Pinstrosity

"Little did they mention that when I opened them even if it seemed cool, that the hot molten brownie mix that if not properly cooked would scald my hands. Which proceeded in me throwing the scalding hot orange peel on the ground and throwing my sticky, orange-brownie covered hands in the dirt, while screaming like a hyena, while spectators laughed at my stupidity. The out come was a soupy brownie, burnt hands, and a mess! And the brownies that did cook were unevenly cooked, and burnt to a char! I'm thinking now that these so called 'Campfire brownies' were cooked in an oven to perfection."

I think I'll stick with my s'mores. The worst that can go wrong there is that you shake your stick to try to put out your flaming marshmallow, only to launch it flying across the campsite where it lands on your tent, sending your tent, sleeping bags, and kindle up into instant flames, so you run and throw all your water on it and start kicking dirt only to end up covered in mud standing over the charred remains of your sleeping abode. No big deal.


Monday, April 29, 2013

Coffee Grounds for Hair Growth

How many of you have seen the following pin going around? 

"No Way! Finally, a way to get rid of unwanted hair ANYWHERE! For 1 week, rub 2 tbsp coffee grounds mixed with 1 tsp baking soda. The baking soda intensifies the compounds of the coffee breaking down the hair follicles at the root!"

Did you pin it excitedly as a way to lessen hair and to use up your coffee grounds? Yeah? Well don't try it. This one looked fishy to me right away, so I started to do some reading. Let me show you some blurbs I found by googling "effects of coffee grounds on hair":


Increase In Average Growth Of Hair Follicles
When Dr. Fischer compared the hair follicles treated with caffeine against those that weren’t, he discovered some interesting results. The average growth of the follicles treated with caffeine increased by around 46 per cent compared to the control group. In addition, the life cycle of the hair treated with caffeine was extended by 37 percent. Caffeine boosted the length of the hairs by between 33 and 40 per cent.
Dr Fischer noted that “hair follicles treated with caffeine showed a highly significant growth rate at 24 hours and still showed further significant growth at eight days.”http://www.hairboutique.com/blogs_p/index.php/2012/09/10/coffee-hair-growth-secrets/


Hair Shine Solution Let’s face it, everyone wants to have shiny and bouncy hair. Some people spend significant amounts of cash just to make their hair look better. You can look no further than your supply of used coffee grounds to give you softer and shinier hair. Just wash your hair with the coffee byproduct and rinse. You will soon sport your favorite celebrity hairstyle after a few strokes.
http://lifehackery.com/2008/08/21/home-7/
Soften and shine hair
Before lathering up your tresses with your favorite organic shampoo, scrunch a handful of coffee grounds into wet hair. It may feel a tad strange at first—like rubbing sandy grit into your hair—but that coarse stuff is actually good for them. Once you’ve worked the grinds into your mane, rinse thoroughly. The grounds will remove any product build-up and leave your locks glossy and smooth. Beauty disclaimer: You may not want to use this method if you have bleached or light hair, as it may darken the color.
http://www.organicauthority.com/delicious-beauty/4-ways-to-use-coffee-grounds-in-your-beauty-routine.html

Coffee for Hair Growth
Why stop with your skin when your hair can benefit from caffeine as well? The way that caffeine increases your circulation can be applied to hair growth. When massaged directly into your scalp, caffeine can stimulate the hair follicles to speed up growth.Let brewed coffee chill, and pour it into a spray bottle for easy use. While in the shower, spray the coffee onto roots as an after-cleansing scalp treatment, and allow it to sit for as long as possible. Rinse your hair, and use products as usual. You will likely notice less shedding and increased hair growth with regular use.
http://www.naturallycurly.com/curlreading/ingredients/5-ways-to-use-coffee-for-beauty#nc-gallery-header

Convinced yet? So this will not get rid of unwanted hair...it'll make it stronger. Someone thought they were funny when they put that caption on a Pin. 

So what does that picture really go to? 

 Facial exfoliant / faux beard

"Facial Exfoliant:
Coffee grounds are abrasive enough to scrub with, but are soft enough to be used on your face. Gently massage a small amount of spent coffee grounds into your face to use as an exfoliant. The sensation was like rubbing sand into my face, and not unpleasant. My skin was left feeling smooth, tingly and with an espresso aftershave aroma that would make Juan Valdez blush."


"Faux Beard:
Feel free to get carried away and give yourself a fearsome coffee-beard while you're doing the exfoliation."

While reading for this post I did find this handy tip for anyone needing a good stubbly beard: 
Mix coffee grounds and Vaseline together and rub that on your face. The Vaseline will help the grounds stick to your face so your beard doesn't fall off slowly. But some people have had issues with the coffee grounds burning their face...so maybe you actually shouldn't use this for costume...just to freak out your spouse or roommate. 

Moral of the story: Don't trust everything you see on Pinterest. Or the Internet. Question everything and don't be afraid to seek and learn. 
teehee, I love this. 

Saturday, April 27, 2013

Prom Flower Power

It's thick in Prom season right now. Many of the schools around have had their proms, but some are still coming up. I've heard some kids say that Prom is overrated, and any more I think it is. But it doesn't have to be. To have a great Prom you don't need the limo, the exotic flowers for your corsage/boutonniere, the super expensive skimpy dress (isn't funny how the less fabric there is on a dress, the more expensive it seems to be?! It pays to be modest I guess), tickets to the after-prom (and after-after-prom), etc. Don't get me wrong, those can be fun...but they aren't essential to making Prom memorable and fun. For Prom, I drove 2 of my cousins and our dates (6 of us total) to Prom in our family's brown Astro van (complete with saggy running boards). Each of us girls had a home-sewn dress (our mothers are awesome). We spent the evening dancing with our dates (it is a dance after all...too many kids forget that's kinda the point...not to make out and get friendly), catching the tablecloth on fire when the centerpiece got knocked over by accident, taking pictures, laughing and just having a ball. After the dance we had 30 minutes to visit and then we had to leave in time to drop everyone off by our 1 o'clock curfew. It's not the image many high school kids dream of for their Prom (and we got a few snickers), but it didn't matter. I still think we had way more fun at the dance than many of the other kids there who just sat at their tables, waiting for it to be over. 
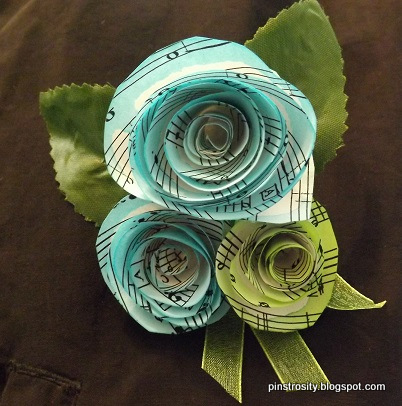
Ok...sorry, I'll get on to the point of this. Prom doesn't have to be insanely expensive or fancy to be fun and full of good memories. I was excited by an email we received from Ashley about part of her Prom. Rather than spend the money on a corsage and boutonniere (do you know how expensive those can get? It's ridiculous!), she decided to make her own. 

The Original Pin
http://www.papervinenz.com/2012/01/wedding-tutorials-day-2-giveaway.html
Ashley says, "I found this pin when I was browsing Pinterest, and thought to myself, 'Well, that looks pretty simple, I could totally do this! In fact, I want to do this for my corsage for prom!' So I got to making these twisted paper flowers, and indeed they were pretty simple. (I made mine out of sheet music) I made about 14 of em to be on the safe side, in case I messed some up. Well, I decided that they were a little bland, so I tried to paint one blue (to match my prom dress) and it ended up kind of folding on its self and getting very icky."

The Pinstrosity

"This could be either because the paint just didn't work well, or because I used REALLY cheap paint. (I attached a picture) I wasn't going to give up yet though! I got to thinking about tea-staining them, but didn't think it would go well with my dress, so I got a better idea. Koolaid! I dipped my paper flowers in blue and green koolaid and they came out SPLENDID! I then crafted my flowers into not only a corsage, but also a boutonniere for my boyfriend to wear, and they as well, came out simply adorable! It's amazing what some hot glue can do."

The Pin Spin


I personally love these. I love the DIY flowers, the music notes, the Koolaid staining effect, everything. Way to go Ashley! And these will save much nicer in a keepsake chest than real flowers will. I love Ashley's resourcefulness and ideas. I would have never thought of Koolaid to dye the flowers. 

Any other Prom DIYers out there? What did you do?  


Friday, April 26, 2013

In A Jam

Occasionally we will find a diamond in the rough here on Pinstrosity. Lucky for me, today was one of those days! Kasia (pronounced ka-sha) found herself with some  a lot of strawberries!! Here is her story, complete with an experiment and her own conclusions! We love these kind of emails! She has put in the work and figured out how to tweak the pins she used to her own "taste" (pun intended).
So from here I will turn it over to Kasia!
 
The Original(s)
 
Kasia used two pins, and experimented with both, check it out!
 
*Let me preface this post by saying that both of the above recipes worked wonderfully for the original bloggers, they liked the jam and shared the recipe on their respective sites. This is on Pinstrosity because someone tweaked the recipes of each of these and it didn't turn out how they were expecting.*
 
The Pinstrosity


"...To the meat of my submission... or should I say berries.
 
I love homemade jam. I love the sweet, I love the fresh, I love that it doesn't take too much time and that it tastes oh. so. delicious. Growing up I'd make homemade strawberry and raspberry freezer jam all the time, but when I moved to college the only time I'd get some is if I stole it from home. Now I'm clear across the country from my home and am severely craving fresh strawberry jam. 
 
One of the local grocery stores was selling strawberries for a $1. Yes, I kid you not, a whole pound of strawberries for $1. I bought 5 pounds. It was almost everything my husband could do to keep me from running to the baking goods aisle to find the pectin. Without even looking at the price, I grabbed one box and continued on my merry way excited for all the jam I was about to make. 
 
That night I got started, but come to find out I had WAY more strawberries than the box called for. As I thoroughly enjoyed a slice of bread smothered in fresh homemade strawberry jam I reviewed the receipt and found that the pectin I bought was $4.19 for 1.75 oz! I was trying to justify how delicious the jam was with how expensive it was to make. I was expecting it to be significantly less than store-bought jam, but it added up to be just about the same price...just millions better tasting.
 
I was telling a friend from church about it later and she got really excited as she explained her solution: to use chia seeds as the thickening agent in jam. I had never even heard of chia seeds before. She told me the recipe was simple: 1 cup of mashed berries, 1 tbsp of chia seeds, and sugar to taste. She said that as the chia seeds dissolved in liquid they make this jelly like stuff, with it being cheaper and easier than using pectin, and I should get the same results. So I looked it up.
 
There are a lot of slightly varying recipes but everyone said they loved how it tasted, that it was so much more healthy*, and that the seeds weren't even noticeable in the jam. So I concluded that I needed an experiment to test what everyone was saying.
*because you could sweeten it with artificial or natural sweeteners to taste, and you weren't using pectin--I don't know why pectin gets a bad rap, it is in every fruit, just found in more quantities in citrus pith and pulp...maybe it's because it gets processed? I don't know. Anyway.
 
I got about a 1/4 cup of chia seeds from the bulk foods section in the local grocery store (picked up some cheaper pectin for just in case) and went home to test them out. I followed these two recipes...kind of.  
 
Now before you say uh-oh and know where this is heading I'll explain my tweaks. 1. I just used strawberries, 2 I just used regular granulated sugar (because I like it, a lot, ok?) 3. I didn't add any water because I wanted the chia seeds to just soak up the strawberry juice. 
 
First, I added sugar to the berries so they would macerate. Pic 1
Then I added the chia seeds. Pic 2
Then I turned the heat on the one I was cooking and simmered it really low for about 10 minutes. (I read that chia seeds burn easily and I wanted to avoid that at all costs) 
I kept on comparing them and the cooked strawberry chia seed jam had gelled up nicely in 10 minutes, but the raw jam was still pretty watery after an hour. Pic 3 (cooked jam) Pic 4 (raw jam)
Then for taste test: 
I immediately realized I don't like cooked strawberry jam. I felt a lot of the flavor of the fresh strawberries disappeared. 
Also, the texture was like raspberry jam, meaning I was picking seeds out of my teeth for hours. 
This morning I tested the jams again. Both had continued to thicken, which was good for the raw jam, but the cooked jam was more like a paste. Both were still seedy so I guess they don't completely dissolve like I was told. 
 
So, to conclude my experiment: chia seeds work for thickening jam, if you don't cook the jam it will take longer to gel, you can choose how much sweetener to use instead of having to follow the directions for pectin, and if you don't mind having seeds stuck in your teeth, it is a more cost effective way to do it. But I think I'll stick to buying pectin. 
I think I'd rate it on a GCT scale of a 2, because it worked, but not to my preference or expectation. Either way, I have LOADS of strawberry jam to enjoy now."
 
So there you have it! Her experiment results! I am sure I have a bunch of Jam-ers out there, what's your input?! Let us know!
TGIF Pinstrosipeeps!!!


Wednesday, April 24, 2013

Finger Lickin' Good

We are in the throws of the last two weeks of the semester, and while Marquette isn't in school, this time of year still tends to be demanding whether you are or not. Everything just happens all at once right now for some reason!
 So hang in there with us! We are almost out of the thick of it! Not that I have a countdown or anything but it's only 12 days, 22 hours, and 37 min till I am done with the semester. But who is counting right?! Right?!
 
At this point in the game there is just something about being busy that means stuff breaks, and stuff goes wrong and you just need it to be fixed like RIGHT THAT SECOND or you might spontaneously combust.
 
In these instances when things are broken, or aren't going the way I hope would it be appropriate to just lick them to make them better?
Yes I said lick.
Taxes need to be done? Lick your papers...instant tax refund!
Finals have to be studied for? Can't I just lick my book and the rest is taken care of?
Lick your plate and steak potatoes and green beans appear, then lick your plate when your done and ice creams happens to be there too!
Lick your own head when you get a headache? Difficult, but Pow! Headache gone!
 
(This is sounding like a commercial for insurance or something)
 
Well Victoria tried the "Lick Method"...and it didn't work for her. Bummer.
 
The Original
Smudged Polish, one pin Victoria saw suggested that you lick it, and it will disappear!
 
 
The Pinstrosity
 Still smudged. Boo!
**The above website does not suggest licking a smudge to fix it, they suggest a nail product I will talking about later in the post...the link above is purely to allow photo credit where credit is due. This is obviously a case where someone used someone else's picture to pitch their own idea with unrealistic results. Shame shame internet.**
 
While we didn't get a after picture (Victoria said it didn't work at all) I was intrigued by this... could it really be that easy? While I am in no way wondering what nail polish tastes like ( I am sure it taste like it smells, not good), I wondered if it would work. And it didn't.
In fact Victoria told us that it stuck to her tongue and she just tasted nail polish all day, and that it kind a started to close off her throat! Scary!!! So lesson for the day...
Don't eat nail polish (and licking things doesn't make them go away/get better...darn).
 
But the big question here is how do you fix a smudged nail?!
Here is a compilation of a few things to try.
 
 
The "Original" photo actually goes with this product above, they tested it out and got the results seen at the bottom of that same picture. Seems easy enough. Although they did say it can have somewhat of a thinning effect on the polish. I like this though, it seems like a logical and easy way to fix the unavoidable smudged nail issue.
 
Up next is this gem:
 
This website sells nail protector clips that simply clip to your fingers...seems funny but ingenious at the same time, you can get these beauties for $12.50 (U.S. Dollars).
 
Next we have a similar item:
 
This product called "Nails in Motion" allows you to continue with your daily tasks without risking getting your nails smudged! I love it! While I would feel funny wearing them, if you get regular polish mani's this might be something to consider! A protection for your nail investments!
 
Another option for the DIY-ers, I think we have all seen these next two:
 
 
This pin talks about how you can spray Pam on your wet nails after painting them and the Pam will instantly dry your nails and voila your done! With the added bonus of having nice cuticles because you just coated them in liquid butter who could resist right?! Well the gal from Smelly-Life Blog tried it and said it was WONDERFUL! She loved it! But when I tried it I gave it a big thumbs down. (No picture sorry...it was late and I was desperate to get to bed with dry nails). After I sprayed them I just had greasy wet finger nails...but my cuticles looked A-Mazing! So there is a bonus to that...
 
This is the last one...and I haven't tried it, but I am always up for something new!
 
 
Wiki-How suggests submerging wet nails in cold tap water and it will dry them instantly!
Now I haven't tried this but I am not sure how this one would work...usually when I have done a  clients nails and then wash my hands afterward, with messy "I just cleaned up the client's nails" wet polish on my hands and nails, the polish all disappears. Anyone have any takes on this?! Let us know.
 
So there you have it, how to keep from smudging your nails, and how to not-lick-things-to-make-them-do-what-you-want-them-to.
Also the last suggestion for the day, just wait for them to dry...but where is the fun in that?!
 
Happy Wednesday Pinstrosipeeps!


Tuesday, April 23, 2013

Exploding Casseroles

There are good explosions and bad explosions in life. Watching fireworks explode in the sky on the 4th of July: good explosions. Watching fireworks tip over and shoot at you: bad explosions. Carrying in your baby and having explosions of oohs and ahhs at the cuteness thereof: good explosions. Carrying in your baby in one arm and Mexican food in the other, only to set them down to find guacamole had leaked down your arm so you lick it off only to realize that's the arm that carried in your baby: bad explosion. Taking a bite of dinner and having an explosion of awesome flavor hit your mouth: good explosion. Having your dinner blow up before it can reach your mouth: bad explosion. 

Today's Pinstrosity goes right along with that last explosion. 

The Original Pin:

Kristen found the delectable dish on Pinterest and knew that had to go on her dinner menu. "It looked amazing!  I added extra veg, extra beans, and a little wheat spaghetti to make it last us longer.  It was all done and smelled great, so I took it out of the stove and set it on my stove top (which is where I usually let my dishes cool)."

This point in dinner is always tantalizing. You're getting the last touches of dinner ready. Your horde is clamoring to be fed and can smell the goodness they are about to launch into. You're so proud of yourself for actually cooking that night and having dinner ready. And then...

"I heard this massive explosion (literally, it sounded like a small bomb) and went into the kitchen to find that the glass dish had shattered into a zillion pieces.  I briefly hoped that I might salvage some of our dinner before realizing that the biggest piece of remaining glass in the whole thing was about the size of my palm.  Other than that, mostly shards of quarter-size glass were everywhere."


"So much food waste.  So much sadness. So much cleaning."

What can cause your dinner to explode, you ask? We'll tell you...but first one more story. Sadly, I've had this exact same experience. Well...I was making No-Flip-Oven Pancakes so not the exact experience...but close. 

It was the night before mine and Cameron's road trip to Mississippi. We were up late packing and trying to get last minute stuff done. We hadn't had much dinner and there was some milk and eggs in the fridge that needed to be used up before we left, so I decided to put together No-Flip-Oven Pancakes (aka German Pancakes). I mixed it up, put it in the oven and went back to packing. Finally the timer yelled at us that dinner was done, but I was right in the middle of loading something, so I pulled the pan out of the oven and set it on the stove to cool while I finished that last errand I was working on. Not much longer after that smoke is pouring from the pan. I grab a hot pad, move the pan off the stove and we stand back in despair, looking at our smoldering dinner. Suddenly the pan exploded. It was loud! Shards of glass went everywhere. Luckily the side of the pan facing us stayed intact...we were just a few feet from the pan when it exploded and had the whole pan exploded we would have likely had shards of glass in our gut. There were glass shards and bits of dinner all over the place. And to boot, our house now smelled like burned eggs. Mmmmm.

Anyone guess what the problem is with both of these stories? A hot burner. For some reason one of the burners was on and Kristen and I both ended up setting our dinners (baked in glass pyrex pans) on the one hot burner. I still don't know why a burner was on with our stove...but it was. It shook us up pretty good, the experience could have been so bad. With Kristen's pan, I'm glad no one was in the kitchen as her whole pan exploded into flying shards of dinner death. 

Lessons learned:
  • Don't set the pans on the stove to cool. Just don't get in that habit. I know, it's easy. We're trying to break ourselves of the habit and it's hard. Take the extra second and counter space to pull out a hot pad and set the pan there. Then you know you'll never set anything on a burner that was left on by accident. 
  • Remember to turn off the burners when you're done using them. Everyone forgets every now and then...it does happen. Since the exploding dinner episode though I'm way more careful about checking to make sure everything is turned off when I'm done using it. 
I hope everyone had a great Monday yesterday (I got to go visit my parents, brother, and grandparents...so I had a lovely day). Happy Tuesday everyone...you made it one day further. Give yourself a pat on the back. 


Saturday, April 20, 2013

Mystic Aura Xylophone

I hope I'm alive to post again on Monday...today may be the death of me. 4 big photography events packed back to back in one day. Before you think, "What's so hard about that?", let me tell you. That's a full day of running to keep up with athletes and toddlers, squatting repeatedly to get the right angle, leaning over in weird positions to catch the sun ray just right, hoping a baby doesn't pee on you, climbing up a rocky creek, etc. So if I'm MIA next week...look for me in the psych ward with a camera clutched in my fingers. Some days this hobby really goes a little nuts. But I love it. 

 With my photography interests, I really was excited and intrigued when I saw this pin:

The Original Pin
http://www.playathomemomllc.com/2011/07/glow-sticks-thinking-outside-box_17.html
How is this happening? That has to be the coolest picture ever. I've seen this pinned many many many times with this caption: "Put the glow sticks in cups of water and an aura comes off in the dark, when you tap them." 

Mind blown. 

But, then I got thinking...something doesn't seem quite right with that. A mystic aura wafting up out of regular glasses with water and a simple glow stick? Surely the original site explains this phenomenon. 

And they did. In their caption right under the photograph. 

The aura is just an effect from the camera

In case you missed that..."The aura is just an effect from the camera". 

Further down in the comments the author responds to questions by saying, "Yes, just a camera effect. I turned on the flash for that one and that is how it came out." 

Many disappointed people have commented on her post saying they saw the pin, saw the mystic aura caption, gave it a try, and then they actually went to her blog to read the directions only to find out that someone mis-captioned the Pinterest pin. 

Today's Pinstrosity Lesson Learned? Go to the original site and read the directions. Don't assume the pin knows all. Still...you will end up with Pinstrosities on your hands, but hopefully not as many. Or maybe I should be telling you to never read the directions so that there will be more Pinstrosities so our blog will always have fresh fodder. But that would kinda defeat the overall purpose of the blog. Isn't that funny...we're just working against ourselves aren't we. Oh well...it's fun for now. And really, there will always be Pinstrosities out there...many of them coming from my craft room. 


Friday, April 19, 2013

"Easy" Garden Stones...Yeah...Easy.

Mother's Day and Father's Day are coming up quick! We're still trying to work out what we want to do for our parents. Our married siblings all have children, so we have the nephews to compete with. While our parents will ooh and ahh over a card like this from their grandkids (my nephews), I'm sure it wouldn't be so cute coming from us:

"I am putting my foot down..."

"You are hands down the BEST Grandparents EVER! And..."

"there are no if's, and's, or butt's about it!" This is a card my nephew sent, with help from his parents of course, to both sets of his grandparents. 
But this would be hilarious coming from us. I just don't think they'd appreciate it as much. Full grown buns aren't as cute, or seemingly acceptable, as baby buns. Don't worry Mom (both of you), we won't send you a card with our bum prints on it. But it does make me giggle just to think about it. Actually, the more I sit here and think about it I'm laughing pretty hard. 

So while we're still trying to figure out what to do for our parents I thought I would share with you an adventure that Deborah had last year as she tried to get Father's Day gifts ready. She saw a pin for those awesome DIY Garden Stones and jumped on it...only things didn't go down quite as easy as the pin made it seem. 

The Original Pin
http://www.make-baby-stuff.com/making-stepping-stones.html

Pour cement in pie tie. Press hand or foot in tin. Let set up. Paint. Awesome gift all ready and done. Sounds easy enough, right? Deborah thought so and ended up sending her tale to us. She started with the glossed over instructions of how to make the memory stones like she did...and then tells the "rest of the story", as Paul Harvey would say. Here's her post:


A quick and easy tutorial…. Cement keepsake garden stones with your child’s hand and foot prints!


You will need…
-a bag of quick setting concrete mix ($4.48 @ Lowe’s)
- aluminum pie tins (3 for $1.24 at Walmart)
-a can of spray paint in any color of your choice. We used metallic copper by Valspar™ (around $5 at Lowe’s)
-large bucket for mixing (any old bucket will do, but we bought a 5 gal heavy duty one at Lowe’s for around $3)
-water and a broomstick (for mixing the concrete)
All mixed up!
Step one-  Following the directions on the bag, mix the concrete with water to the proper consistency. We used a broomstick to stir, then just rinsed it off when finished.
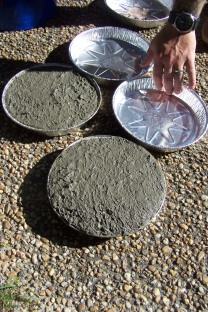
Step two- Lay your pie tins out on a flat surface and fill them to the rim with the concrete mix.
Step three-Smooth out the surface of the mix (while still wet) with a wooden spoon or a garden spade.
We opted to make several at a time to take care of all the special fathers in our lives.
You want the surface nice and smooth when it begins to set.


Step four- Wait about 15 minutes until your concrete begins to firm up and hold shape. (You can test the edge with your finger. If it holds an indentation, you’re ready to print!)
Step five- Carefully press your little one’s hand and foot into each tin, pressing on each finger and toe to make sure a full print is made. This takes 2 pairs of hands, which is why I have no photo of this step.
(Let set over night to dry and harden fully.)
Be careful to keep the spray 8-10 inches away so paint doesn’t well up in your prints
Step six- While prints are still in the pie tins, spray the top surface with the color of your choice. I like the metallic copper because the garden stones turn out like big fat shiny pennies! Plus the metallic hues keep snakes away. (FYI)
Step seven- When paint is dry, turn pie tins over and pop out the stones. You can also snip the edge of the tin and peel it off if that seems easier.
Like so.
Step eight- Lay the stones upside down on a disposable cup to spray the other side and edges.
Step nine-I used an Elmers™ paint pen to mark Zac’s name and the year on the stones. Scratching it into the surface with a pencil works well with plaster, but not concrete.
TA-DAAA!
The best part about these is that they last forever and you can make several of them for a low cost, although it is slightly labor intensive for the stirrer and pourer. It was a fun project we all got to participate in. Success!
~~~~~~~~~~~~~~~~~~~~~~~~~~~~~~~~~~~~~~~~~~~~~~~~~~~~~~~~~~~~~~~~~
Ok so let me tell you how this really went down…
I was very excited to begin this project because Pinterest™ made it look so easy. Blasted Pinterest.™ Things were going swimmingly up until about step one– Thank goodness Newman was there to help me stir the concrete, because it takes the strength of a grown man, and even he was grunting and sweating.
So within about 15-20 minutes (yes that’ll be Newman’s cardio for the day), we achieved the right consistency, got the mix poured in and smoothed out– now just have to wait for it to begin to set. The bag says 30 minutes… well we came back outside 20 minutes later (to be on the safe side), ready to press our little cherub’s hands and feet in, and we had pie tins full of set concrete. No prints. FAIL.
So Newman headed back to Walmart for more pie tins. We still had enough concrete mix left to just try this again without incurring any more cost than just the replacement tins. No biggie. 30 minutes later, hubby is back with new pie tins and ready for another stirring workout. But instead of following the directions on the bag this time, he thought he’d speed up the stirring process by putting water in the bucket first, then dumping in the last of the bag of concrete mix. Ok, now I feel comfortable eyeballing flour to water, or let’s say salt to soup, but not concrete. Waaaay too much water. We had concrete soup. FAIL #2. Back to Lowe’s for another $5 bag of concrete. But here’s the clincher  it is now 7:38, rapidly approaching bath and bed time, and Lowe’s closes at 8. GO!
8:12, let’s try this a 3rd time. I’ve put off Zac’s bath because I’m planning to dip him in concrete as soon as daddy has it mixed…. again. At this point, I’m not even participating. Zac and I are inside watching cartoons and eating ice cream while Newman is outside making his own Father’s Day gift. Oh well. I say he owes me one.
The third take goes well (enough), although the moon is out and we are working up on the porch by the lights now. Zac and I reappeared for the fun part… and he really liked placing his hand and foot in the yucky mud. He seemed to understand right away “Slow and Easy,” which is unusual for him– he doesn't typically operate at “Slow & Easy.”  He must have known mommy was so totally over craft time. As soon as we finished the hand and foot placement, I handed Zac off to Newman to go bathe him while I did a little careful print editing. As it turns out, my thumb print is exactly the same size as Zac’s big toe. And the tip of my pinky, the rest of his toes. I had to keep carefully lifting off excess moisture with a paper towel and reinforcing the prints, as water was rising to the surface while the concrete was setting. This was super annoying and seemed to take forever, but no one can say we didn’t work really hard on our Father’s Day gifts this year. Next year, they’re all getting World’s Best dad mugs.
lame.
The overall finished product looks great and I am glad we stuck it out and finished the project. Together.  And I highly suspect all those “Simple” DIY tutorials out there on the web are fudging on the details a bit…
                                                                                                                          ~~Deborah


I got a good chuckle out of her story. Don't you love those projects that you think, "Oh, I have time to do that really quick before bed time!" only to find yourself finishing it up past midnight? We've all been there. We'll all be there again in the future. It's pretty much guaranteed I will be. So many of my projects happen late at night because I'm sure I can finish it in just a half hour before bed. Yeah right.

Hey! Maybe we should make these for our parents...yeah, probably not. Man...why do the kids get all the good ideas? There has to be something awesome and witty we could send. We'll think of something. Soon I hope, but most likely we'll be up late the night before putting it together. Maybe we'll just end up copying that  card after all...hehehe (okay, not really).