I can remember my first origami book...it was a kit and book all rolled into one, with the paper, instructions and...well, that's it. What else is there to origami? I folded flowers and birds and weird things that no one could identify. I was on the origami kick for a few months, but then my interests jumped somewhere else. I'm still not highly interested in origami at this point in my life...nevertheless when I opened up Al's email I felt the origami sleuth rise within me (for some reason I don't The Origami Sleuth would ever make it to a super hero movie...or a comic book). Anyway. While I'm not big into origami at this stage in my life, or butterflies really, Christmas is coming up and this idea could be used for some cute stocking stuffers for little girls.
The Original Pin
 |
| http://www.duitang.com/people/mblog/45948427/detail/ |
Al decided to try this out. She said, "I should have known better than to try a pin that wasn't in English, right? But this cute little butterfly looked so sweet, and the photos were so easy to follow! Uhm, at least up until the last step. Where it totally went to *pot*".
The Pinstrosity

"I tried doing it in paper rather than fabric, just to see if it would work (it looks like origami, right?) before chopping in to my fabric stash. I don't think that was the problem, though. Maybe I am just not seeing it, but there seems to be a huge step missing between those last two photos."
When you look at the directions, it really does seem like something is missing...until you stare at it long enough and dissect the picture. One more photo would have really helped to clear up the confusion with how to go from a yurt to a butterfly. So, I decided to break it down and show you how to get all the way through and (hopefully) end up with a butterfly at the end.
The How To
First off, I found out you have to start with a rectangular piece of paper; a square doesn't work I found out.
And...in the directions it shows the paper horizontal...you need it vertical to start with. Like this:

Fold your paper in half by folding down the top edge to meet the bottom edge (like my lovely butterfly paper? I didn't know what I was ever going to do with it-it came in a pack-but it worked out great for this).

Then fold the paper in half again, folding the right edge over to meet the left edge.

Now you're going to make the top 2 layers into a triangle. I found the easiest way to control this was to put my thumb down in between the first two layers and then have fingers up near the folded point.

Holding the bottom layers in place with your thumb, push the folded pointer over to the right.

Align the center folds and crease the edges.

Turn over the paper.

And make another triangle fold on the back. For this one I found it was easiest to again hold the bottom layers with my thumb and then to push the folded edge with my finger.

And it just opens right up.

Again, align the centers and crease the edges.

Next, lift the right flap...

...and fold it up. You want the top of this fold to go just slightly past the edge of the back layer (see my back layer peaking out there?).

Unfold the triangle you just made. Those fold lines will make the next step a little easier, as it will give you a guide of where to fold.

Using your thumb, push the triangle inward and refold along those lines that you just made with your previous fold.

Fold along the lines you previously made...

...and then crease the edges.

You're going to do the same thing with the other side now.
Fold the flap up the same amount as the other side.

Unfold.

Fold the triangle inward.

Next, take just the top layer on the left side and fold it up.

Make sure that the corner of the piece you just folded up lies right on the edge of the layer behind it (see where my finger is pointing in the photo below). Crease the edges.
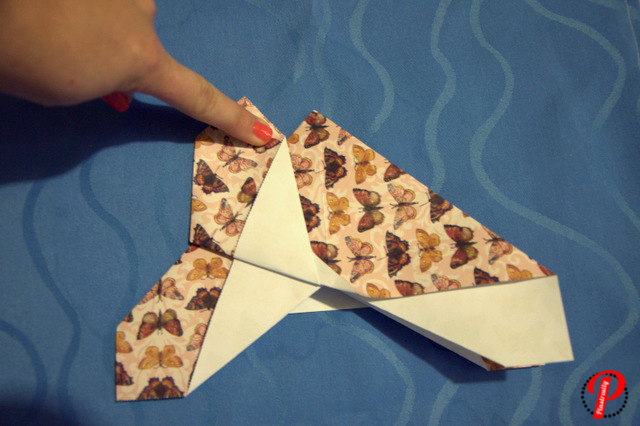
Do the same thing with the other side.

And there's your ups-side-down butterfly...

just turn it over and voila!

So Al, you actually just about had it! Hope this helped and didn't just add to the confusion. Happy Tuesday everyone!