Monday, April 2, 2012

Oobleck Watercolor

I was just trying to decide which pin I wanted to test today to post up when this email came in from Carolyn. The timing couldn't have been more perfect. Thanks Carolyn! She says, "Who doesn't fondly remember getting to watercolor as a kid? I hated the fact that the watercolors that you buy at the store had so little in them; they never lasted very long. When I saw this pin for homemade watercolors I became pretty excited. I now had a way to make as much watercolors as I wanted, in what ever color I wanted!"

The Original Pin
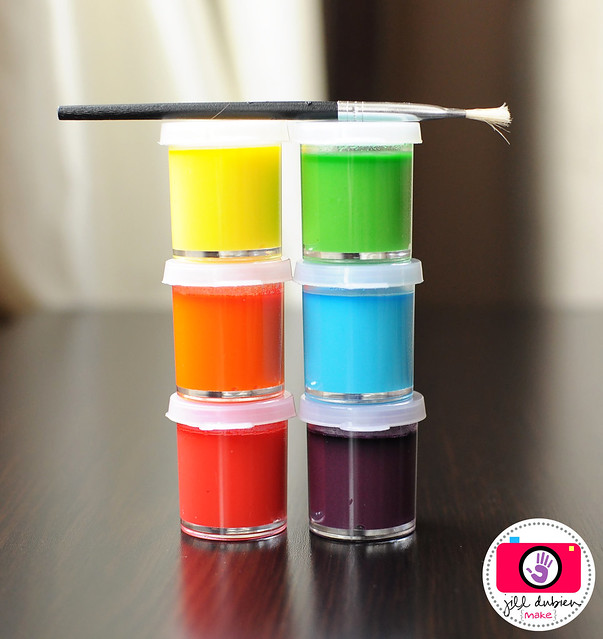
http://www.meetthedubiens.com/2012/03/make-your-own-rainbow-watercolors.html

"While my darling son napped I quickly gathered up the supplies, and started mixing enough for one color. But my mixture was too thick, so I added some more vinegar as suggested on the original pin. But that made it waaaay too runny. So I thought if I doubled it I could make two colors, and I would add a little less vinegar than supposed to. Still it was too runny.  I threw that out, grabbed another plastic cup to try again. This time I read the directions on mixing it all up a little more carefully. 'You basically want it to be like an oobleck or gak consistency (can be formed but then melts away if you let it go).' Gak! I loved messing with that as a kid. It was so cool that it was a liquid but kind of a solid at the same time! So I started mixing away, using the exact measurements that were given. Still too thick. I reached for the vinegar, but them remembered that Gak get really thick when handled really fast (such as quick stirring, stabbing your finger at it, etc.). I got a spoonful and pulled it out of the cup to look at it. Sure enough it quickly turned runny. I managed to get past my first road block, and had the consistency right."

"Then I started to mix the color in. It took more color than I thought to get it to the shade of green that I liked. But that's ok, because it wasn't too difficult to get the right shade. I then set it on the counter to dry. Through out the day I could see a little layer of liquid rising to the top, taking a lot of the color with it, so the main paint wasn't as vibrant. Annoyingly it took twice as long as the original pin said it would to dry. And the color faded to a really light pastel green."


"When it was dry I grabbed a brush, and a scrap piece of paper to test it out and see if I wanted to make more colors."

The Pinstrosity

The color isn't as vibrant as Carolyn had hoped, but she did end up with usable watercolor paint.

So you don't have to play the mad chemist as Carolyn did to get the consistency right, she suggests stirring slowly so you don't mistake the mixture as being too thick. She also suggests adding way more color than you think you need so you get a more vibrant color in the end (if a vibrant color is what you're going for) as the color fades as the concoction dries.


Saturday, March 31, 2012

Pop Tart Pains

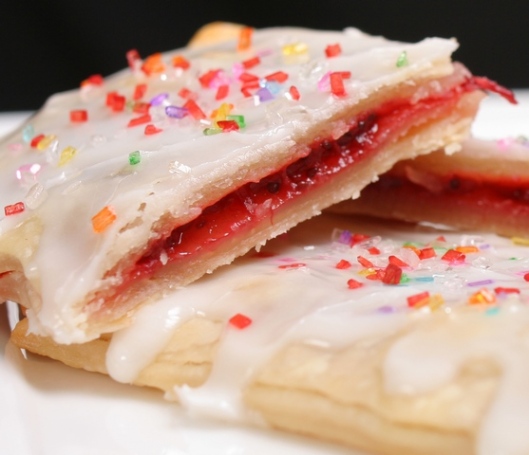
Homemade Pop Tarts

I can't see Pop Tarts without thinking of Brian Regan. "Yeah, my doctor told me to eat more fruit, so, what better source than a thin layer in a strawberry frosted Pop-Tart....You can microwave a Pop-Tart that just blew me away, that you could do that. How long does it take to toast a Pop-Tart? A minute-and-a-half if you want it dark? People don't have that kind of time? Listen, if you need to zap fry your Pop-Tarts before you head out the door, you might wanna loosen up your schedule."

If you haven't heard his whole pop tart routine, you should go check it out. It's funny stuff. 

Anyway, I loved pop tarts as a kid and I still love pop tarts as an "adult" (I still feel weird calling myself an adult, I don't know why). I'd never even thought about making my own though. Christina emailed in her Pinstrosity when she followed a recipe she found for homemade Pop Tarts. 
The Original Pin
http://bakememore.com/2009/02/15/sorry-kelloggs-these-pop-tarts-will-make-you-crumble/
Christina says, "Simple enough, right? Pie crust, jelly, fold over and bake. WRONG."

The Pinstrosity


Christina tells us, "I followed the directions! I swear! My glaze tasted like SOAP. I felt bad for making my kids try it. ha! It was better after being ON the pop tart. But all the goods oozed out of them.:/ The kids still liked them but they sure weren't pretty and only had a slight taste of jelly. Yes, my kids love dough." 

I'm so glad to see there are other kids that love dough. I grew up on dough. I love dough. 

Just from reading the original blog post and looking at these pictures I have a few ideas for improvements, but I haven't had the chance to try them yet. I'll repost when I do test them out. But here's what I'll do in my first test: 
  1. I love my pie crust recipe (ok, so it's really my mother's recipe), so I'd use it rather than a store bought refrigerated crust (some of them are good, but some of those taste like cardboard).
  2. I've just had better luck with pies and such when I roll the dough out a little thicker than the recipe normally calls for. It makes the crust stronger and gives more substance. Maybe it'd help hold in the jelly better? 
  3. I'd probably crimp/pinch the dough edges together rather than use the fork method, just in an effort to seal the edges better. I don't know if that'd make a difference or not. I'll have to report back on that. 
  4. I'd probably stick with the 1 tsp of jelly/jam to start out with, but by Christina's results, that may be too much. That's just going to have to be trial and error. 
  5. Then for the glaze: I'd add a little bit of vanilla extract to help with the flavor. Then I'd make the glaze really thick, so that as it baked and spread out, it wouldn't all run off the tart. 
So...without testing it yet, those are my first thoughts. Perhaps I can test this out tomorrow and report back, but today my time is way over booked. If any of you have any suggestions or tried and true methods, let us know!