Saturday, September 29, 2012

51 Years of Memories Magazine

A little over a week ago now I suggested that rather than just copy everything you see on Pinterest, try taking a few of them and making the pins your own. Adding personalized details or tweaking the project can put a whole new spin on an "old pin". Often I'll get into a project with one picture in my head of how I want it to turn out and then half way through I end up changing what I'm doing...either because I had a new idea or because circumstances around me changed and changed was necessary. Jean sent us in a great example of thinking on her feet and changing up a pinned project when she was thrown a curve ball. She started with a sweet and wonderful gift idea for her husband and ended up with something different but just as wonderful...she made the pin her own. 

The Original Pin
http://nothingbutbonfires.com/2011/06/sixty-years-memories
Have you seen this "60 years of memories" idea? You ask family and friends write memories they have of your loved one (usually the birthday boy/girl) and then you order them by year and present it as [insert age] years of memories. I did this with my husband one year for Christmas...he loves top 10 lists, so I had people write their favorite memory of Cameron and I made a top 10 (or 20) list of favorite memories involving Cameron. He loved it. It meant so much to him that people would take the time to send in their memories and thoughts. We did this again for my parents 25th anniversary and they loved it. This gift really is sweet and fun for anyone at any age. 

Here's Jeans story of her experience with this project: 


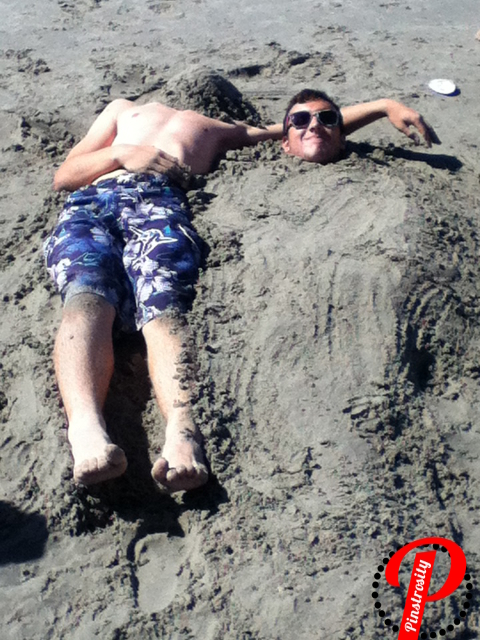
"When my husband's 50th birthday rolled around, I froze.  Paralyzed by the fear of planning a surprise party, I did (mostly) nothing.  I did enlist the help of our young daughters in creating an Angry Birds cake, but that's a whole 'nuther Pinstrosity. 

Not wanting to disappoint him for his 51st, and knowing the pressure was off for a real surprise, I began recreating the fabulous '60 Years of Memories' pin.  In the original pin, the Pinner presents her dad with 60 letters from his friends filled with their memories of him.

Like this Pinner, I wrote an email using her verbiage but exchanging words where necessary.  The following message was sent via Facebook to approx. 100 friends:

'Hello!
If you're receiving this message, you probably know that Tom is turning 51 next month. To celebrate his birthday, I'd like to put together a little surprise to let him know that his nearest and dearest are thinking of him. I'm going to try and create a '51 Years of Memories' book with a memory his friends and family have of him.

And this is where you come in!

If you have a spare moment in the next few days, I would be so grateful if you'd jot down a favorite memory you have of Tom and send it in a reply to this message, or email it to me at [email address]. You can mention anything you like -- although the more nostalgic the better! Please absolutely feel free to send jpg photos too.

Thank you so much for participating -- I know everyone is busy with their own lives, and I do appreciate you taking a few minutes to do this; it will be so worth it when he reads all the memories people have of him! (Please don't forget to keep it a surprise until then, though!)

Thank you again! -- Jean'


Of the 100, 15 friends replied with stories, 2 asked when the party was (party?), and at least 3 said they would get back to me (but never did).

Since I was a far cry from the intended 51 letters, I had to work with what I had. I created a magazine, and gave each friend a full page to tell their story.  This resulted in large, easy-to-read fonts and big pictures."

The Pinstrosity


Jean said that "although this did not turn out as expected, [her] husband is VERY proud of his birthday magazine, and never misses an opportunity to show it off."

Things will go awry (I love that word) during projects. That's just life. And Pinterest. But that doesn't mean that all hope is lost and that we should climb under our covers and wail. 15 letters would not have made quite the impact in the original form of the pin...but Jean was able to take the pin and what she had, and make it her own. 

When things don't turn out just exactly how you imagined them, look for ways you can salvage it and turn it into something new! I know not everything is salvageable, but you'd be surprised what you can save even out of the biggest Pinstrosities. 

Friday, September 28, 2012

I Love Lamp.

Friday is here!!!! Holy long week Batman! Tomorrow is craft day with my girl Mille, and I have this lamp that is in desperate  need of a makeover, and this Pinstrosity was just what I needed to get my butt in gear for a lamp shade renovation! Here is Lindsay's creation!

The Original

This was just a plain cream lampshade beforehand, and using a piece of craft or wrapping paper, you measure the area you need to cover, and then cut your fabric to your new paper pattern and using craft glue you glue it on...Lindsay followed the directions and ran into some slight issues, check it out:

The Pinstrosity

It looks great before you turn on the light, and certainly brings some color and dimension to an otherwise boring lamp, but while in use the extra edges underneath create an icky shadow.

How to fix this:

-Lindsay measured the fabric correctly, there is supposed to be a little extra to place underneath, however her fabric looks fairly thin, and therefore is more prone to show a shadow of the leftovers.

-She might have been able to trim up the edges ( after all the gluing was finished) if she was super clean with her application of glue around the under edge, but if she was liberal with her glue (which is fine, you definitely don't want the fabric to go anywhere) than that isn't an option. Make sure your fabric isn't going to cast a weird shadow if you can't trim it.

-Another option is to line the lamp with a darker shade underneath, and then place your decorative fabric on top (if it is especially thin). The only issue with that is that you probably own't get as much brightness if you do that. For some projects, like purely decorative or mood lighting lamps that's fine, but if lamps are your only source of light this probably won't be ideal. 

-I would suggest looking at fabric in the home decor section  (it looks like that is what the original blogger used), it is generally really thick and they tend to have patterns that match most decor (imagine that! Decor friendly fabric in a home decor section lol). This is the stuff you would use for curtains, or reupholstering etc. Be advised that it is usually a little more expensive though, if you are doing a small lamp like Lindsay's though I don't think it would be too bad, however the lamp I will be doing will probably need a yard and half or more, it is a large antique decorative lamp from my grandmother that was damaged in our last home when it flooded, and I am hoping to be able to fix it on the cheap (Huge world map perhaps?!).

And there you have it, how to upgrade your lamp on the cheap and easy...does anyone have any fantastic lamp upgrade experience to share with the Pinstrosity world?!
Make sure to check in tomorrow for an awesome post from Marquette, and have a great weekend everyone!

**Update: So I must have been distracted, because the suggestion to add decorative ribbon to the bottom of the outside of the lamp to hide yucky edges, or to add ribbon to the inside to make a clean silhouette totally eluded me, but almost every single one of comments suggested that, an easy fast fix. This is why we ask for your feedback! Sometimes the simplest answer is the hardest to find! Thanks readers for your suggestions, y'all are awesome!**


Thursday, September 27, 2012

Do I smell something burning?

Pinterest myth #423...the instructions are ALWAYS 100% correct. 

Okay, I know...our number one suggestion is to follow the instructions when trying out a pin, but Lyndsey is here to tell us that sometimes the instructions can be way off. 

 "I am a newly wed. My husband and I had been married and in our new home for all of two weeks when I decided to surprise him with a pinterest inspired meal when he got off work. Bear in mind, I am no Paula Dean. I have no hesitation admitting I am not a great cook, but if you give me directions, I can usually pull off whatever recipe it is... Enter Chick-fil-a inspired chicken."

The Original Pin
http://www.domesticfrugalista.com/2011/09/15/recipe-home-made-chic-fil-a/ 
"Things went fine until it was time to fry the chicken. The directions tell you to heat the oil for 20 minutes. Now, most of you would automatically say 'No way!'. I, however, thought, 'Far be it from me, a lowly novice cook, to judge these super women Pinterest people...' and continued to heat my oil on the stove top (on 5) for 15 minutes..."

The Pinstrosity
http://www.clintondailynews.com/photoarchives2.htm
Okay...that's not really Lyndsey's house...but you get the idea. 
She tells us that she ended up with "a grease fire in which the fire department was called, and my husband and I were out of our home for close to a month while is was being cleaned of smoke damage.... Lesson learned, take everything with a grain of salt."

"P.S. no picture of burning skillet, though flames went to the ceiling..."

Lyndsey, I hope you don't mind I was chuckling through your story. I think that most of us have these early cooking stories (or if you're like me...still making these cooking stories). I was at a sleep over and my friend and I got up early to make breakfast for the family and pulled out their pancake recipe and mixed it up...only we didn't know there's a difference between baking soda and baking powder. We didn't end up with a kitchen on fire but those were some pretty weird and nasty pancakes. Or like when I decided to make potpourri as a kid and put some grass which I had pulled form the lawn into the microwave to dry. I was sure I was going to get a great smelling plate of awesomeness and that mom would be so proud of me. That microwave made everything taste very..."organic" for the next few weeks. So, we all have these moments that to some might seem like, "Well, duh!" moments, but really we all do things like this every now and then. I'm glad the house didn't burn and that everything turned out alright in the end. But yes...20 minutes is way too long to heat your oil on high...but you know that now. 


Wednesday, September 26, 2012

Chaos And Curls

As a hairdresser, I have seen my fair share of hair woes...cosmetology school would be the BEST reality TV show EVER created. On a side note, not only would the comedy factor be high, but the drama alone would beat out all those stuffy rich housewives in a second...and America would then know what NOT to do with their hair, it's a win win win situation. Think on it. If I ever get a decent camera, I am starting on that A.S.A.P. and will then distribute the millions I make with all of you, promise. Until that day comes however I will share with you a series of unfortunate hair Pinstrosities...we have received this one, or a variation of this one quite a bit...You might want to sit down, and if you are drinking something, set that down too, laughing and drinking are a chocking hazard, you have been warned!

The Original

Miranda sent us this, and here is her take:

The Pinstrosity


The Original
http://theglitterguide.com/2011/10/27/1980s-hair-tutorial/
Here is Sara's take:

The Pinstrosity


The Original
From Piper: http://sherellechristensen.typepad.com/my_weblog/2007/05/monkey_cupcakes.html
The Pinstrosity


From A.
The Pinstrosity               The Original          

Another take on this pin from Sarah Rose:

The Pinstrosity


Ok is everyone still breathing? Is your computer liquid/spit logged because you didn't heed my warning and you ended up spitting your drink onto your keyboard? Bummers. 
Here is the hard part folks, and some of you may be mad, and think, what does she know?! Keep in mind I am a cosmetologist, and I have had experience with all of this and then some, but the hard truth, like we have said before is not everyone's hair will do everything, and it definitely won't do it perfect, the first time or otherwise.

Here's some good news, it also might do what you are wanting. Doing wet twisted curls with your finger and pins isn't always going to give you the same end results and here is why. Variation. Every time you do it you may be pulling harder, pinning looser, taking smaller chunks, taking bigger chunks, inconsistency is the issue a lot of times. That is the other issue with Pinterest, did any of these pictures come with directions ON them? NO. Now if you are lucky enough to have had a link to go with your picture, and smart enough to follow that link, watch the tutorial video (the first one had one), and then follow those directions, you might have had a fighting chance. However if your hair is different than the tutors, then you run into more trouble. Let's be real here also, nobody's hair is exactly the same...I have had clients whose hair does not work with heat, others who do not work without heat, others who had to wash it every single day  in order for it to anything, and others who washed it once a week or it looked like a wig on chicken. Everyone's hair is different. 

Now that I have the different hair pow wow over with I CAN give you some tips to help out.

-Some pins you need wet hair, others need dry, look at the picture, does the original pin picture have nice tight twists on top of their head or do you see "fuzzies" sticking up everywhere? If you see an abundance of "fuzzies", there is a good chance the pinners hair is DRY. If it looks slick and clean is is most likely wet.

**The one with cute little girl seems to be wet, and her picture tutorial only shows four pieces (we will touch on that in a moment), kids hair tends to be softer and easier to do things like this with because they have little to no damage**

-Using a leave in conditioner will generally help with tame the"fuzzies" for when you take your hair out, but humidity is a WHOLE nother (is that a word?it is now.) ballgame. 

-Leave it in over night. Most of these pins require you to sleep on them. Those of you who have hellathick hair, your hair will most likely NOT be dry in the morning, like I said in our last hair post, if you  MUST blow dry it, use the blow dryer gently on low heat low speed...gently...too vigorously and you will look like you put your hand in a socket. No bueno. 

-Those of you with fine limp hair, this is tricky...you don't have a ton of hair and it generally doesn't have a lot of volume, I would put a silver dollar size of muse in your roots before twisting it up, this should help add some volume. Also when you take it out tousle your roots with your fingertips while your head is flipped upside down, but don't shake like a dog, too much will ruin the effect, and definitely use hairspray. 

-Section sizes, it's hard to tell you what size to take because everyone's hair thickness is different, but I would say thick haired people use 1" by 1" squares all over if you want good defined smaller curls. For bigger more wave like curls take bigger sections, but I wouldn't suggest anything bigger than 3" by 3" or you will have a problem with it not drying in time. 

-People with short hair, these pins aren't generally your friend, unless you are going for a look like this:
(Cat included)

-Another thing to think on, if you are sleeping on it, maybe use a hair net, or hair cap over it to add some security, some of us aren't still sleepers. Food for thought.

-DON'T brush it out, use your fingers to separate it, if you are desperate use a pick, again, GENTLY.

Short hair peeps: This isn't t say if you do it loose and maybe do a touch up curl or two that it can't look cute, because it can...exhibit A:
http://pinterest.com/pin/155866837074249482/
Cute no? Short, yes. Touched up? Hell yes. 

-Also, in general you will almost never see a hair style like the above styles on Pinterest that hasn't been touched up with some sort of curling iron/straightener/wig. It is just the way of the game, just like photo shop and magazines, they think no will notice and that everyone will think that's just how they look. The jig is up, America knows.
The moral of the story is, don't get discouraged, make sure you have directions, or someone who has done this before to maybe help you out, and figure out your hair, it's yours, own it! Everyone's is different, and with that will behave differently, so remember to take that into account...and don't be ashamed to do a two minute touch up. I'm not, and I am a hairdresser. 
Happy Hair Hunting Pinstrosipeeps!


Tuesday, September 25, 2012

Melted Minon

College is a time for learning and experimenting. Me...I ran out of milk one day so I experimented with putting egg nog in my cereal in replacement (the logic? it's made out of milk and it's already sweet so I didn't have to sprinkle sugar on the cereal). Don't do that. A perfectly good bowl of unsuspecting and innocent cereal massacred. Most of us have stories to various degrees of hilarity of lessons learned in college. Hailey sent us in a lesson their apartment discovered while trying to make a Minion Cake. 

The Original Pin
http://rm16uhps.blogspot.com/2010/11/terrific-tio-cakes.html
Pretty good?! I'd give them a thumbs up. They did pretty good recreating the minion from Despicable Me.

http://www.amazon.com/Despicable-Single-Disc-Edition-Steve-Carell/dp/B0042U94UQ 
So, let's see what Hailey's roommates came up with. 

The Pinstrosity
I'll admit it...I busted up laughing when I opened this email. This is fantastic. Maybe it's a Jabba the Hutt Minon? 

According to Hailey, the roommates "made the red velvet cake in the microwave in a huge mug, first problem.  The frosting underneath was as thin as water.  She burned the fondant so it was chunky, and then tried to color it and the color wouldn't blend.  It wasn't dry enough so it drooped. It was the most horrendous thing I've ever seen, and tasted.  It tasted very spongy."

So let's address each point. 
1. "She made the red velvet cake in the microwave in a huge mug". Microwaves cook food not with direct heat but with, well...microwaves. When food is heated in the microwave it cooks differently that it would in the oven. The texture of the microwave mugs can be anywhere from mostly normal to Spongebob. According to hurryupcakes.com, "many microwave cakes have a rubbery texture and/or more than a hint of “poached egg” flavor. Another big difficulty with microwaved cake is how quickly they dry out — which is quickly. Very, very quickly." 

2. "The frosting underneath was as thin as water." Well...that's not good at all. You definitely need frosting the right consistency. A good test to see if the frosting consistency is about right is to scoop up a spoonful and then turn the spoon so the icing can slide off. If the icing runs of or slides off quickly it is too thin. It should slowly "slide" off the spoon. If it doesn't move at all, you might need to thin it out some. There are various methods for thickening icing. Buttercream frosting (which is the frosting that is suggested for use as the base under fondant) can be temperamental. Mixing it in high heat or humidity can make it melt and be too runny. Try chilling the frosting first to see if that "thickens" the frosting up. If that doesn't work you can add 1 TBS of powdered sugar at a time, mixing thoroughly. Some people use shortening instead of butter as shortening doesn't melt the same. If you're making your frosting from scratch, add less liquid than the recipe calls for...it's sometimes easier to add little bits of liquid later to thin than it is to thicken the frosting. 

3. "She burned the fondant so it was chunky, and then tried to color it and the color wouldn't blend. It wasn't dry enough so it drooped." Fondant can be tricky, especially if you're making your own. Having never worked with fondant myself, I'm not even going to try to pretend I know exactly what to do. I read a few great sites that I found by Googling "How to decorate with Fondant". One great one I found is http://www.wilton.com/decorating/fondant/, with helps on how to color fondant, shape it, smooth it, etc. 

One thing I did learn in college though...these projects that turn out funky are perfect for leaving on  your friends doorstep. Place it in front of the door, knock, run to a good hiding spot and watch their reactions. It's funny what college kids find funny, isn't it? 


Penny Stain

My first semester of college I watched a friend once take all the pennies out of his wallet and throw them away (we were at a fast food place...so I wasn't about to dive after them). It seemed so odd to me to throw money away...even if it was just a few cents. Right then I started collecting any pennies I found. I picked them up off the street, gathered them from under the cushions and saved my change. I was going to see how long it took for the pennies to add up. Well, it was slow but over time I had over $20 in pennies. Not too shabby. After graduating I didn't keep up with my "project" as heartily, but I still had most of my penny stash. But...I didn't ever know what to do with it (I'm a scrooge with my hard sought pennies and don't want to pay the fee to have the machine sort them so I can have my few bucks). Lately on Pinterest I've seen quite a few different penny projects, but I hadn't ever done one until we received a project that needed testing. 

The Original Pin
natural wood stains
http://www.moneypit.com/article/natural-non-toxic-wood-stain-coffee-berries-and-more 
(No...that isn't what this stain actually looks like...but that is the only picture on that page so that is the picture that gets pinned all over Pinterest. I haven't found a picture of penny stained wood). You can make a wood stain by putting pennies in vinegar! The site says, "Vinegar works as a wood stain when you add a metal object in the mix and let it sit in a glass container for a week.  A handful of pennies will produce a beautiful pale Caribbean blue stain." Allison tried it out and sent it to us. 

The Pinstrosity

Not the Caribbean Blue she was expecting. Here's what she did:

"Day 1: Placed a "handful" of pennies in a jar with vinegar. 
Days 2-6: Every time I walked by and thought of it, I would just shake the jar a little.  The instructions don't say to do this, but I thought, "What could it hurt, right?!?"
Day 7: Opened the jar (very difficult to open by the way--I don't know why, but it was really bad!) and proceeded to use a foam craft brush to give the 2x4 I used a good coat of the stuff.  After that dried, I coated it again, and again, and again (5 times in all.)  As you can see from my picture, 5 coats did a little something, but not much at all.  Not enough to make me get the "Hey! That wood looks kind of like barn wood!" feel and it definitely wasn't worth my time to put 5 COATS for that result."
"I'm not sure there is much hope for this project.  Upon further examination of the vinegar on day 7, I realized that most of the apparent darkness was actually just an illusion.  Little floaties from the pennies were actually most of what made my "stain" (if you can call it that) look darker.  I want to try using a different type of metal (like steel wool) and see if that has a better result.  There just wasn't enough of a chemical reaction between the copper and the vinegar to give a nice stain to the wood."


So it was a disappointing bust of a project for Allison, but it got me quite intrigued and I wanted to test this one out a little bit further. Out came the remains of the penny stash. 
Found that penny jar at a thrift shop when I was in high school and had to have it.  

I dumped out my pennies...take a guess at how many are in that pile.
1962 pennies! Did you guess anywhere close? 

I decided that I wanted to test this one out pretty thoroughly, so I got "scientific" with it. I sorted the whole penny pile out in decades and then counted how many pennies were in each decade pile (for those interested, 2010-present: 62, 2000's: 842, 1990's: 491, 1980's 322, 1970's: 176, 1960's: 62, 1950's: 2, 1942: 1 1919: 1, unidentifiable: 3).  I wanted to make sure that I had the same penny to vinegar ratio in each container, so I calculated out 1/8 tsp. per penny of vinegar and poured it in jars and then added the pennies. 

The 1990's took two jars because I couldn't find another jar large enough, but the ratios are still right in their separate jars. 

Since pennies had a much higher copper content before 1982, I was curious to see what each individual decade would produce as far as a tint. I left these jars on the counter for 16 days (I know...it said a week, but I extended it) and here's what I got:


Some jars seemed unchanged...some were dirty and nasty and one was tinted blue. 

Mostly unchanged. 

Mostly unchanged. 

Dirty and nasty!

Clear until shaken up...then dirty.

Unchanged vinegar, but pretty and clean pennies.  

Caribbean Blue!

I figured the 70's pennies were going to give me the best tint...but there wasn't any tint at all! 
The pennies from the 80's and 90's fared the worst...they were nasty and had a weird film on them and they just weren't pretty at all. 


So I got to work to see how the stain worked. I had a cute little unfinished wood bird house that I got in the craft section at Walmart. I don't know what kind of wood it is...the label didn't say. Cheap wood...from the cheap tree. Here's the progress:

(click to enlarge photo)

By the end of the 8th coat the stain was quite pretty. It didn't take too long to dry between coats either. 

So there you go...the penny stain does work, but you need older pennies. Just a "normal" handful isn't quite going to do the job for you. And you will have to do multiple coats (but that's pretty normal for a stain...this isn't paint you know). 

Want to see how I finished the bird house? 

I painted the trim copper and then super-glued pennies to the roof as shingles. This'll make a cute addition to our bird bedroom decor. 

Now I need to go find a pin on "How to get super glue off your fingers."

Monday, September 24, 2012

Sand Sorrows

Em here: So I know this is usually Marquette's territory, but this one is pretty simple to fix, and mostly just for a good chuckle...and it's a Monday,  and who couldn't use an extra laugh on a Monday right?! Here is a Photo Fiasco for your Monday viewing pleasure!

The Original
We were unable to find the source for this photo...anyone know?


Carrie had sent in this Photo Fiasco, she and some friends went to Stone Harbor NJ for the weekend, and attempted this fun photo they had seen on Pinterest. Here is their attempt:


The Pinstrosity

Not quite what they had had in mind, however still gives a good laugh!

Now I have never been to NJ, so I have no way of telling if the sand there is harder to deal with than any other sand. The sand in the original picture looks fine and soft, but there is no way of knowing where the original picture was taken. All in all, sand texture I am sure has something to do with how it works while molding and playing with it, but I am by no means a sand expert so don't quote me on that haha. 

This fiasco seems to be a case of over estimating the holding capacity of their sand trench, A.K.A. their hole for the body and head just aren't big enough...I'm sure it took a lot of work to get the hole they did make the size they did, and well, I would have been too tired to make it bigger, so you aren't alone there Carrie. However that seems to be the only thing I can see that would help make this little project turn out more successfully.

There you have it Pinstrosipeeps! A little laugh for your Monday, have a good one!


**Marquette here with 2 extra tips to make this work.
1. The key to getting the "beheaded" look is to be able to see the body's neck. Taking the photo more from the side rather than from the feet will get a better angle to improve the illusion.
2. When you take the picture from the side, take it from the sunnier side. I know you'll have to try and hide your shadow, but by taking it on the sunny side you'll minimize how much the mound of sand over the person's head stands out. 
So if the person taking the photo in the Pinstrosity had moved to the left and forward a step or two to take the picture the illusion would have worked a little better.**


Saturday, September 22, 2012

BBQ Boats Revisited

On my last grocery run I picked up a number of ingredients that would allow me to test out some of the food Pinstrosities that we have posted up so far; I wanted to put all our advice to the test and see how we did.  For test number one, I decided to make the BBQ Bombs from our April 11th post for our dinner a few nights ago. 

The Original Pin
http://www.thecountrycook.net/2012/04/barbecue-cups.html
Don't those look yummy? Do you remember Amanda's results? Atomic mushroom clouds of BBQ and cheese. 

The Original Pinstrosity

Hers went a little nuts. I'm sure they still tasted good, but they weren't supposed to look like mushroom clouds of BBQ death. It was suggested in the post that the wrong size of biscuits were used...so I was very sure to buy the Jr. biscuits. I followed the directions and...

The Pin Win


...it worked! They were the perfect size and SOOO good. I knew this would be a quick and easy meal...and I was sure it would taste okay, but I didn't expect it to taste amazing. It sure hit the spot. 

So it is confirmed...the key to making these work is to use the Jr. size of biscuits rather than the large. This is one case where bigger isn't better.